Showing posts with label Hawaii. Show all posts

Sunday, April 29, 2018

Making steel (2)....the "Aristotle" furnace


I want to try making my own steel so, based on the specifications given by the Japanese swordsmith Sumihira, I built this oroshigane melting hearth furnace.


This simple vertical shaft furnace is used to melt scrap iron and steel, and in doing so, raise (or lower) the carbon content, hopefully to around 1.5% in my case. Make note that this furnace is for remelting scrap, NOT smelting iron from ore (maybe someday I'll give that a try too, but for now…). I'll give the particulars of this build in another post, mistakes and all, so those of you who want to give this a shot have something to go on. Everything I learn was originally shared on the net by someone else, so it's only fitting that I do the same. Successes and failures both.


For starters though……

After building my oroshigane furnace, I had some materials left over, so I quickly put together a smaller version, based on writings by Lee Sauder. A PDF of his original paper can be found on his website, along with some of his other writings. All are worth reading and it's thanks to his work that so many others are trying these archaic methods of steel production. He's the pro.


Aristotle furnace


This “ Aristotle” remelting furnace is intended to be a quick and economical way to try making some steel and should be considered disposable. You might get 3-4 uses if you are careful but to try making it more robust rather defeats the purpose. You can slap one of these together and have it drying within an hour, a great afternoon project, for sure. Uses VERY little charcoal, one bag will last for multiple burns. If you've got clay in your yard, it'll cost nothing to make and it's super fun!

I've made three for these things now, but my success has been, ummm….not so good. Two aspects are important for this design to work. Clay and air. Last year, my friend Jeff and I tried building one of these but, living in Hawaii, we have no native clay here. What I did have was the clumping type of cat litter.


Clay

CAT LITTER WILL NOT WORK WELL AS A HIGH TEMPERATURE REFRACTORY!

Unscented clumping cat litter will reconstitute into a workable clay and is handy for lots of things, just not the extreme temperatures required to melt iron. At high heat, the clay starts to degenerate into a sandy powder. It shrinks a lot too, not what you want. If you have clay where you live, try that first ( it will likely work) but if you need to buy it, look for something with a high firing temperature, as close to a cone 10 as you can get. Lots of stuff will work though…..Just not cat litter, haha.

Air supply

Last year I used an old 12 volt air mattress inflator and it was fine. A hair dryer should be perfect for one of these small shaft furnaces and they are cheap and easy to find (if you can't borrow one ;-). A shop vac, set to blow, will be WAY too strong, but OK if you can throttle it down some.

Once your furnace is dry and up to temp, the steel making process only takes about 20 minutes. In my case, we were listening to the shriek of that inflator for 2 hours….WAY too long! We were melting down some ¼” rebar bundle wrap wire, no problem for this design, but something wasn't right. The iron bloom that formed in the furnace was stuck fast, so after smashing the stack to get the metal out, you could see that the area of the tuyere (air inlet) had slumped, greatly restricting the airflow. We did make a blob of low carbon iron, though not what I was shooting for. No pics, my bad.

This time, still traumatized from last years howling mattress inflator, I grabbed a small 50 cfm bathroom ventilator fan and gave that a shot. I mounted it in a very sophisticated, waterproof and mobile containment (ie: Walmart bucket w/lid).


I added a ball valve to the 2” pvc tubing so that I can adjust the airflow down, handy for slow preheats or for using in the real forge.


50 cfm works for a small charcoal forge, but a 100 cfm fan might be a better choice if you are buying something new. They aren't the perfect choice for a charcoal forge in general, but they work and are very quiet. If you are forging with mineral coal, don't waste your time with these, get a real blower.


For this “Aristotle” furnace, I used a mix of Home Depot fireclay, perlite (for insulation), shredded bark (for strength), and mortar mix to help things set up more quickly.


Despite what you might find on the internet, mortar/cement is a POOR choice for high temperature refractory. It's just not durable and when those hydrogen bonds reverse at high heat, it changes back into powder. It will work, somewhat, but there are better choices. Simple sand and fireclay seems to work better….20/20 hindsight.


I dry and preheat the still wet clay by burning some scrap wood, then start adding the guava charcoal that I made a couple of years back. You might remember my charcoal making ventures from before, and I'm finally getting a chance to use some of it. I really need to start making pine charcoal again, as this Guava burns slow. I'd prefer to have both on hand in the future.


At the center of the stack, you can see some of the ¼” mild steel stock that I am melting down.

Trying to melt down, that is.


Ellie melts down some old copper pennies and pokes the steel into the hot zone…..


….while Renee snuggles Nago the pig.


And in the ancient tradition of iron workers everywhere, I give offerings of ale and try to melt some bottlecaps. The stick of wire just sat there, laughing.


No love…..needs more air.


More in a bit…..


Wednesday, April 4, 2018

Sucker Hole or not......get the roof up quick!

Finding good, used building supplies here on the Big Island is a real trick. Yes, there is a Craigslist here, but after repeatedly seeing ads offering water soaked offcuts and the type of items that you'd normally be pulling out of the dumpster, all at next-to-new prices….you get burned out after a while. I guess it's a natural result of needing to have everylastthing shipped in at great expense that makes people think that this stuff is made out of gold, but every now and then you find some deals.

One of the metal roofing companies not far down the road has occasional scratch and dent items, and if your stars are all in alignment, they might actually have something at the exact time you have need. Don't count on it. Steel roof at $2/linear foot doesn't last long, so when you see it, grab it. All of it. I did, about six months back, in anticipation of getting a real roof over our heads, and that time is now. One slight problem; the rain just won't give me a break.


A Sucker Hole, for those of you who aren't familiar with the term, is a break in the cloud cover that makes you think that it could turn into a decent day…...then as soon as you get started on something good, the clouds return, usually with a vengeance. Hahahahahaha…..SUCKER!


The Ace Hardware store here sells two different colors of large tarp; grey/brown and white. Both tarps are made by the same company, but the white tarps have proven VASTLY superior in both finish and durability. Despite the grey/brown tarp having a moderately reflective grey surface to minimize heat gain, the white colored tarps stay markedly cooler, like 30% cooler, so says my IR temperature gun. Go figure….in any event, relying on ANY tarp to keep you and yours dry is something all done on faith. We've been lucky, to say the least, but crossing your fingers for over a year in a climate as rainy as this one will test anyone's faith.

Now if only it would stay sunny for a few days…..


An actual bedroom, lucky kid.


I've been sitting on that decent sized pile of metal roof for months, and now that I've finally framed in Ellie's new addition, it's time to put it to use. The rain stopped, it's time to go for it!


And, the gods being fickle (at best!).....the clouds came back. In force.


Ahhhhh Hubris, you've gotten me again.


Actually, I got everything buttoned up, just in the nick of time, but only minutes away from a serious deluge. And only a couple of leaks, haha. It beats the tarp though. Next thing to do is gutters. At least now that it's raining again, I can get back to work on my fuigo.

It never ends, this building stuff.


Thursday, March 22, 2018

Rainy days getting you down? Build a Japanese blacksmithing bellows!


Thinking rationally for a bit, I realize that it doesn't REALLY rain every day here but…...it feels like it's been forever since we last had a solid day of sunshine. Rainy days are particularly bothersome for us in our open-air lifestyle ie: no windows that close, no doors and certainly no heating or dehumidifiers. Everything here is out in the open, and while that is nice when the weather is beautiful and sunny, wet days kinda suck. Three weeks of rain REALLY sucks!


There is a goodly long list of things that need doing ( replacing our sketchy tarp roof with real roofing, building a new bedroom addition for our soon-to-be teenage daughter, etc,etc,etc…..) but some tasks are better off being confined to drier days. Wooden body kanna tend to swell a bit in high humidity and can get out of whack. Lumber twists and warps, not a big problem for framing, but definitely a bad day for finer furniture projects. I don't know about you, but I hate working out in the rain anyways, so framing is out. Finish applications are verboten in this weather but given that I haven't built anything finer than a plywood box in God knows how long, that's pretty much a moot point. I can dig stuff up using the  backhoe, as long as it's not raining too hard. Sharpening tools is a good rainy day project. Working at the forge is a great thing to do on cold and dreary days. Now, if only I had set up the forge sooner……


I bought the materials for putting together a forge blower using a bathroom ventilation fan, oh, two years ago I think. Ventilation fans are high volume, low pressure, pretty much the opposite of what you really want in a forge blower, but since I'm doing all my forge work using charcoal, the bathroom fan is adequate. Best of all, it's really quiet. The thing that I DON'T like about using an electric fan is that, unless you install a momentary-on foot switch, you are burning up fuel constantly. When you are producing all your own charcoal, that's a real concern. A human powered forge bellows only makes air when you need it.

When working tool steel at the forge, temperature control is crucial so you need to regulate the air supply to make the fire hotter (or less so). You can install an inline gate valve to restrict the air volume, but the simple shaded pole induction motors used in small bathroom fans don't really like the increase in back pressure. You can wire in a rheostat, but they don't really like that either. Either of these means will work, so if that's all you got, work with it, but it's not exactly ideal. Bathroom fans use electricity of course, and that's something that is in short supply in our off grid lifestyle, so although that's another factor for me, it's probably not so much of a concern for you, hahaha.


So…..it's raining again, and everyone needs a rainy day project, right?


One of things holding me back from building said forge is my oh so strong desire for a proper Japanese blacksmith bellows ( 鞴 [ふいご (fuigo)). You know…..that funny wooden box that you see sitting to the left of the forge in nearly any Japanese blacksmithing video.


I've been wanting to build a true Japanese fuigo for a long time, pretty much as long as I've been interested in forging tools. One slight hang up though, is that there are very few resources for the details of their construction. Search the internet in any language you choose and you'll find a few examples of fuigo that others have built but they have been, shall we say...simplistic in design? A traditional Japanese fuigo box bellows IS a simple thing, being essentially a box (duh!) and piston, with a few flapper valves that keep the air moving in the direction you want to it to go. There are a few hints of construction to be found that indicate that the Japanese fuigo has some details that aren't obvious to the casual observer.


Here is a couple of links to a repair that was performed for the Miki city ancient rite preservation society.


Fuigo repair (1)

Fuigo repair (2)


The fuigo being repaired had been used by one of the most highly regarded Japanese toolsmiths, Chiyozuru Sadahide I, a name that is well known to any Japanese tool aficionado. It's hard to find a more legitimate example of fuigo construction than this, and those blog posts highlight a few interesting details.


  • The long sides of the fuigo are bowed inward in both height and width (although just how much isn't specified) to better resist the force of air pressure.
  • The flapper valves are tapered, thin at top and thicker at the bottom, and are covered with rice paper to provide an improved seal. Dave Friesen of Island blacksmith did an excellent write up of this detail here……making-valves-for-fuigo-box-bellows
  • The long side panels of the fuigo are only about 9mm thick and are made up of two planks of cedar glued and reinforced using iron pins (like brads or dowels, but I can't find any pics of that detail).


Some interesting clues, to be sure. But that's not all…..


This YouTube video highlights a reproduction fuigo, skillfully built by California craftsman John Burt.


Making a Japanese box bellows

This reproduction fuigo was built for the upcoming United States visit of another well known Japanese blacksmith, sawsmith Miyano Dai Endo, better known on this side of the ocean as Yataiki (You can read more about Yataiki at the Daiku dojo website http://www.daikudojo.org/Archive/gallery_yataiki/)


The YouTube video mentions the bowed sides of the traditional fuigo, but also says that the bellows is tapered in length, a full 5mm from one end to the other. That's interesting……I wonder what else there is to learn here.


A few years back, Gabe Dwiggins of Granite Mountain Woodcraft wrote up the best fuigo build ever.

http://granitemountainwoodcraft.com/category/fuigo/


To top that off, the next year he drove all the way across the country to visit with Japanese saw metate Mark Grable and while there, took detailed and meticulous measures of a REAL Japanese box bellows.


There are clues here, to be sure. More than clues actually, because Gabe was able to get accurate measurements.

hirotas-fuigo

Ironically, this fuigo is the exact same bellows that John Burt copied in that YouTube video... cool! Small world, isn't it?

Gabe, being the awesome guy that he is, took it upon himself to draw up detailed plans, then shared this hard earned bit of intellectual gold with others. It's taken me far too long to get going on this project, but it's finally time to build this sucker!

I'm not going to give a step by step build log, because I suspect that Gabe has one of his own in the works (and if not…...hint hint!) , plus he will do a much better job of detailing this important tool build, far better than I ever could. I am just digging the opportunity to build something I've wanted for quite some time and didn't even need to do the difficult design work. I can't think of the last time I got to built something to a plan, haha.

Easy peasy. I owe you big time, Gabe!

----------


Starting these types of projects, I start to remember certain things. Things like……


I dislike gluing up large stock and….


....I hate yellow glue ( but I'm also leary about using hide glue in this warm and humid Hawaiian enviroment).


The prospect of gluing up the various sizes required for this project was probably the single greatest obstacle to me not building this thing sooner.


I love working with different species of wood, especially when they agree with my kanna.


Most of this fuigo will be constructed of your basic western red Cedar, but when I didn't find any 20mm thick stock hidden in my lumber stash/treasure hoard (and felt too lazy to head over to the lumber yard), I decided to use this mystery wood. Harder than cedar, I suspect it's some species of mahogany. I've got a fair bit Honduran mahogany buried in my lumber pile, but this isn't it. Spanish cedar? Toon? Nope, not Toon (Australian cedar). Whatever it is, it's got a nice reddish hue and it works nicely with my edged tools, not something that I can say about the many varieties of eucalyptus we have here in Hawaii.

Doesn't matter what kind of wood it is, pig loves to dig in and take a nap.


The list of stock thicknesses for this project are various : 9mm, 18mm, 20mm and 25mm. Convert these measures into the old-school Japanese shakkanhō (尺貫法, "shaku–kan system") measurement units of bu (3.03mm=1bu), and you've got some readily available stock that conveniently matches your chisels…..at least if you are in Japan, haha. I'm making due with what's more commonly found in his part of the globe.


There is one final hurdle for me, concerning this build. If Gabe went through all the effort of making detailed measurements of an honest-to-god Japanese fuigo, it would only be fitting that I should make my reproduction as authentic as possible. I've already fudged some stock thicknesses to what I had on hand, but not by any huge amount, ditto the wood species. My hangup is the nails used to fasten the sides of the fuigo.


These forged nails have a head that is first flattened, then rolled back on itself. Way cool, and there is even a YouTube video showing them being forged.


Forging traditional Japanese nails

This would be another ideal and appropriate little side project…...if I had a fuigo, haha.

Chicken or the egg….chicken or the egg…...


Saturday, March 10, 2018

Building inroads


As I'm sure I've mentioned before, this place in Hawaii where we have come to live started out as a blank slate for us. I mean, REALLY blank…..no buildings, no electricity, and no driveway (unless you count the well established pig trails).

Our first steps in making a survey of possible building sites necessitated cutting my way through the fern and guava tangle using that mainstay of all jungle explorers…..the machete. Next, pick a route, any route, make your best guess as to where you might end up, then cut down anything within reach of the chainsaw.  Now it's time to bring out the big guns….the backhoe.

Having a machine like the backhoe to do the heavy lifting (or digging, as it were) has been an immense time and labor saver, although all that easy access to dirt moving muscle makes it somewhat more likely to bite off more than you can chew. A backhoe is a sort of jack-of-all-trades, able to do many things, but it's not necessarily the perfect tool for the job. The smart people hire a bulldozer and get the job done in a few days rather than fiddle around for a month, picking along with the hoe. To use this one machine as the sole means of building a road or leveling a house pad is folly so, of course, that's exactly how I choose to go about the task. It works for me, but it's not what I recommend to others, haha.


Try to choose a path that will entail the least amount of material removal, then muck out as much as you can.


I filled the deepest holes with a combination of rocks and old tree stumps, but the style credit goes to Renee. Some sections of the drive remind me of the Inca trail, with carefully placed basaltic lava filling and leveling things out as much as possible.


Unfortunately, this is only a foundation course. The next step buries all that excellent rock work underneath a bed of red cinder, the go-to choice on a volcanic island with no gravel deposits.


The cinder is the highly aerated ash and molten rock that gets blasted out of a volcano during eruptions. It's lightweight and very friable, crushing down to fill in the nooks and crannies amongst the larger stones. It looks cool and comes in either red or black, although red is harder and is the more preferred for roads. Some of the black cinder is light enough to float on water and it makes a popular growing medium.


Red and green….looking a bit like Christmas last winter.


As we wander over the land, we are trying to maintain a particular vision in how we are altering the landscape. Ellie had her eye on this naturally wet spot as the perfect site for digging a pond.


And after a few hours of digging, she was finished.


Next comes rock work, plantings, and the addition of some mosquito fish to keep the biting insects in check.


After 500’ of road building fun, we reached to a tolerably level area, a good enough spot to build a quick and dirty shelter.


What's that? You hear banjos?


Building here has been a trial all my own. I've had such grand ideas and desires, clever solutions and design/build concepts to explore, none of which have happened yet. I'm embarrassed to say that expediency has been the primary motivator, just trying to get a better roof over our heads. This area was only intended to be a dry spot to work but, as these things tend to go, we've been living in this shed for over a year now. Time for a real roof, ya think?


Stay on the trail a bit longer and the guava eventually thins out, getting replaced by Uluhe ferns and sparsely placed native Ohia trees.


Some date palms, a few soon-to-be monster Albizia trees, Hapu'u tree ferns and sunshine.


The perfect place for another structure, lightly built and none too well at that (although I'm far from being finished). I lugged in every stick, on my shoulder the entire way, so some big concessions were made in material choices and dimensions.

This too was intended as a quickly built and dry place to work, the primary building site is even further down the trail. We'll see how that plays out. In the meantime, it's a nice place to string a hammock.


The sunny spots attract a different kind of wildlife.


I swear, most of what we are building here ends up being taken over by the critters.


Her favorite nesting spot.


Eggs and tools, two things that might be better off separated, but at least we are getting the eggs more often than the rats do. Finally, somebody is earning their keep!


Monday, February 26, 2018

Wild boar!


Jesus H. Christ! Nearly two years since writing?! Where ya been? Watcha been doin’? I guess that enough time has passed now that it's time for an update.

I'll warn you up front…..I've got a two year backlog of pictures and much of this will only be of direct interest to friends and family. Who wants to sit and look at some stranger's baby or vacation pictures?!


OK, where was I? Oh yeah…..the challenges of living with wild pigs.


You see them on occasion, but signs of their passing through are everywhere.


Unfortunately, the evidence that they leave behind is often a completely trashed garden and dying fruit trees that have been stripped of their bark.


Wild pigs in Hawaii.


It has always been our intention to hunt wild pig. I mean, they are so common in this part of the big island that a few more won't be missed and they taste good! They make gardening a challenge, alter the native forest environment in many negative ways and reproduce like mad. Bagging a few for the freezer is a win/win, right?

Well, about this time last year, just before nightfall, my daughter Eliana and I heard a loud ruckus coming from the near edge of the jungle. Dashing off to check things out, after a few minutes Ellie returned.

“Dad! There's a young wild pig here! I'm going to try feeding him! Yes, I'll watch out for the momma pig.”, in that exasperated tone that's so familiar to the pre-teen parent.

“Don't forget to bring a big stick!” I yelled as she was running off, thinking of all those nasty pictures, hunters gored and bleeding from wild boar tusk woundings. Yet another example of good parenting, it's true.

We have an unwritten rule regarding animals that show up around here. Everybody gets fed! As you would imagine, this quickly leads to a overabundance of mouths to feed. More cats than I can remember the names to, chickens trying to take over the storage shed, and now….


I'm sure that you have already guessed where this is going…..


Ellie promptly named him “Nago”, in homage to the wild boar deity from Miyazaki's “Princess Mononoke”.


I had an old bag of dogfood that was getting in the way, might as well put it to good use.


From hunting pig, to feeding one. Rest assured, the irony is not wasted on me.


If you've lived with pigs before (not that I have), you know that they are extremely social creatures. This little guy follows you everywhere, “helping” in the garden, running off with your tools or trying to sneak into the house. Not having an actual door per-se led to a couple of misunderstandings between us, but for the most part, things have gone smoothly. Remarkably well, in fact.


Ellie introduced him to the pleasures of mud…..


...but the tub he figured out on his own.


He likes the cats, something that we were concerned about...


And just as cats do, he prefers to sleep on your lap, or at your feet as a second choice.


We walk through the jungle, trying to find the eggs that the crafty chickens hide from us.


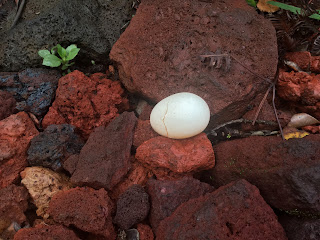
Note to chickens: Bare cinder makes for a lousy nest that is not kind to eggs.


This place is thick with old lava tubes, often just below the surface. In between other projects, Nago has a favorite tube that he is trying to fill with branches and sticks.


I cover the hole with an old piece of roofing, but he pulls it off and gets back to work. We have no idea what he is planning, but it is interesting to see him being so industrious.


It didn't take long for him to outgrow his tub.


Right about that time, teenage boys being remarkable similar regardless of species, it was time for a trip to visit the vet.


He looked a little hungover on the ride home.


The vet didn't even think that we were crazy, not that unusual at all. Kinda makes you wonder about the place where we live, doesn't it?


So, one year in and he's still here, not exactly a pet, but close enough that it makes no difference. We have a few rules established, for him and for us. No pigs in the bed or the house. Ellie is not supposed to ride the pig. Pig is not supposed to run off with my tools or the groceries. We are to feed the pig at daybreak, lest pig wake us all with his impression of a loud and demented kazoo. And so on.


From this….


...to this.


And for those of you who wonder what it is that I do with my day...Too much of this, to be honest.


Sitting around in my pj’s, drinking coffee and providing cats with a warm place to snooze, pig at my side and waiting to do something fun.

It's harder to eat someone who you know. Those other pigs though…..


The last couple of years has just flown by, yet not a single day has passed where I haven't given at least some thought to writing these posts. The idea of putting ones lives and thoughts out there in such a visible way as this can be so daunting at times. What do you focus on? Who reads this stuff? Is this supposed to be a diary? Should you concentrate on simple and close-ended projects that others might  emulate? Long term projects that someone might find inspiring? Are you building a brand and using the blog to promote your own awesomeness?

Maybe it is best to think of this blog as a sort of catch-all bin, lots of random stuff, some of which might come in handy some day. Welcome to the junk drawer of my mind, haha. Strange though it is to say (sad, I'll admit) I occasionally need to refer back to something that I wrote years ago, having entirely forgotten whatever it was in the interim. Documentation definitely has its value. Just because you find something interesting on the internet today, don't assume that it will be there tomorrow. Some of the best and most valuable resources of information that I have found on the net over the years are gone already and more is disappearing daily. Domains expire, picture hosting becomes a financial burden, technology shifts to the flashy new thing, or maybe intellectual property is getting monetized. Whatever. It's gone. Remember that knowledge not shared=knowledge lost. If you care about something, share it as widely as possible.

Of no less benefit is the people whom you meet, in a virtual sense if not in person. Finding someone to talk with and bounce ideas off of is really nice, particularly on subjects of, shall we say, less than universal appeal. I tend to get quite wrapped up and obsessive in my varying interests and it's not often that I find someone that is patient enough to sit through my endless yammering on and on and on. I try to keep that junk under wraps, not wanting to scare the neighbors. When I catch myself running a bit over-long on some obscure topic, I can usually cover up by apologizing for my lack of social skills…..”Yeah, I don't get out much...umm….Sorry”. With a blog, the reader can be passive, active, or just opt out entirely without needing to back out of the room as politely as possible. My wife loves to read the blog because it gives her a glimpse into the reasons why I find certain things interesting, yet doesn't obligate her to sit and listen to me ramble for hours on end. She gets to share in some of my delight, but it doesn't give her a headache, haha.

The act of organizing the content in my mind and arranging it some coherent fashion, choosing photographs to augment the presentation and then writing enough to fill in the blanks, requires me to think about things in a more linear pattern. This forced focus has only improved the outcome of most anything that I've documented. The downside is when I start writing up some new interest or discovery, only to fail so spectacularly halfway in that I gotta drop the line. A series of posts detailing something that only results in a dead end sucks, both for the writer and the reader. I've been guilty of that far to often already and you have my sincerest apologies.

But the best thing of all? In an very literal sense, arranging words and images tells a story. The wonder of telling the story is that it shifts the attention into the abstract. To describe what we are building, be it a box, a travelog, or a philosophy, draws the writer out of their own first-person experience and into the third-person. Paradoxically, it is that distancing of self that can help us to better see the wonder and beauty inherent in each of our lives. The things that I do in my daily life are quickly written over by new experience, then forgotten. In sharing, I see myself differently. Something as mundane as digging yet another hole becomes something…..more. I don't really know how to put any of this into words, but whatever it is, I've missed it greatly.