Tuesday, June 30, 2015

The house we didn't get, and...design challenge.


We were recently visiting the mainland, myself for a brief medical visit (regular 6 month CT scan, Pseudo-myxoma Peritonei, no discernable tumor growth.....no news is good news. Dr. Holbrook.....my appreciation knows no bounds.), and Renee to receive her Doctoral papers, visit with friends and family....and 2,000,000 other things. Three days was enough for me, but my wife and daughter stayed for nearly two weeks. Better them than I, sayeth me, haha.

Anyway, Renee returned to Hawaii rejuvenated, and is seriously looking to make this place home. As I mentioned before, the Hawaiian real estate market has some interesting twists, lots of poorly built, very expensive homes.....also some well built, very affordable homes that were built with thoughtfulness and character. These houses are most often built without the "proper" building code approval (a notoriously difficult process here, but I have no direct experience with that yet. Just FYI), so banks won't loan on them.


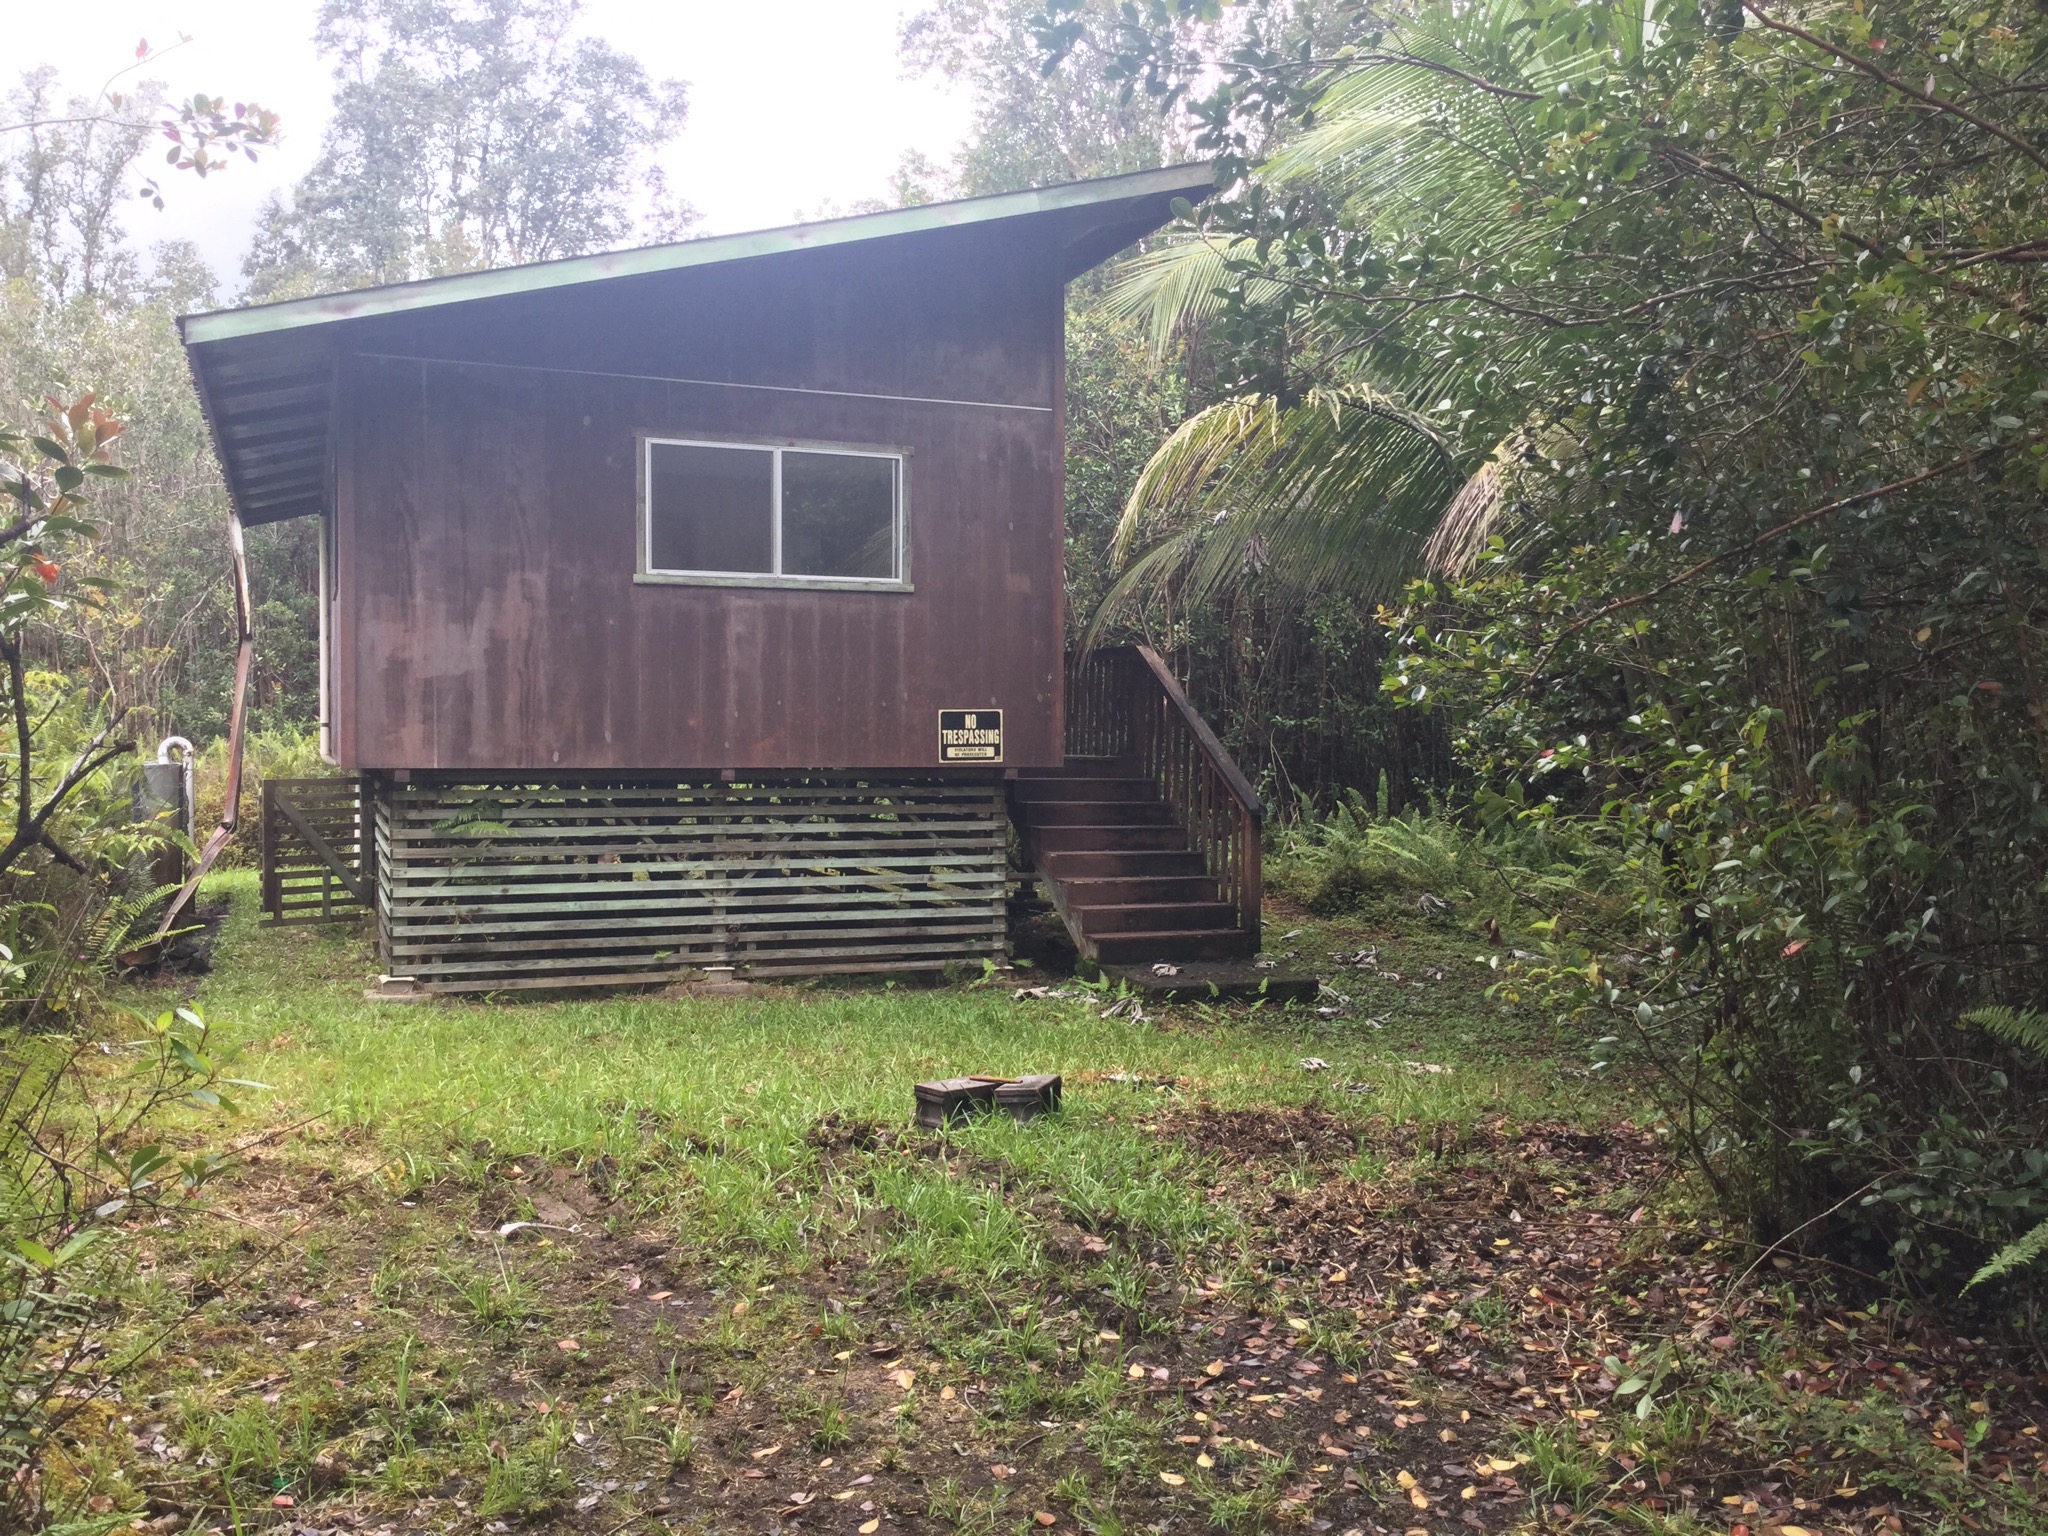
Here is a perfect example of a home where we would love to live, but unfortunately we were a "Day late and a dollar short ", as they say. These aren't my pictures, so forgive the fuzzyness.


You peek around the corner and spy a creepy old shack in the woods....A perfect setting for a horror movie, right?


I notice hand split cedar shakes, translucent fiberglass wall panels, and a very commendable economy of design.


Inside, it's all wood. Some of the wood appears rough, right from the sawmill, but some has been planed smooth. Again, translucent panels abound.

The kitchen has built-in tables and cabinets, rustic but not rough. There are elements here that feel familiar to me from my many years of designing sailboat interiors. Was the person who built this place a one-time sailor? It even had a ships propane galley stove, and a small refrigerator (stolen a few years back, when someone broke in and took the good stuff, fridge, solar.....).


This room has a painted wood floor, wrap around glass windows, and a strange stepped masonry and tile.....something. Even after peeking through the windows, we have no idea what this room is for.

The camera over-compensates for the light levels, making it look dark in here, but the entire house is completely filled with soft, warm light.


The stairs are simple, functional, and neat. There is a built-in bed underneath, the perfect place for a father to sleep.

My daughter is only 10 years, but the 'teens are swiftly approaching.


The roof has many translucent panels as well, bathing the loft bedrooms with light.

These look like ships bunks to me.


Off the back deck is a wood-fired hottub, filled by rain from the downspouts.


There is a nicely sized workshop /shed/garage, not too big, not too small. Just right.


The shed also shelters the rain cistern.


When Renee and I looked at this place in person, it was immediately apparent that this was a special place, built by someone who truly cared about what they were building. They built a home, not just a house that would be seen as an investment to be sold sometime in the future. The closer you looked, the more good things you saw.

I didn't take photos, but the landscaping was wonderful, a huge variety of ornamental plantings, funky god-knows-how-old stone walls, and many, many trees. 8 acres worth, and we only got the barest hint of what was there. Horribly overgrown and neglected, just discovering what had been done before and then bringing it back to life.......

Sigh. Cash only, no permit =no bank, and a prior offer is set to close this week.


Unfortunate, but....there are quite a few places similar to this one, and the timing must be right. There are design elements that were used in this house that could be incorporated into something that I would build. Heck, this looks like someplace that could've been built by me!


We looked at another place a while back, put in an offer and everything. Fully permitted construction, and offered at a great price, actually. This would've been a good investment property.

Boring boring boring, cheapest materials and construction possible. This would've been a house, but not so much a home. Thank god our offer was rejected!


We did love the banyan tree, though.


This was a perfect example of the conundrum of building, following all the rules, and ending up with a valuable property that is severely lacking. We could've turned this house into someplace with character, but at risk of staying within the allowances for code approved additions. You are allowed to replace what already has been approved, but anything new....new approval is required. That's a good thing, but.....kind of heading down a road that I've already traveled. I want to go someplace new, you know?


Here is another place that I looked at. The land itself is fantastic, a great lot, and you even got an ocean view.


The house however....ummmm.....

Two structures tacked together, but never finished.


Abandoned.


They started, but a lot of work remained.

A LOT of work!


Termites can be a concern here, haha.


As scary as that property was, I saw potential there. Really!


I have been accused of being an optomist.


In designing our home, I want to make the most of this wonderful climate. I've never in my life lived someplace with such benign weather. 


Do you want an open-air bathroom?

No problem.


The property that we buy will have lots of trees, so using round wood joinery will be a priority.


Convertible spaces that utilize sliding panels, screens and doors.......


Thinking.......thinking.......

Project Mayhem #2.....KOSHIKAKE KAMATSUGI (STEPPED GOOSE NECK SPLICE)


Project Mayhem #2.....


KOSHIKAKE KAMATSUGI (STEPPED GOOSE NECK SPLICE)


Got two short beams but you'd rather have one long one? Here we go. GabeD added some basic proportions to the illustration to make things easier for us......now if only he would give me a sashigane.....


I cut my version of this stepped, goose-neck splice using an old chunk of 4x4 that I had rescued from the dump. All told, my time in was 3.5 hours, one shot, no trial fitting, and I made the thing too darn tight. This is never coming apart (not necessarily a good thing, too tight). The bulk of the time was in excavating the recessed areas and making the inner faces as flush, plumb, and true as possible. The finished joint looks cool, is decently strong, and was very fun to cut.


Thanks Gabe, great choice!


Gabe gave us the essential proportions for the joint, so converting that information into the proper size for my timber took some thinking on my part (sometimes an iffy proposition). The proportion system makes things quite simple, and the only thing that really gave me pause was that of the angled slope of the goose-neck /hammerhead part. The slope is determined using the standardized width of the sashigane ( the Japanese carpenters square), but not actually having one, I first had to do some research (it is 15mm BTW). Then had to do a bunch of fidling using my ruler, drawing and measuring, never a good thing.

Note to self.....get a sashigane! I keep hoping to find one here in Hilo, but haven't had any luck so far.


I square the stock, plane things smooth so that I can better see my layout, then start drawing.


This timber is large enough to use a proper centerline layout method, something that is really growing on me. With any stock that is less than perfectly square and of uneven thickness, centerline is my new way. Slow learner, I guess.


I grab a marking gauge, set it to something close to half the timber width, then make a mark.


I strike a second mark from the opposite face.


In this example, my gauge was set too close to the halfway, so my two marks kind of smooshed together, but the result is close enough to the true center. Now I can strike a line the length of the joint, to use as my origination point for laying out the joint.


I started out squaring off lines using a regular carpenters framing square, but the huge, awful thing was way more trouble than help. A machinists try-square was of greater assistance. I layed out both halves of the joint on the same piece of wood, just separated by a 1/4" waste portion.

Note to self.....get a sashigane!


On the positive side, for this joint I inked the lines using a 0.2mm pen and it worked wonderfully. Not as cool as using the bamboo pen, but far better than the mechanical pencil that I have always used in the past. I never would've thought that I would be cutting to an accuracy of fractions of a millimeter, but here we are.

Layout.....1 hour, half that being wasted by researching sashigane and my slower layout, on account of its lack.


I cut every perpendicular line possible, while the stock was still full length. Easier to hold on to that way. Sawing all of the crosscuts while the timber is still whole, as opposed to ripping some of the waste first, means that I do nearly twice as much sawing this way. I use my plain-Jane Z-saw 265 kataba, nothing fancy. A decent construct grade saw.


I'm finding that if I don't use any clamps to hold the piece being sawed, if I rely on gravity, a screw/stop on my bench and just hold the material with my off hand, it forces me to saw in a very neutral and controlled manner.

More accurate cuts are the result, as well as longer saw life, I suspect. After the two pieces are separated, I rip the other lines, trying to maintain accuracy. I am trying to only saw to half the thickness of the line, leaving nothing to pare or finish.


The cheeks of the mortice are cut using the same saw, but a rip tooth would've been much faster here. I wrap a piece of tape on my auger bit to set the depth, then bore out the ends of the mortice to make the excavating easier.

My favorite beater chisel, doing its thing. I need to fix another stop block to my bench for this sort of thing, it being hard duty for any clamp. It feels like 1/2 the force is absorbed by the movement of the workpiece.


This sidewall of the mortice is tolerably square......


But this side has too much undercut for my liking. Sloppy work.


And another little error shows its head. I mis-measured the goose-neck /hammerhead part. The mortice is correct, but the shoulder of the male portion is 5mm off.


Easily rectified. Given a second chance, I cut this line to a very slight taper which will help draw the joint tighter.


The moment of truth. I used a block of wood and my small ball-pein hammer (not the heavy sucker) to drive the joint home.


It is very tight, so there will be no second chance for this guy.

A few gaps, but not horrible.


Planed smooth.


The underside of the joint shows the worst. The tongue is just a hair fat of the line.


So, a great practice joint, fun to cut, too. By deciding to do as much cutting as I could, right from the get-go, I had more sawing to do, but less drawing and extending of lines. Possibly that helped my accuracy, I'm not sure. Sawing is fun, so I'm happy with that decision.

I am less than thrilled with my excavation of the goose-neck mortice. The level of undercut at the sides was excessive, and the depth of the mortice varied a bit as well. Gabe used a sliding bevel gauge to measure depth and angle when he cut his, and that seems a great use for a tool that most of us have. I was actually considering making a dedicated mortice depth tool but this day found me in more of a hammer/chisel/hit stuff mood, and for some reason the sliding bevel gauge didn't even occur to me, haha.

http://granitemountainwoodcraft.com/2015/06/26/cutting-koshikake-kamatsugi-stepped-goose-neck-splice/

Finally, I cut this joint too tight. With my current level of skill, it would be better had I allowed for at least one trial fitting. I got lucky, thought the fit isn't quite as "perfect" as I would like.


Time to consider the next challenge, eh?

Maybe we save this one for later.


Saturday, June 27, 2015

Handsaw tension.


Gabe has questions regarding handsaw tension, as do I.


  1. This removing the tension from the edge with the hammer, did it make a noticeable change in how the saw cut before you re-tensioned? It seems quite counter intuitive that striking along the tooth line with a cross peen would remove tension. My grandfather has an Irwin hard pointed saw, but as a full length panel saw. It cuts very well, but the saw flops around in use like a beached fish. It seems obvious to me now that it needs tensioning. Any reason you used a round faced hammer to tension? How did you know when the saw felt like it had enough tension?
    Lol, I'm full of questions today. As far as the smaller distortions, how does it go for you to sight them visually? I mean to say, are you having much luck holding the saw up in front of you and viewing the plate at a low angle? Most of the time when I am looking at a saw the distortion I can see in the plate does not readily suggest how to be corrected with the hammer. You're doing great work! Though a humble little saw, that tool now has a lot more value.


Hi Gabe!


I really wish that I had some good answers here, your questions are all good ones.....questions that I share! Tensioning of handsaws is one of those questions that a few of us are asking, but finding answers is proving difficult.


George Wilson (now retired, tool makers from colonial Williamsburg) indicated in some long ago thread on SMC that they didn't actually tension many of the full size long saws that they made on site, and they worked just fine. What the heck is tensioning anyways, and is it necessary? Here is my thinking, such as it is.....


When you cut wood, force and friction cause the blade of the saw to heat up, not like HOT, but the heat is definitely there. The heat effect is greatest at the tooth line, and causes the saw blade to expand slightly, effectively lengthening the saw a tiny amount. The effect being greatest at the tooth line, if there isn't some way to accommodate the extra length, you get wandering cuts or binding. Striking the body of the saw to "tension" it, is essentially making the body of the blade longer than at the tooth edge, so that as the blade heats in use, all things are evened out. To me this would mean that, rather than the edge being "tensioned" in its normal state, what we are actually doing is putting it in a state "compression". Tensioning would then be a misnomer. I'm not sure if this is the case, but that's how it works in my mind, haha.


I doubt that this saw was tensioned originally as I saw no marks on the plate that indicate that it was run through an English wheel....lines of distortion running longitudinal to the body. I think that's how they do it nowadays. The saw plate on this guy is just relatively thick, and very stiff. When I struck the tooth line at the hash marks, to remove or neutralize the tension, it was mostly for forms sake. The idea is that I would be "lengthening" the tooth line to be equal in length to the body, and I used my faux cross-pein hammer to give more directional force, a stronger lengthening effect.


In re-tensioning the blade, if we look back to Hasluck Handyman's Guide,


he calls for the use of two different hammers to fix bends, the cross-pein hammer for specifics and a larger dogs-head hammer for the general area around the bend. The larger hammer is used for tensioning, I am assuming because we need to input more force. Bob Smalser calls for using a 2# hammer for tensioning, so he has something similar in mind.


It would've been interesting to have tested the saw prior to tensioning, but it didn't occur to me. This was one of those cases where I just got pissed, grabbed the hammer and started whacking things. My direction and intent were there, but the pictures came after the effect. Let's all try to do better in the future, because this is helpful information, haha.


As I spend more and more hours staring at these different saw blades, I guess that I am training myself in various ways to see deviations. When I bend a saw blade and look at the way the light reflects, I now see much more than I did a few months ago. I would have to say that my eye is looking differently now, somewhat akin to the way an artist sees the space around an object as much as the object itself, seeing the "negative space". Mark Grable refers to this as right brain/twilight brain thinking, and that would be correct as well. I don't look at the blade itself, but more how the light gets distorted by the bad spots.....kind of. And to be clear, I claim no facility here either, I'm just starting to see this stuff. When I was tensioning this blade, how did I determine the areas that needed extra tension? You could call it a guess and be just as correct as any excuse that I could devise, haha. It just felt like it needed a few extra whacks to bring things back into line.


When staring at the blade side on, if you just bend the blade into an arc there might not be anything to see, but if you squeeze that blade between your hands as you bend (inducing a compressive force) you might see much more.


Somewhat similar, I have two ryoba, one cheap and the other much higher quality. The cheap one bends smoothly and evenly, also rings loud and bright. The higher quality saw bends smoothly as well but as I bend it, it feels like the saw plate close to the edge is stiffer, while the main body is more flexible. It doesn't bend evenly exactly. Smooth, but not even. When rung, the sound it makes it clean, but also lower in pitch or perhaps richer/more complex.


I was looking at a handful of old, rusty saws yesterday, and spent a minute bending them back and forth, sighting the length, just kinda checking them out. One of the saws was an old 1920's Disston, one was a "guaranteed superior", and a couple were just.....crap. The Disston was trashed, but the GS saw was stiff, bent in a way that felt nice to me, but more than just stiff. I don't know yet how to describe it. Most interestingly I thought, were the crap saws. Though they bent clean, smooth, and easy, they just felt flexible.....like if you were sawing something, they would be flopping all over, wandering from one side of the line to the other. It just feels like something was lacking.


I have been looking at some pictures of a nice Maebiki-oga that was on eBay not too long ago.


Of the great variety of hammer marks that you see on these handmade saws, the maebiki have some of the most distinctive.


I'm looking at the upper corner, and the wealth of impact strikes that are common here. Is this to thin out the metal in that entire corner, reducing drag in use? Is it greatly thinner there, to allow a degree of correct-ability when your cut runs away from the line?


Is it to drive mass into the greater body of the saw, as part of the tensioning process?


When I look at this photo, I see hammer strikes that are pushing (fullering, in blacksmithing terms) metal from the tip of the saw into the main body. Then, that mass gets pushed /spread along the length of the saw, as evidenced by the little line marks from a completely different type of hammer.


The opposite side of the saw shows a similar (though not exact) system in play. Obviously this is done for a specific reason and I would love to know.


Gabe, you've got two maebiki right there....what are your thoughts?


Wednesday, June 24, 2015

Simple saw tuneup


So, while in the midst of my masters level coursework on Japanese saw rehabilitation, I needed to cut some wood. Specifically, I needed two short lengths of 2x12 that I am turning into a reasonable facsimile of a Japanese style saw vise, so what do I grab?


I swear that I'm not doing this just for the pleasure of tormenting Sebastian (he hates this poor little saw, haha), but it is a handy tool to have, it gets used on a daily basis...... and this one in particular can be improved.

Mark's rule:

  • 8) start on modern western softer thicker blades

This is your garden variety handsaw, something that you can buy in most any home store. The last time that I went to Home Depot, while they didn't have this exact saw, they had another brand that was more or less identical. It's backwards ( ie: cuts on the push stroke), but uses a Japanese style tooth pattern, similar to ChoMasaru, actually. The teeth are impulse hardened.


From day one, this saw exhibited a slight tendency to drift to the left, just a bit more than you can overcome easily, so you had to start the cut slightly off to compensate. Stuff like this didn't used to bother me. I always figured that I just kinda sucked at sawing, you know? Well I've gotten slightly better with the saws, so when this guy started to drift (as it always has), I thought "Screw this! Your time has come, Sucka!"

Unfortunately, this was a spur of the moment decision, so my pictures are a bit worse than usual.


The last time that I was at Home Depot, I took a good look at the handsaws they carried, four different types, if memory serves.

  • $9.....Bottom rung super cheap/crap Western style tooth. Painful to use, dull, bowed and ugly. This would be the only saw that you would ever need, because after one use, you would likely never cut anything else by hand, ever again. Made in China.
  • $12.... Basically the same as the saw above, but with a Japanese style tooth. Bowed along its length, and the tooth cutting operation had left a significant bur edge along one side of the entire blade. This would cause the teeth to snag and load up with wood fibres during the cut, and would also cause the teeth to cut unevenly. This saw would drift like a SOB ! 4 out of 5 were significantly flawed, but a few weren't so bad. Made in China.
  • $18....short toolbox type panel saw, Japanese tooth pattern, bowed along its length but the tooth finish was a bit better. Impulse hardened. This saw would at least be functional. Made in China.
  • $32.....Stanley "fat max" short toolbox saw. Japanese tooth, impulse hardened. The tooth finish looked decent on these saws. Some were bowed slightly, but they weren't bad. Obviously this line of tools is targeted at the working professional who understands the value of quality tools ( and big pickup trucks!). Made in China.

Yep. All crap. They sell about 350 kinds of power saw, though. Also, that these crap saws are all made in China? They just build what we want to buy. This is our own fault.

Notable was the erratic quality control. If you need to buy something and know what to look for, you could get a usable saw there, but if you just grabbed the first one off the rack? Good luck with that.


Time for a tuneup!


The shiny, brighter patches are where the saw rubs during use. Some of these areas are from the saw binding, getting kinked, smacked into something, having a tree fall on it.....whatever.


Used, and used hard. The saw plate is very stiff, so there haven't been any severe bends, but there are a couple of mild kinks.


This horizontal line shows one slight kink.


And here is a second one.


Neither of these kinks amount to much by themselves, and are barely visible when you sight the length. The saw still cuts pretty good, but it could be better. What the heck, right? I might learn something.


Theoretically, a decent handsaw has the blade under a certain amount of tension. The tension helps to keep the saw teeth in line. A saw that is poorly tensioned feels floppy and dead, whereas a nicely tensioned saw feels alive. The tensioning process is now done by machines, but back in the day, it was performed by the sawsmith, sharpener, or metate.


Bob Smalser goes into this "Straightening of a western saw" thing in some detail, and his work could be considered the Bible on this subject.

http://www.wkfinetools.com/contrib/bSmalser/strSawBlade/strSawBlade1.asp

It seems highly unlikely that this saw was ever tensioned. The saw plate itself is so thick and stiff, it probably wouldn't have been necessary. But......what the heck, right? Bob says that the first thing to do here would be to remove the tension at the tooth line. Theoretically you want the blade to be in as neutral a state as possible before you attempt the straightening process.


Tension in a saw blade, an interesting thought. In the illustration below, fig.13 is a good analogy of how I imagine a handsaw blade to be under tension.

This from Drabble and Sanderson saw doctors guide 1925


This wouldn't be correct in a literal sense, but I like the analogy. This work specifically is in dealing with large sawmill blades, blades where rim speeds are in 100's of mph and the blade itself operates at heat. I could go on here, thinking out loud, but......back to the project at hand.


Bob says remove the tension at the edge. The small hash marks running perpendicular to the teeth represent where I aim to strike, running the full length of the blade.


Strike on the oblique, to direct the force along the length.


Run down one side, the saw reacts by bending into a gentle curve.......flip the saw over and repeat the operation on the opposite side. The curve disappears.


Back to " The Handyman's Guide".


Here are those two gentle kinks, all marked out where I want to strike.


This saw blade is thick and stiff. I need to strike nearly 2x as hard as I have been with the Japanese saws. How hard?

Mark's rule :

  • 4) don't hit harder than it takes to have an inspect-able result


I hit along one series of those lines that represent a kink, maybe 10 strikes. Sight the length, and if the kink is gone.......that was hard enough, haha. Far better to hit lightly than to strike too heavy. I run the line on one kink.....sight the length....some effect, but not gone yet.....run the line of the second kink.....sight the length....you get the idea. I maybe did each of these lines 3x's.

Mark's rule:

  • 2) work by halves - sneak up on straight little by little
  • 3) don't focus on a couple square centimetres


Sight down the back of the saw, too. Maybe the kink is harder/more pronounced towards the back of the saw? The only really important thing here, is that I am training my eye, learning to see how the blade responds to the hammer's blow, the kinks and bends. As I look at the saw, I am learning to see, but it is now becoming so subtle that it can barely be described as "seeing". It is becoming something between sight and imagination.


As you check your work, it is likely that some new kinks or bends might manifest themselves, bending the saw to the other side. At the very least, I have been very lightly (1/2 as hard) hammering the side opposite the kinks, kind of generally working lightly over the entire general area.

Mark's rules again.

  • 3) don't focus on a couple square centimetres
  • 1) work from both sides


I do all of this work on the anvil, though not shown on this picture. And you don't need an anvil per se, just a heavy smooth chunk of steel. In fact, a regular mild steel block might be preferable, at least for the straightening process. Mild/low carbon steel would have a touch more "give" to it, if that makes sense.


So after striking the lines, working out those kinks, the saw is actually quite straight, better than new! As I look at the saw more thoroughly, I see many small rub marks, all over and on both sides of the blade.

I map them....


.....then strike, except this time I am using a small ball-pein hammer, because the marks themselves are more round in nature. I figure that the hammer should match the work.


Those little dimples.....as they get hammered out, the shape of the saw changes. Fix one thing, two others might show up. If you only concentrate on a single area, nothing works. Work the entire blade and the deviations have a tendency to cancel each other out.


Many of these distortions are artifacts left from the factory. When they punched out the blank for this saw, those goofy little holes....each hole represents energy input, and distorts the blade slightly. Most of the energy leaves the saw immediately, as the metal slug is punched free, but a little bit remains. That is the distortion you see around each of those penetrations.


Hammering down the high spots is, in my imagination, allowing the remaining energy to be spread more evenly throughout the body of the saw. Even and relaxed, good things.


It is straight, although the set of the teeth now need to be adjusted, haha.

Something for another day.


The tension was a removed, now I want it back. Going back to the previous illustration Fig. 13, you want the toothed edge to be straight and "tight". The body of the saw should be "loose". Hammering the length, about 1" up from the edge, gives tension to the toothed edge.


I try to do both sides evenly, but I need to sight the length to be sure. Adjust the plan accordingly.


I bend and flex the blade, sight down the front, the back, hold it up to the light......just kind of "look" at it for a while. It feels like this saw needs something more.


Both sides, of course.


Double/triple check that things look good, then I take her for a spin. Miracle of miracles, the saw works like a charm. Success!


This saw now cuts straight and true, effortlessly cutting the line, and requires much less attention to use. Instead of working to stay the line, now I can concentrate on power, keeping my stroke clean.


In general, as my sawing has improved, I have begun to slow my stroke fairly dramatically. I concentrate on the saw, the blade, and try to "feel" the teeth as they cut. My arm speed has slowed, but my cuts are actually quicker to execute, and clean. Less to clean up afterwards. Slow is fast, right Gabe?


Ultimately, this is a trial and error process. It's no big deal.

  • 16) It's only a saw. You are only You.


This whole process start to finish, took maybe 15 minutes. A lifetime of crappy sawing, fixed in 15 minutes......life is short, and there is much to learn.