Monday, March 31, 2014

Diamond bench stones-DMT and Eze-lap..... and a bit about lapping substrates

I seem to be having one of those days where I would rather talk about something , than actually DO it. Well, that and wanting to clean out some pictures before I forget what the pictures pertained to. Something like that. These are just some thoughts based on my VERY limited experience......


All of these sharpening stones that I have been making, every one needs to be flattened. I have been doing that using various combinations of loose abrasive grit on a flat (ish) substrate. This has proved to be so much faster than, say, sandpaper on a flat surface, that I can't imagine ever using the sandpaper method again. Loose grit is faster AND gets the surface flatter, win-win.

For tools, the choice is not as simple. I have piles of old tools and most of them require fairly substantial reworking. This means removing lots of metal, and even *I* get tired of grinding away for hours on end, at least if the time/work curve feels painfully flat. I do use power tools, grinders and the like, but I prefer handwork, IF the T/W curve is reasonable.

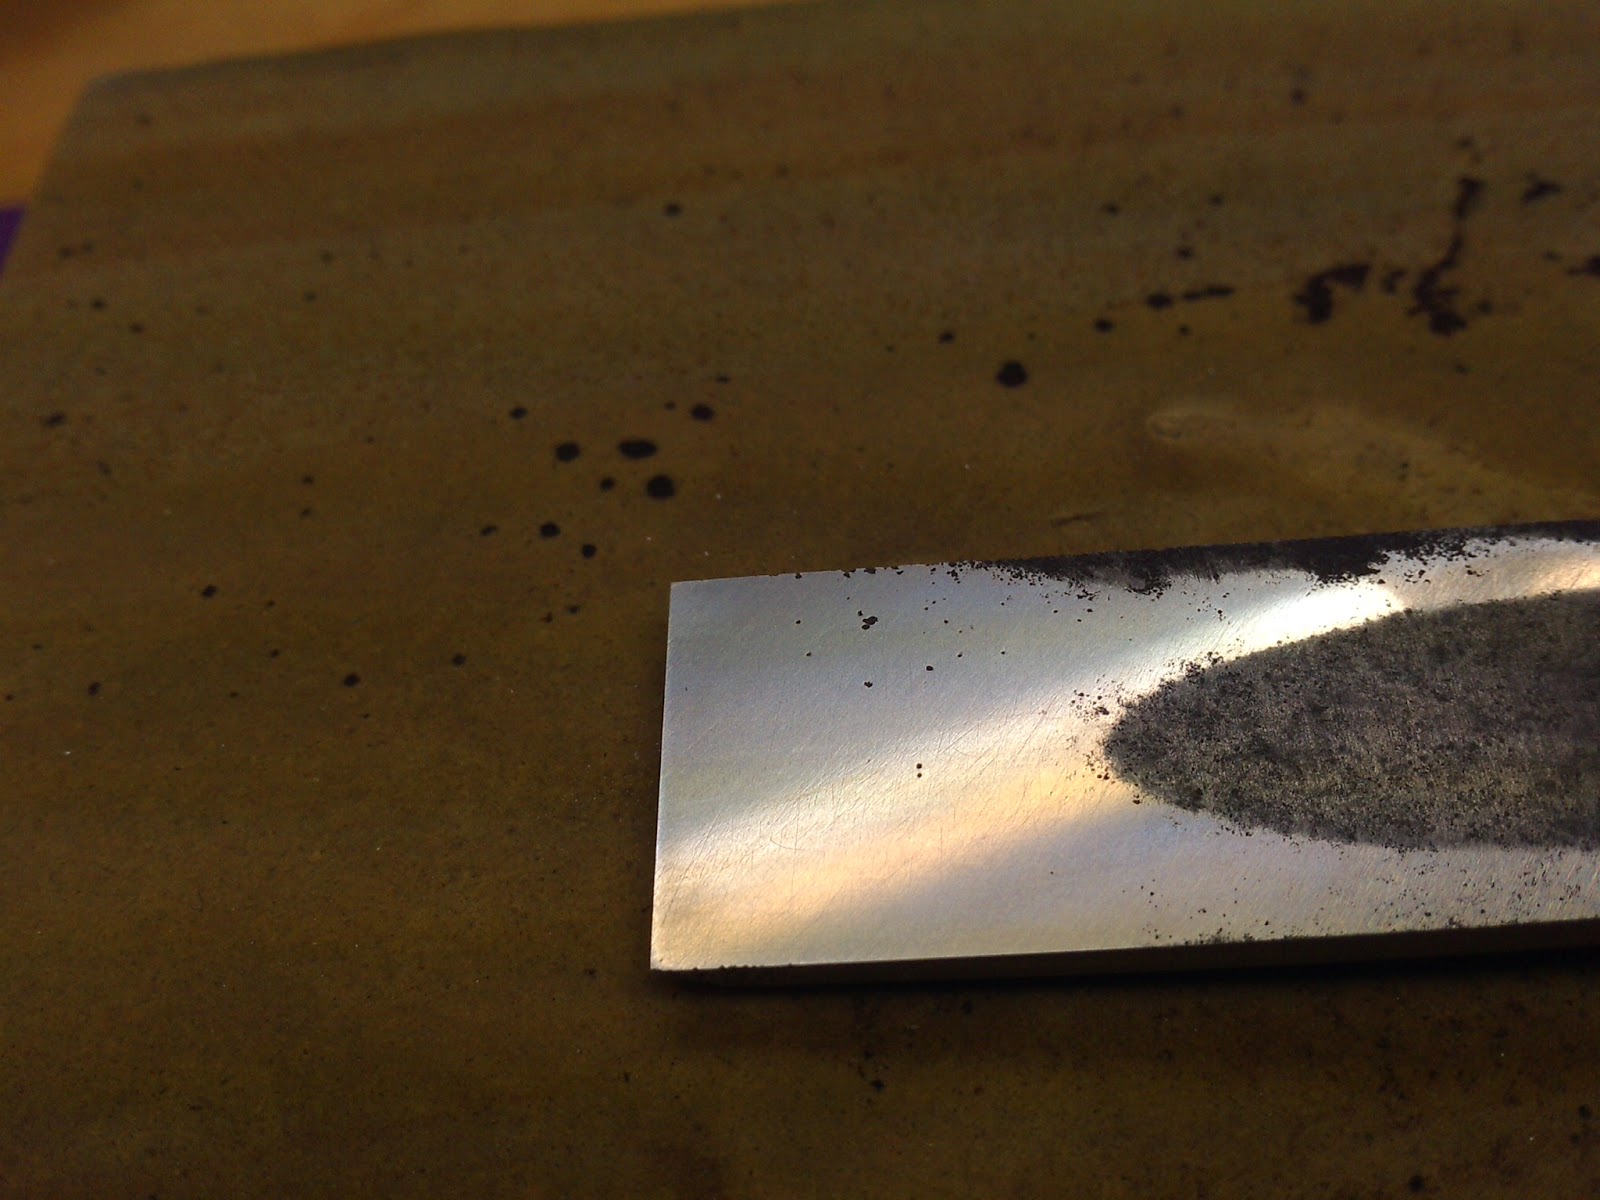
I am going to be trying loose diamond grit on a lapping plate, but for now, I just want to make some surfaces flat. I have been using a flat granite tile and valve grinding compound....


.....but the level of wear is unacceptable.


This was after only about 12 blades (2 were amazingly hard, though).


So. Diamond stones. The hand sharpener's Crack cocaine... And they are flat, right?


Two stones, a DMT duo-sharp and an Eze-lap #600 grit.


The DMT I bought new, about 1 year ago. The Eze-lap is from my friend Brandon, and is old, 10 years? 15? It has seen some use, definitely. The Eze-lap (10 years old) works great, but the DMT (1 year, maybe) is getting decidedly tired, and is also starting to delaminate. 

It's also bowed +1/64 along its length. Always has been. Many people have found this to be the case, particularly with the perforated composite stones.


Significantly bowed, for what is widely advertised as "very, very flat". The company that makes the DMT'S advertises 0.001/inch for their regular bench stones, and supposedly BETTER for these duosharp stones. 1/64 over 8" = 0.00195, almost double the target 0.001. Decidedly bowed. 

The problem with the bowed sharpening stone is this. Say that you begin with a flat blade. Using this stone, you will make your blade first concave (#600 Fine), then convex (#1200 Extra Fine). Then you have to flatten the blade all over again using your finishing stones, which takes a while. All told, you have removed about 4X more material than you would if you were using a TRULY flat stone. I like sharpening things but......


The Eze-lap is usably flat....


....but that's because I made it that way.


A BIG vise and LOTS of pressure, these are made from hardened steel and are very sturdy. You can see that my little fulcrum block is crushing. I had to use two hands and extra ooomph! to tighten the vise, just shy of needing a breaker bar. Very sturdy! I obviously can't do this with the DMT, bummer.

Worse, however, is the scratching. The DMT has #600 (F) one side, #1200 (XF) on the other. The #600 (F) is consistent in it's degree of aggressiveness, but tired. The #1200 (XF) side is very uneven, with approximately half being an appropriate #1200, while the other 1/2 feels more like a #400 grit AND has a few random, huge particles, just to keep things interesting. I'm starting to wonder if I got a bad one......


At least I finally found out where my mystery scratches are coming from. I get these scratches on every tool that touches the DMT, and they take RIDICULOUS amounts of time to remove. Heck, this thing even left scratches on my sharpening stones, before I figured things out. Now I try to use stone/stone to true my sharpening stones. You need to use a DIFFERENT diamond stone to remove the scratches left by this stone, far from efficient. Ergo, the Eze-lap stones.

The two stones use different types of diamond grit. The DMT uses a mono-crystalline diamond abrasive that they say is better/more expensive/higher quality/longer lasting etc. The DMT does leave a nice, even scratch pattern, at least on the #600 side.

The Eze-lap #600 uses poly-crystalline diamonds and though old and worn, still is MUCH faster than the DMT, although the finish isn't quite as fine. This is consistent with other people's findings. You can read a bit about the mono/poly debate in various venues, written by people with WAY more experience the I.

Like this one....

sawmillcreek. Synthetic-polycrystalline-diamond-paste-cheap-and-otherwise

The consensus is that mono starts fast, wears out fast, and produces occasional large scratches. They are more expensive, too. Sounds familiar. My $8 set of (not so)crappy Chinese diamond stones are still working fine, even though they get abused on a daily basis. They are most likely poly diamonds. Seriously, just today I did the rough shaping of an old kanna blade, worked on the initial flattening a MF'ing hard potential sharpening stone, chamfered the edges on another stone, sharpened an old Japanese ax, and (finally!) worked a bit on flattening a cast iron lapping plate.


I am going to send my DMT in for evaluation. I'll let you know how that goes. Today, I would give 5 DMT's for 1 old Eze-lap. Maybe 7. Probably not 10, though. I mean, it DOES still work. I have read that some of their other products are more consistent in the lateral plane ie: Dia-flat lapping plate @.0005/inch.

Kinda spendy, though.


Tuesday, March 25, 2014

Show and tell- 3/25/2014 (Special birthday edition!)


A few weeks ago, Junji put a REALLY nice kanna up for sale. My wife immediately told me to buy it, "If you don't, I will!", she said. Here I was, feeling all responsible and prudent for not immediately buying yet ANOTHER Japanese carpenter's plane. Besides, it was too nice, too new. My other tools would get jealous!

Well...... Actually, after seeing me wander aimlessly about the house, sighing heartfully, she finally got exasperated enough to ask, "Why the glum face?". Wisely foreseeing days of excruciating should I/shouldn't I, she decided to be proactive and kill two birds with one stone. I have a birthday coming up soon, and I am one of those people who are impossible to shop for, so she saw the perfect opportunity. Wise AND beautiful!


I have also begun my foray into high quality saws. My personal sharpening epiphany has lead me to learn how to sharpen EVERYTHING that I use. To transform a tool that merely works, into something that feels like an extension of your own hands..... Well, the thought of a disposable tool makes me a bit sad now. But EVERYONE uses disposable blade saws now, right?

Disposables work great, last a long time, AND are cheap. I, of course, need to buck the current and swim upstream. Given the choice between common and cheap over rare and difficult, I unfailingly choose the more obscure. I have been waiting a while for exactly this type of saw, a azebiki-noko, to use for cutting small joints and such. An opportunity presented itself....


A NOS Nakaya azebiki-noko. I think that it is made by Shigemon, but I'm not sure. In any event, it's here and I'm happy.

 
I need to make a handle.
 
 
A bit of surface rust, but no pitting, from sitting on a shelf for 30 years. One side is rip tooth, the other is crosscut.
 
 
The teeth are so tiny and sharp, they remind me of the teeth of a fish. A mean little bitey fish!
 
 
The blade(plate) is dramatically tapered in thickness. This photo is looking from the heel, towards the toe. It looks like the blade thins into nothing.
 
The edges are beveled and tapered, hand done. Perfect.


I happen to already have another saw (a 270mm Ryoba) made by the same blacksmith, but a different grade, more machine made than hand made.
 
Different sizes.....
 
....same signature.
 
I had heard about happy saws, and how they will "sing" when being used, how they resonate. The big saw will sing, true, but the little saw...... The little saw rings, clear as a bell, when you touch it. And keeps ringing, like a tuning fork. It's actually a bit unnerving.
 
This is my first "real" saw, a professional grade tool, and to compare the two saws, side by side, there is little to compare. They are very different. The little azebiki breaths quality. Sharpening is gonna be a b***h, though.


Now, my most expensive Japanese tool, although that's not saying much, haha! For the same price you could buy a (new) very mediocre chisel from Japan Woodworker.
 
72mm Kojiro hira-ganna (finishing plane).


My first plane that still has its koppa-gaeshi intact, nice and tight.
 
******EDIT 3/1/2015******
Doesn't this guy read his own stuff? I need to correct some terminology here,sorry. Obviously if you want to learn the proper terms, you might search elsewhere,haha. I suggest Chris hall.
I said koppa-gaeshi, but that's actually the nearly vertical ledge just in front of the blade's cutting edge.
What I meant to say.......is that the TSUTSUMI is still intact. The tsutsumi is the funny little ledge that contacts the bevel on the primary blade, and is primarily seen on the better quality dai's. After a few years of conditioning the sole of your kanna dai, the tsutsumi dwindles away to a mere flap of wood, but this kanna is virtually new still.
My apologies, my bad.
 
*****end edit*****


It even came with its own house!


The ura-suki has been carefully preserved, and has probably only been sharpened a few times. I love how easy the back face is to sharpen, when it hasn't been all fouled up. No fat ashi here! Ito-ura, here I come!
 
 
The soft iron ren-tetsu is VERY soft, easy to work, and sharpening will be a simple affair.
 
It also has a lot of figure. I expect that this is a special variety of iron.
 
The chip breaker blade has a spot of discoloration, where the hot (Yes, hot!) shavings and resin have gummed up the blade.
 

Sometimes a chip breaker blade will get almost blue from the heat of planing, certainly discolored, and you can feel the heat as you cut certain woods. I would guess that it has something to do with moisture content and all of the heat energy that is released as the water molecules change phase.


The detailed texture on the head of the blade is very deep and 3-D. I almost wonder if it was done using an arc-welder, it looks strangely familiar. It's not something that was done using a texturing hammer, in any event.
 
The head is a bit deformed by hammer strikes, but not badly.
 
Not surprisingly, I need to immediately polish it. Notice that I said polish, not sharpen. It IS sharp! And the bevel angle is already right where I want it, 30 degrees.
 
I head right to my best stone, the Nakayama-esque asagi.
 
Soooo much figure to the iron. The blacksmith used these remarkable materials to achieve this exact effect.....and this is ONLY visible if you use these stones. A true example of a functional synthesis in art, I suppose.
 
 
The bevel surface looks dull and uneven, but is actually an almost perfect mirror.
 
 
So cool.
 
 
AND the super soft wrought iron was easy to repair. It only took a handful of light hammer blows to reshape the head, back into its intended form. This is the softest metal that I have ever worked, by far. I tried to duplicate the original file marks, too.
 
Definitely my best birthday present, ever. How did you guess?
 
 
The danger here is that a door has been opened, a precedent has been set. If I mope enough and let slip some mournful sighs, will she buy me these oh so nice tsuki-nomi that Junji found this morning.....
 
 
20-22 inches of giant chisel, meant for fine tuning the supremely detailed joinery used in temple construction. So very pretty, two with ebony handles and what COULD be ren-tetsu bodies (very rare in chisels) and the third just, well......just nice to look at.
 
Sigh....... sigh.....*ahem*...SIGH!!!


Get (un)bent!-Straightening a bent chisel


OK, a good chisel, but one with issues. How far dare I go? The chisel is bent to the front, just a bit, but enough to be bothersome. This could be SO nice otherwise......


The bend.


I warm the chisel with a heat gun, thinking to reduce the shock of bending, somewhat. I am using my big 'ol machinist's vise with 3 movable fulcrums. Two are made out of oak, the third is a brass rod.


 The oak pieces are hook shape and have a small magnet glued into the back, where it contacts the jaw of the vise. The magnet attachment allows you to slide things around, to apply force right where you need it.

I periodically check for flatness by grinding the back of the chisel, using a diamond grit bench stone. There was a fair amount of rust pitting to eliminate, but the hard steel is thick enough that I didn't have to worry TOO much about grinding through, into the soft iron.


Better


Not perfect, but at least something that I can live with.


The diamond stone that I am using isn't truly flat. For that I need to use a different technique.

Lapping the back, using valve grinding paste on a granite plate/tile.


The black stick looking thing is....a stick. I use it to apply more pressure, directly over the cutting edge. My right hand wraps around both the handle of the chisel AND the stick, supporting the weight, my left hand applies the  downward pressure. 

The paste is VERY thick, so I thin it a bit with some mineral oil. Keep the paper towels handy, this is really messy! Ahhhhh.....memories of sandpaper and oil, scary sharp (yuck!).


You can see the rough/grinder spot that I mentioned, the black area on the right. If I try to take the whole back down to that level, I'll lose the ura completely and the hard steel would be getting alarmingly thin. It might become an issue in 10 years or so, but for right now, this is fine.

The lamination line looks very nice. 


Unfortunately, the side of the blade had some significant corrosion issues. I had to grind down the worst of it, leaving the lamination line a touch asymmetrical. Aesthetics aside, this will be a very useful chisel.


The finished chisel. The boxwood handle has been trimmed to shape and French polished. 


I made a new sharpening stone the other day, using some demo waste from our neighbors rock wall. Probably my best local found stone yet. It is hard, a little sticky, and makes a small amount of slurry on its own, but likes a diamond nagura if you are in a hurry. It starts at about JIS#4000 and seems to work up to around #6000. 


There are still a few butt cracks (sorry..), but for the most part, the handle cleaned up nicely.


A slight asymmetry, damned rust!


For sharpening this chisel, I used a nagura, a pink Akapin "Nakayama" that I bought from eBay seller japanathome (could this be another 330 mate name, hmmm?). They are sold as "maruka" Nakayama (highest quality from a particular old supplier), but these don't look ANYTHING like maruka's from reputable sellers. 

That said, the stone does work nicely as a  (big) nagura and for the $25 I paid (delivered!), I like it well enough. I wouldn't pay $50, though....


Even with all of that grinding of the back, the ura is still nicely shaped, go figure. Nice chisel, good thing that it didn't break in two. 

Lucky me.


Wednesday, March 19, 2014

What, still Christmas???- Tool haul 3/12/2014 some Japanese chisels


Yes, more chisels.

There is something about chisels. For me they seem to be the epitome of a woodworking "TOOL". While it is true that a chisel is nothing more than a sharpened wedge used to cleave cellulose fibers......Ohhhhh, the refinement!


Here is one from the bargain basket. It looks very nice from this angle.


Ahhhh, bent! Very nicely finished, though. This is not a "cheap" nomi.


Ouch! The hard steel hagane back has been broken. You can see the crack running perpendicular to the primary axis, towards the right of the pic. The back has been sharpened AND used since the break, as you can see from the (otherwise) excellent shape of the ura.


Laminated blades warp to the hard steel side during the hardening/quenching process. The blacksmith forges a REVERSE bend, knowing that this distortion will occur, but it is a very delicate thing..... Too much? Not enough? 

This chisel MAY have been broken while trying to straighten the blade, or it might just be attributable to a careless user. My money is on the user. Japanese chisels get used HARD (using steel hammers to strike! Not wooden mallets, like us westerners are taught.) and I bet someone was levering chips a BIT too hard while chopping a mortise.

Further evidence of a high quality tool, the handle was made by Kane-ei and has the stamp to prove it. For kanna, the "best" wooden bodies are made by Inomoto. The best chisels? Kane-ei. Score 1-0.


GASP! A new chisel, a shiny one! You know how a picture can differ from reality? I thought that this chisel would be a polished black. It is actually more bright, a burnished steel.


Stickers, an Oiyamashi. These retail for about $90-100. 


The urasuki LOOKS like it is forge black, but it is actually just dyed gun blue. The tool has some interesting curves to the shape and I was very excited to get it.


The shape is a flattened rod, a low profile, to get into tight areas.


A nice boxwood (gumi) handle, heart center for strength. 

The reality. A good chisel, but...... kinda cheap, if you know what I mean. The corners are a bit harsh, lines are slightly off, as is the makers stamp. It feels slightly light in weight. The handle is good wood, but dyed yellow and underneath the sticker? A small knothole, hidden. The neck is awkwardly machine swaged, with no file finish, just a slight bulge. A mostly machine/factory tool, built with a certain lack of integrity. I would be VERY bummed to have paid retail, but I got an extremely good deal ($25). It is a strong chisel. I have sharpened it and it's HARD! We'll see about the edge holding ability. Score 1-1.

The reason that I am doing these "Show-and-tell" sessions, is to point out what I look for when buying USED tools. Sometimes this works out well, sometimes not as well as you might like. This chisel is an excellent example. If I was buying my first Japanese chisel, paying retail prices from a catalog, say Japan Woodworker, I might be thinking "WTF?!" Then again, from what I have seen of the new, catalog sourced Japanese tools...... This might be par for the course. I will stick to older, used tools. 


Man! Talk about on knit-picky! The bummers are MORE than offset by..... this guy. Another cheapo ($8) bargain bin chisel.

A 282x24mm paring chisel. Well, maybe not REALLY a paring chisel, but it IS missing the striking ring (kasura, I think), so I'll call it a paring chisel. I think that the ring fell off, but someone still used a hammer to strike...... Sigh.


The back side is where the nastiness shows. 


There is some deep rust right at the cutting edge, and it looks like someone slipped while grinding the back flat. There is a good sized gouge, halfway up the back. This might cause some problems in 10 years, or so. 

It has a REALLY thin profile, very handy. This style chisel is on my must-have, "Didn't-know-that-I-needed-one-till-I got-one" list.


So thin..... that someone bent it! Yes, another bent chisel! You can see a slight curve to the blade. 


It is usable as it is, but I would prefer it to be flatter.

It is an ouchi (I think). The paired leaves are faintly visible and it has a nicely curved shape. The chamfered edge flows beautifully into the shaft. This chisel was formed with intent.


Another gumi handle, this time NOT dyed. Heart center (too bad about the hammer abuse, though).


In the hand, this chisel just FEELS like a quality tool. The steel is heavy, for its relative thinness, and the handle is thick, yet fits my hand well. This tool shows promise, potential....

I'm gonna fix it up, right away. No waiting.