Wednesday, May 9, 2018

Oroshigane steel (7).....last bloom of the day


This day has been all about playing with fire. In keeping with that theme, as soon as the previous bloom was spark checked for approximate carbon content, it was popped back into the furnace. Actually, all of the blooms that I had made were added together to see if this Oroshigane melting hearth could handle the larger volume of steel.


The prior bloom looked to my eye as if the air blast was a bit strong, so for the start of this melt, I separated the air feed pipe a couple of inches to take things down a notch.


One other notable difference for this melt is that the first two melts of the day had used up the amount of charcoal that I had sized and screened (roughly ½-1”, no fines). For this melt I was throwing chunks of charcoal in bucket, crushing them carelessly with a hammer, and adding the entire mess into the furnace, fines and all. The third and last melt of the day ran longer than the first two, mostly due to the reduced air pressure and volume. With less air, the charcoal seemed to be filling up the chimney column more completely and felt like the fan was having a hard time pushing air through the increased quantity of fines. I let things run for about 30 minutes to get the blooms back up to melting temperature, then reconnected the air supply pipe.


The flame tending to shift from red to yellow is more dramatic in picture than in real life, but does seem to correspond to the melting state of the iron inside the furnace.


Well…….the higher air pressure had no problem clearing the fines, that's for sure, haha!


My favorite!


The huge bursts of sparks only last for a few minutes after each charge of charcoal has been added, but add greatly to the overall excitement! After the fireworks have abated, the flame looks a bit less dramatic.


If you stare at the flames too long though, they will sometimes stare back. Ellie says this flame is full of fire demons!


I ran the melt for about 30 more minutes (roughly 1hr total), then let the charcoal burn down to the tuyere before pulling the bloom. This one I like, bloom and picture both!


The camera can be a valuable tool in discerning what is going on during these high heat processes. I think that it shows a better differentiation that I can see by eye, maybe some increased IR ability, I don't know. The higher density of the iron/steel holds the heat much longer than the less dense slag. As with the other blooms, the mass is cup shaped, dramatically so. A small amount of slag would ideally be sitting on top of the developing steel bloom, but in this case is getting blasted off the top and onto the far wall of the furnace.


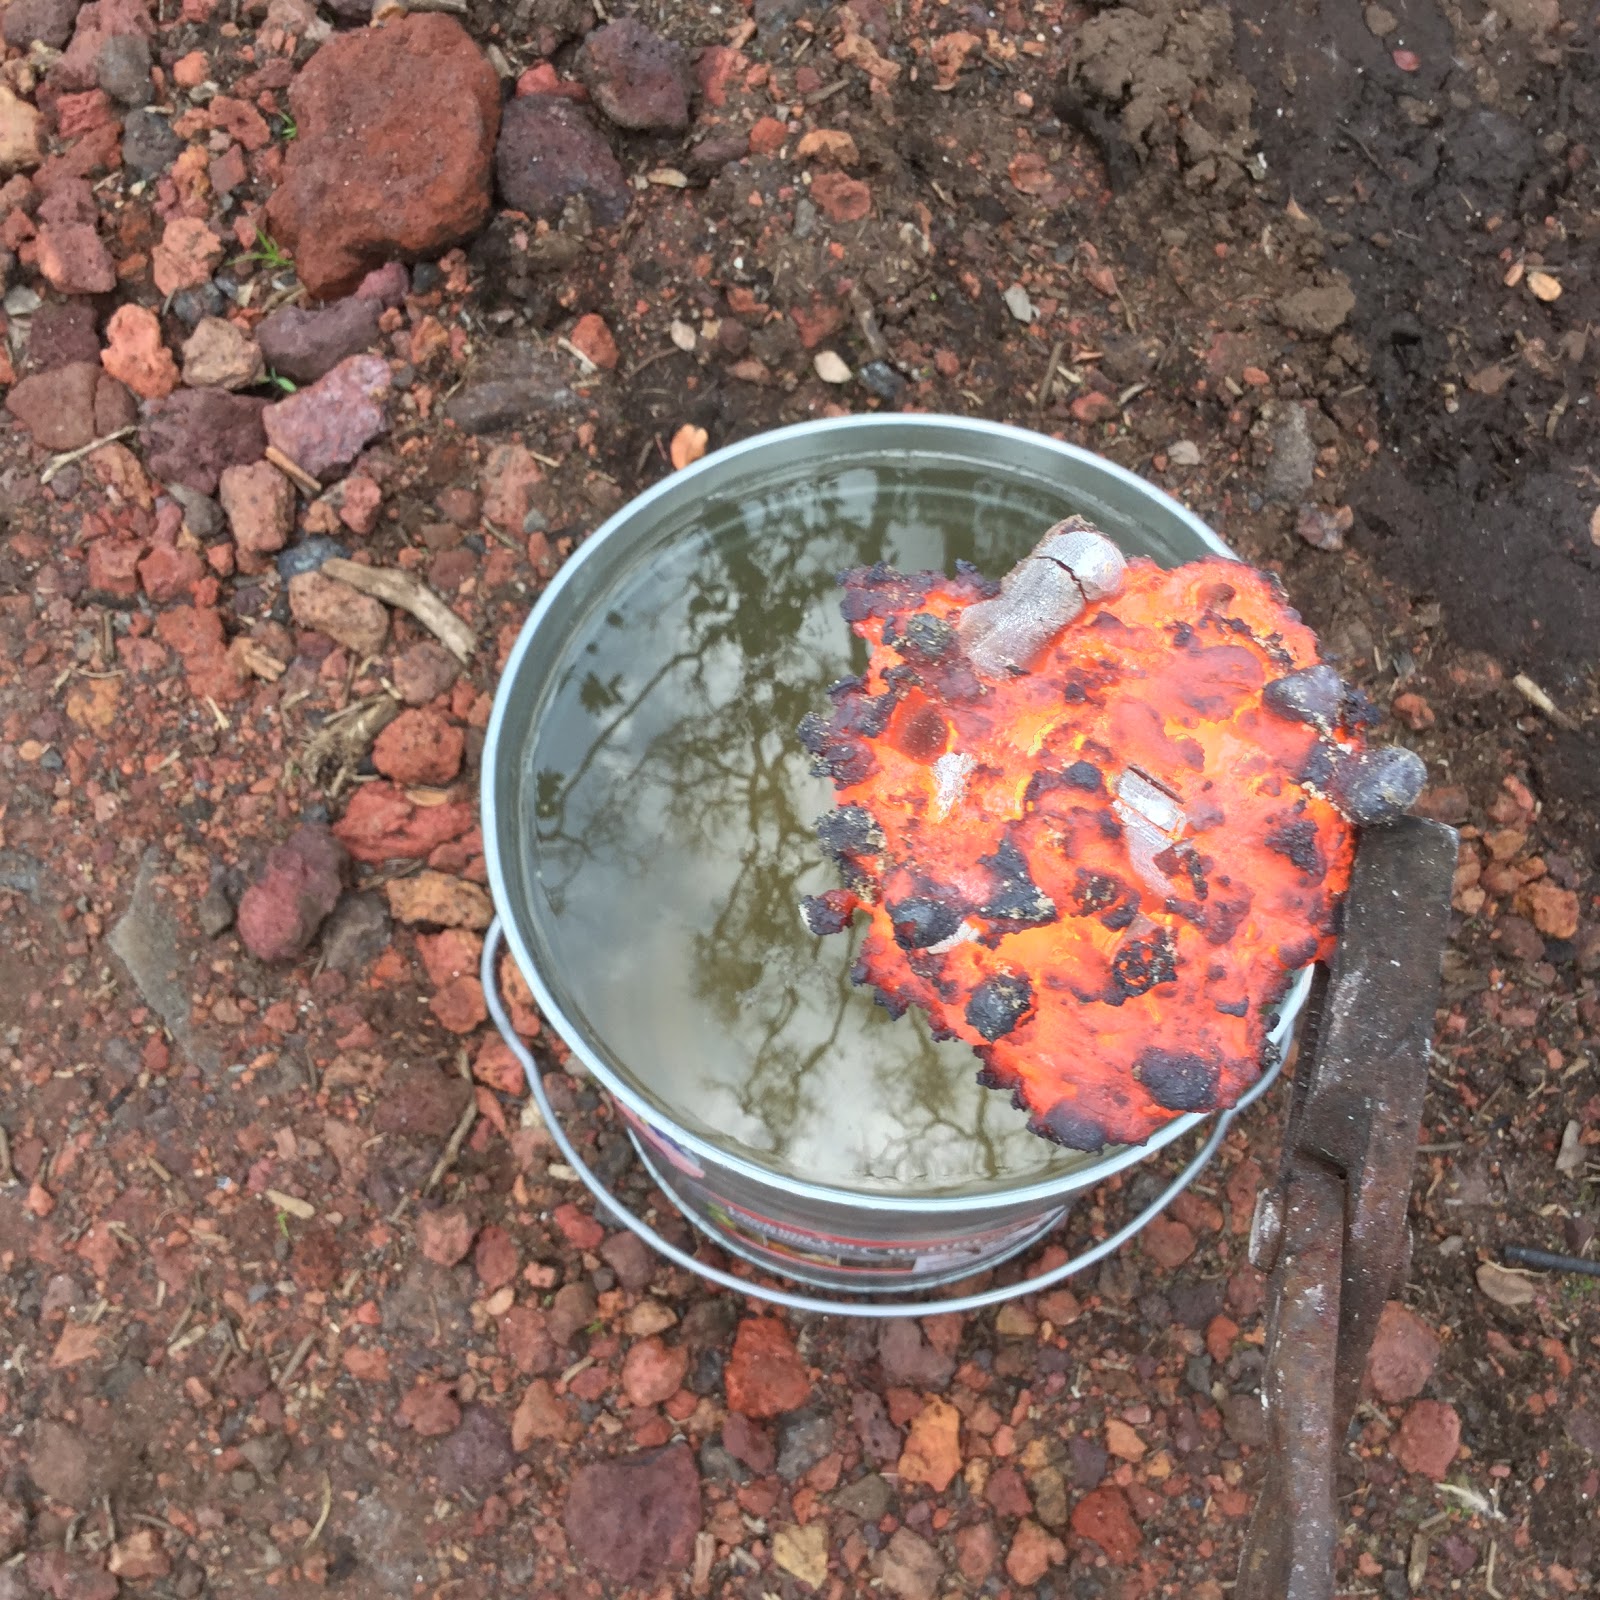
I quench the bloom and pick out the small fragments of entrapped charcoal bits before finally giving it a quick spritz of phosphoric acid to dissolve the black oxides remaining on the surface. The original air blast direction is away from the viewer, the small slag mass being the furthest away.


The bottom of the cup shaped bloom is a fascinating construct of small blobs and ribbons of iron. The tiny ribbons are bright, shiny and very flexible. You can bend then back and forth repeatedly without them breaking and they spark test as very low carbon iron.


They are also razor sharp, something that I didn't realize until the next day. “How in the hell did I get all these cuts on my hand!?”


The side view of the bloom opposite the tuyere seems to show a gradient of steel, iron at the bottom shifting to cast iron at the top.


This bloom would've been great to keep as is or to consolidate into a tighter mass, but instead of that, I smash it cold into fragments, to check out the grain structure of the iron/steel. I can make more, right?


The mass as a whole is very tough, odd considering that the steel grain structure should be huge, given the high and prolonged temperatures, but this thin section broke nicely.


Mostly rather nice and relatively small grain steel with a tiny bit of  iron showing the characteristic stranding we see in wrought iron. The darker gray areas outside the break spark as cast iron, with a very few short red sparks.


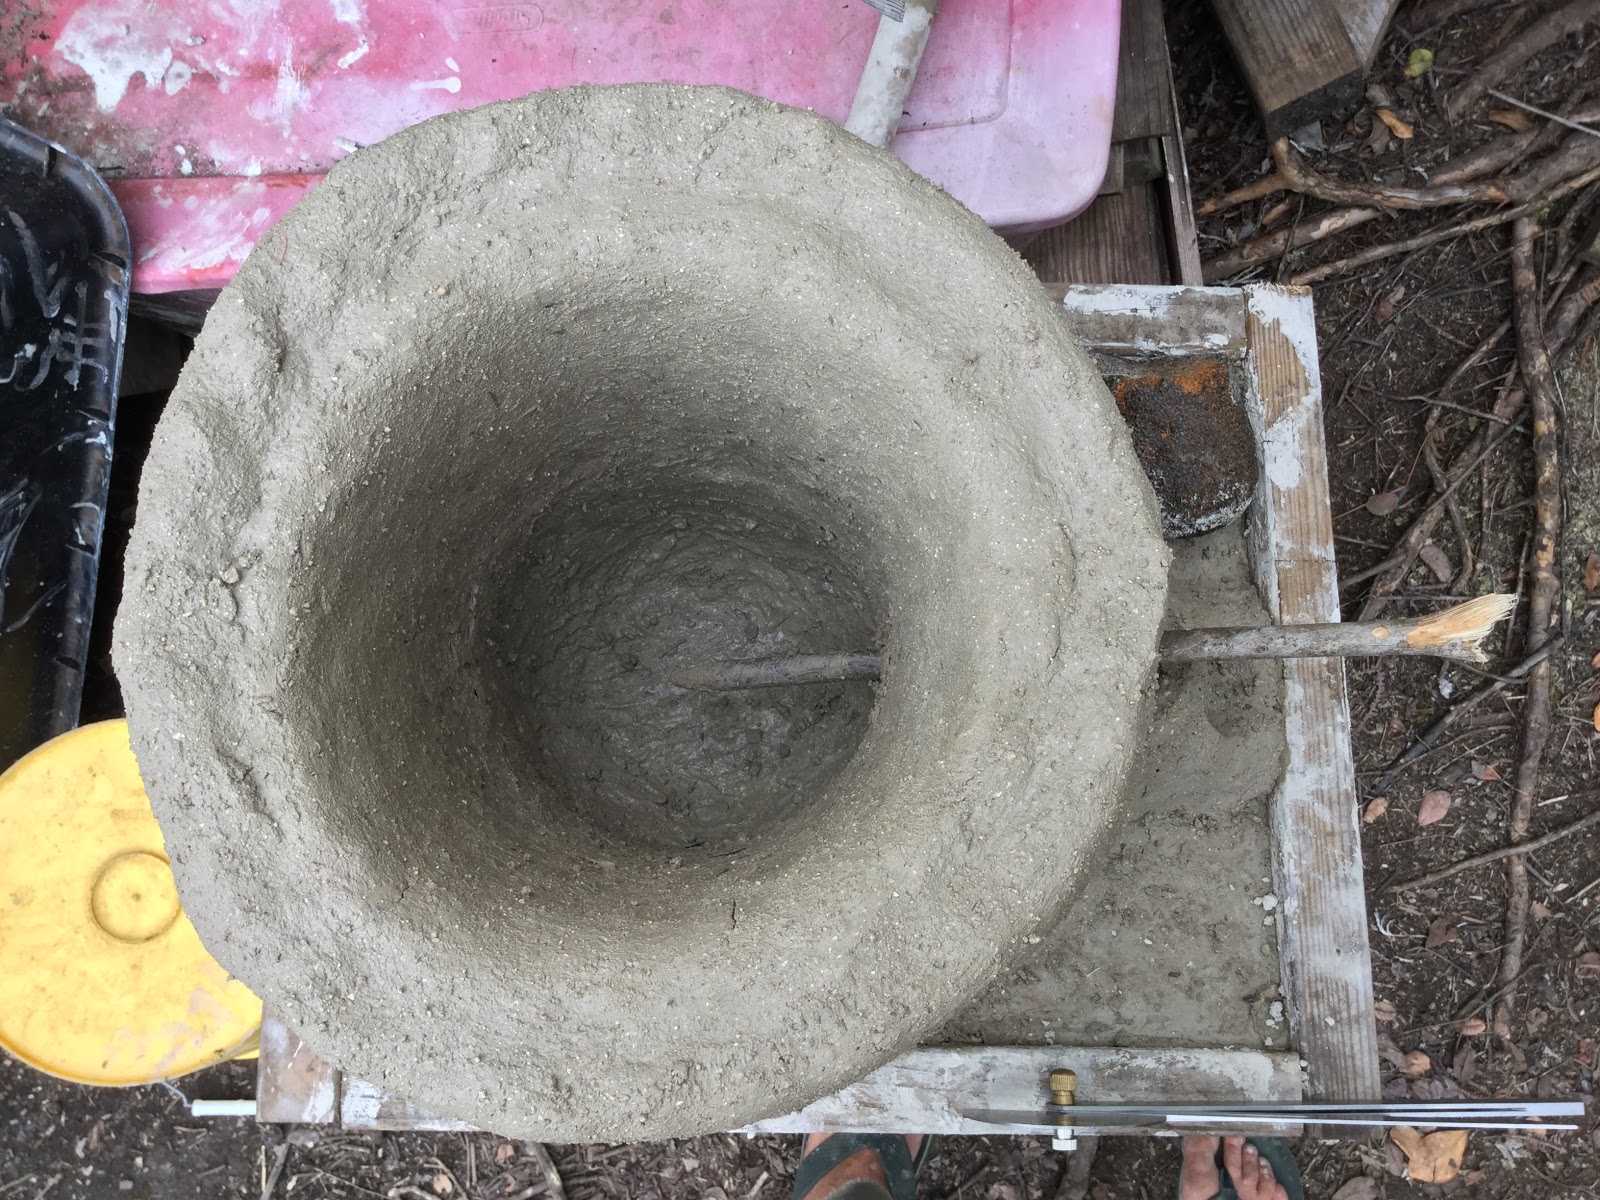
The higher heat of this final melt has put the end on a long afternoon of steel production. It isn't too clear in this photo, but the furnace wall has eroded back over 30 mm and the clay/charcoal tuyere is essentially gone. Large vitrified sections of the wall surrounding the highest heat areas have shattered and fallen away, presumably to end up as slag that was attached to the bloom.


First some furnace repairs, then more fun.

Monday, May 7, 2018

Oroshigane steel (6).....Still trying


The first round of iron melting in the Sumihira style Oroshigane furnace went so well, I just had to keep going. I used my last bit of bundle wrap wire during the first melt, but I still wanted to see how this furnace would handle a slightly larger mass of metal.


How about a remelt of last year's pseudo-successful “Aristotle” run? If you look closely, you can see the remains of the partially melted feedstock still stuck to the mass of the bloom.


The original melt of this blob of metal took over two hours and resulted in no notable increase in the carbon content. The mild steel rebar bundle wrap that originally tested as low carbon came out looking very different, but the spark looked much the same (perhaps it was just surface decarburization; I should've cut and polished the interior, but didn't). The reason that the melt took so long was because during the burn, the area around the tuyere (air inlet) had quickly melted and was continually dripping down to block the airflow. Not enough air = not enough heat. It did make a nice, very dense bloom however.


Since the new furnace was already good and hot, I plopped the old bloom in at the bottom, then filled it with charcoal right to the top of the shaft. It only took a short while before the charcoal was fully burning with a sparse red flame.


The flame becomes more “solid” as the metal begins to melt.


The previous burn produced a bloom that looked burnt to me and had a significant amount of cast iron in the composition. This time, as the flame begins to shift slightly into the yellow flame stage, I briefly turn off the blower (the hateful air mattress inflator!) and give a listen to the fire. I definitely hear the iron “boiling”, so I turn the blower back on and refill the shaft with charcoal one last time.


As soon as the charcoal level drops to the level of the tuyere…….


…..it's time to check out the results. This time the melt took, at most, 15 minutes.


The thin gray mass on the left that is stuck to the bloom is the sacrificial charcoal/clay inner lining of the furnace, doing what it is supposed to; prevent the molten iron from sticking directly to the furnace itself.


And, the result.


Another cup shaped bloom. The air blast was travelling from the ball of my thumb towards the tip of my pinky finger, as it were. There is a small bit of furnace lining stuck to the bloom (on the left) where it had briefly adhered to the wall underneath the tuyere.


I like the appearance of this bloom better than the last, in any event. It looks like the force of the air blast was scouring the top of the bloom and throwing the small amount of slag against the wall.  Because this isn't a smelting furnace for reducing iron from ore, the slag is most likely from the slight amount of wall erosion around the tuyere.


The underside of the bloom has many globular masses that sparked as high carbon steel.


Looking into the furnace, you can see that the tuyere has eroded to be nearly flush with the wall of the shaft and there is evidence of spalling, as the walls vitrify and fracture off. You can also see the unstuck half of the sacrificial carbon/clay plate that the bloom sat upon.


The first two blooms from this furnace have been cup shaped in profile. I'm sure that someone with experience in these matters could tell in a moment what this says about the internal environment of the furnace is exactly, but I will need to do more experimenting. I suspect that that I've got the air blast set too high, but we will see.

Soon.

Friday, May 4, 2018

Oroshigane steel (5)..... using the sumihira style furnace

The Sumihira style furnace has been completed and drying for a few days…..it's time to take this bad boy out for a spin.


Remember that stubborn little stick of mild steel that we just couldn't melt, using the “Aristotle” furnace? Reverting back to the dread air mattress inflator makes reducing this iron into a blob of unrecognizable goo a breeze ( no pun intended... really!).


Starting out, flames are thin and red in color, with just a hint of blue at the base of the flame ( which you can't see here because the sun is too intense in Hawaii).


As the furnace comes up to melting temperature, the flame becomes much “thicker” and shifts towards a more orange color.


You also get a good view of my ghetto style blower motor, duct tape and all.


Knowing when to pull the molten bloom from the hearth is going to take me a bit of time and effort to get dialed in. Sumihira writes that as the process nears completion, the intensity of the flame will moderate some and also shift into the yellow spectrum. Then…..you turn off the noisy blower and listen. The molten steel will sound as if it's boiling.

If you think that it is about ready to come out, let the charcoal burn down until it reaches the tuyere, then turn off the air, grab a tool to hook out the bloom and…..


…..see what you got.


Looks like a burnt-iron cookie!


Another thing that I've been wondering about…...water quenching the bloom. In the handful of resources devoted to small scale iron smelting, YouTube, etc, when the raw bloom gets pulled from the furnace, the consolidation work begins immediately. The yellow-hot blob of steel is thrown onto a log or anvil, then gets gently pummeled by guys swinging sledgehammers. This squishes the odd protruding edges of the bloom into the concentrated center, consolidating the mass. The goal is to get the slag and other impurities out of the way as quickly as possible, resulting in a tight block of bloom iron or hearth steel.

In contrast to this, pretty much all of the Japanese resources on tatara ( the traditional large scale way to make steel) and Oroshigane show the hot bloom pulled from the fire and then immediately quenched into water. The bloom gets cleaned up, then returned to the forge for shaping and consolidation. Why would you not start working the bloom right away while it's still good and hot? Does the force of the water quenching blast off the slag and bits of charcoal stuck to the bloom?

Here's my chance to find out.


Fun, lots of boiling water and funny noises are produced, but as far as the resulting bloom is concerned, I'm not sure that the quenching does anything to tidy up the mass.

Rather ugly, this one.


I've seen lots of pictures of bloom steel and while this wouldn't be the ideally shaped result, it does display a commonly seen dished profile.


In this picture, the air blast would've been coming from the left. Please excuse the green strings of algae growing in my quench water, haha.


This entire process, from preheating the furnace to pulling the bloom from the fire used less than half of a 5 gallon bucket of hardwood charcoal, not a bad way to spend an afternoon. Even if you buy your charcoal in the store, that's still only a few bucks cost, a good deal even for a tightwad like myself.


The nice thing about performing an immediate water quench is that it makes the bloom available for spark testing right away. I sparked this little 1 lb. bloom but, try though I might, I couldn't get any decent pics as the sun was just too bright. Ahh…. the trials of living out in the open, haha. I'm grossly out of practice at interpreting carbon values by spark, but it looked to be a gradient of med/high carbon ( shortish yellow spark with strong bursts) ranging up to cast iron (very short red spark, sparse). A few bits tested low carbon, but the highest proportion looked to be cast iron.

This bloom would most likely be forgeable, given a high enough heat and a bit of patience. Fold and weld, fold and weld, and soon you would get a more homogeneous steel…….and I didn't do that. The melting of iron was so much fun that I immediately started in on a second melt, just to see if I could create a bloom with a more solid core. And larger, in anticipation of losing much of the total during the welding and blending phase.

One thing is certain though…..I need to be keeping better notes. Small changes in procedure seem to have large ramifications on the resulting steel. Go figure.

Sunday, April 29, 2018

Oroshigane......making steel (1)


The weather gods have shown pity on us and granted a brief window of dry weather, just enough time for me to gutter the new roof…..and explore a new rabbit hole. With the drainage under  control, it's time for me to shift gears a bit and take on something that I've been wanting to try for years; making steel.


Why would anyone want to make their own steel when so many excellent carbon steel alloys are widely available? Is homemade steel better in some way then what is already out there? In a word….

No.


So then, why put time and effort into  working with such a ridiculously crude and outdated a material? After all, this is essentially a backdoor production method that hasn't seen the light of day in nearly 300 years. I could go on about the mystical alchemy inherent in the transformation of iron to steel, the connection to ironworkers ages past etc, and while that is certainly true, the short answer is that it's just plain cool. Come on now….who wouldn't want to make their own steel?


In the Japanese swordsmithing tradition, the blacksmith can select a variety of different steels and re-melt them into a more easily worked form. This blacksmith made steel is called Oroshigane, and while I am not especially interested in making swords, I AM interested in their steel. Broken blades that shatter during the quench, old cast iron teapots, even the steely crumbles that accumulate in the bottom of the forge, all of this can be combined and blended to create a steel with the specific qualities desired. Call it extreme up-cycling.


It's all about the carbon

Steel, at its heart, is a simple compound of elemental iron and carbon. The amount of carbon added to the iron is very small, but it's impact can be huge. Take iron and add only 0.2-0.3% of carbon and the result is mild steel, the most common structural steel in use. Kitchen appliances, “wrought iron” furniture, the list goes on and on, but most of what we see on a daily basis is made of iron that has been made tougher by a miniscule addition of carbon. Add 0.4-0.6% carbon and you start getting a steel that can be made harder and therefore suitable for more extreme duties. Car axles and shafts, hammer heads, nails, lawnmower blades, wrenches….generally medium carbon steel.

The sweet spot for carbon steel, at least for cutting edges, is around 0.8-1% carbon. Knife steel, Western woodworking plane blades and chisels, old car springs and such fall into this group. Steel with more than 1% is more of a rare animal, but Japanese woodworking tools (planes and chisels) generally use this very high carbon steel, likewise taps and dies, and some metal working files.

At the higher end of the carbon steel spectrum, steel with carbon in excess of 0.8% makes the material more difficult to work. Forging is physically harder as the material just doesn't like to move, even at a high forging temperature. Forge welding becomes more difficult too, particularly when joining wrought iron to steel as my favorite tools do. Without delving into the metallurgy, any carbon in excess of 0.8% has the potential to cause trouble, unless the smith really knows what they are doing.

Add 1.2%-2%% carbon and steel turns into a tricksy thing, and can exhibit a range of traits not normally associated with traditional carbon steel; superplasticity, extreme toughness, impact resistance and high elasticity…...all the while maintaining a very high degree of hardness. Again, this assumes that the blacksmith is highly skilled. Some of the tool steels used in laminated kanna blades use this UHCS (Ultra high carbon steel is the term) for the cutting edge, laminated to antique wrought iron.

A carbon content upwards of 2% is termed cast iron, and while cast iron is a wonderful thing for pots and pans or engine parts, it's of no direct use in hand forging. As the carbon content of iron rises, the melting temperature falls (a trait that will come into play shortly), so having a very high carbon content allows iron to more easily become fully molten, then be poured into a mold….cast into a usefully shaped component.

So, why all all of this blather about carbon content? At, or near melting temperature, iron is able to either take on (or lose) carbon, and that's what the oroshigane melting furnace is for.


This small shaft furnace heats the iron to a partially molten state as it descends towards the bottom of the column. Wood charcoal acts as both the fuel source and adds the carbon component, all brought to a furious heat by an air source that increases the rate of combustion. The concept is a simple one but, as they say, God is in the details. Shaft volume, air volume and pressure, carbon content of the starting materials, even the size and type of charcoal is important.

Of most importance perhaps, is the height above the floor where the air blast enters the column. The temperature of the furnace is highest proximal to the air inlet, so if your furnace floor is at a level with the air inlet (Tuyere is the term), the molten metal will be getting the full force of the air blast. This will actually burn out carbon, so if you are trying to lower the carbon content of cast iron to a more forgeable level, that's where you want to be. If your aim is to raise the carbon content to make some cutlery steel, you want the iron to be able to fall through the heat zone and collect underneath the air inlet, where it sits and absorbs more carbon, eventually resulting in...cast iron.


I'm just getting going with this, both the steel making and the long winded particulars. If you are truly interested in this field of inquiry, there are a few places to go, materials to read. Here's the shortlist …...


Jesus Hernandez wrote up his experiences forging a blade out of steel made in a so-called “Aristotle” furnace. The swordsmith’s oroshigane furnace I made is nearly identical to this, and it was in reading this forum thread that I first became really interested in making my own steel.

— BROKEN RECORD WARNING—
This thread is a perfect example of how information is disappearing daily from the web. If you find something of interest, document it well, because the original information might be gone before you know it. To view this post in its entirety with all of the important images, you need to go Wayback……the Wayback machine will take you there. Donate if you can.


A new way to make steel


Bladesmiths forum is one of my favorite resources for edgy inspiration. They have a whole topic section devoted to smelting ore and making steel, tons of information here….


Daniel Cauble has had some laudable success in making his own oroshigane, really inspiring work, beautiful steel.


But my main source? The Japanese swordsmith Sumihira gifted us with actual particulars and details of how he raises and lowers carbon content in his work. It is from his writings that I got the measurements for my little furnace. Gold!


The forging process, beginning with making the oroshigane (Google translates oroshigane as “wholesaling”, but you can figure it out….mostly).


Lowering the carbon content of cast iron = sageba = ”lowering place”


It's a start. More to come….


Making steel (2)....the "Aristotle" furnace


I want to try making my own steel so, based on the specifications given by the Japanese swordsmith Sumihira, I built this oroshigane melting hearth furnace.


This simple vertical shaft furnace is used to melt scrap iron and steel, and in doing so, raise (or lower) the carbon content, hopefully to around 1.5% in my case. Make note that this furnace is for remelting scrap, NOT smelting iron from ore (maybe someday I'll give that a try too, but for now…). I'll give the particulars of this build in another post, mistakes and all, so those of you who want to give this a shot have something to go on. Everything I learn was originally shared on the net by someone else, so it's only fitting that I do the same. Successes and failures both.


For starters though……

After building my oroshigane furnace, I had some materials left over, so I quickly put together a smaller version, based on writings by Lee Sauder. A PDF of his original paper can be found on his website, along with some of his other writings. All are worth reading and it's thanks to his work that so many others are trying these archaic methods of steel production. He's the pro.


Aristotle furnace


This “ Aristotle” remelting furnace is intended to be a quick and economical way to try making some steel and should be considered disposable. You might get 3-4 uses if you are careful but to try making it more robust rather defeats the purpose. You can slap one of these together and have it drying within an hour, a great afternoon project, for sure. Uses VERY little charcoal, one bag will last for multiple burns. If you've got clay in your yard, it'll cost nothing to make and it's super fun!

I've made three for these things now, but my success has been, ummm….not so good. Two aspects are important for this design to work. Clay and air. Last year, my friend Jeff and I tried building one of these but, living in Hawaii, we have no native clay here. What I did have was the clumping type of cat litter.


Clay

CAT LITTER WILL NOT WORK WELL AS A HIGH TEMPERATURE REFRACTORY!

Unscented clumping cat litter will reconstitute into a workable clay and is handy for lots of things, just not the extreme temperatures required to melt iron. At high heat, the clay starts to degenerate into a sandy powder. It shrinks a lot too, not what you want. If you have clay where you live, try that first ( it will likely work) but if you need to buy it, look for something with a high firing temperature, as close to a cone 10 as you can get. Lots of stuff will work though…..Just not cat litter, haha.

Air supply

Last year I used an old 12 volt air mattress inflator and it was fine. A hair dryer should be perfect for one of these small shaft furnaces and they are cheap and easy to find (if you can't borrow one ;-). A shop vac, set to blow, will be WAY too strong, but OK if you can throttle it down some.

Once your furnace is dry and up to temp, the steel making process only takes about 20 minutes. In my case, we were listening to the shriek of that inflator for 2 hours….WAY too long! We were melting down some ¼” rebar bundle wrap wire, no problem for this design, but something wasn't right. The iron bloom that formed in the furnace was stuck fast, so after smashing the stack to get the metal out, you could see that the area of the tuyere (air inlet) had slumped, greatly restricting the airflow. We did make a blob of low carbon iron, though not what I was shooting for. No pics, my bad.

This time, still traumatized from last years howling mattress inflator, I grabbed a small 50 cfm bathroom ventilator fan and gave that a shot. I mounted it in a very sophisticated, waterproof and mobile containment (ie: Walmart bucket w/lid).


I added a ball valve to the 2” pvc tubing so that I can adjust the airflow down, handy for slow preheats or for using in the real forge.


50 cfm works for a small charcoal forge, but a 100 cfm fan might be a better choice if you are buying something new. They aren't the perfect choice for a charcoal forge in general, but they work and are very quiet. If you are forging with mineral coal, don't waste your time with these, get a real blower.


For this “Aristotle” furnace, I used a mix of Home Depot fireclay, perlite (for insulation), shredded bark (for strength), and mortar mix to help things set up more quickly.


Despite what you might find on the internet, mortar/cement is a POOR choice for high temperature refractory. It's just not durable and when those hydrogen bonds reverse at high heat, it changes back into powder. It will work, somewhat, but there are better choices. Simple sand and fireclay seems to work better….20/20 hindsight.


I dry and preheat the still wet clay by burning some scrap wood, then start adding the guava charcoal that I made a couple of years back. You might remember my charcoal making ventures from before, and I'm finally getting a chance to use some of it. I really need to start making pine charcoal again, as this Guava burns slow. I'd prefer to have both on hand in the future.


At the center of the stack, you can see some of the ¼” mild steel stock that I am melting down.

Trying to melt down, that is.


Ellie melts down some old copper pennies and pokes the steel into the hot zone…..


….while Renee snuggles Nago the pig.


And in the ancient tradition of iron workers everywhere, I give offerings of ale and try to melt some bottlecaps. The stick of wire just sat there, laughing.


No love…..needs more air.


More in a bit…..


Oroshigane steel (4)....Building the swordsmith's hearth


To hopefully clarify things a bit, the melting furnace that I have been describing up until now has been the “Aristotle” design that I first encountered on Lee Sauder’s site.


It's a neat little thing, quick to make, economical to run and, if you get lucky, will make you some high carbon bloom steel to play with. It's very small in size, with an internal shaft diameter of 10 cm, and 20 cm in height. Think of a 2 liter bottle of soda and you'll understand how small this is. The air comes in through that bumpout on the right side, a plenum that makes the air supply connection easier. I really like that aspect of the design, and while I love that this thing uses barely any charcoal, it's small size makes it a tricky proposition to get repeatable results.


The Japanese swordsmith Sumihira gave the particular details of size and construction of a very similar design on his website. His vertical shaft furnace is used to either raise or lower the carbon levels in steel, the primary difference being that even at its lower range in size, this oroshigane furnace is still about 6x larger than the “Aristotle” in bore volume.


The dimensions that I used in this build have an internal shaft diameter 15 cm and a stack height of 30 cm. It's still small, but I think that the larger size makes it more stable in operation. The walls are 5 cm thick and the increased thermal mass holds the heat better, acting to buffer swings in temperature a bit. That said, this design is still at the small end of the size range given and Sumihira notes that getting consistent results with a small size furnaces can be problematic. I used the plenum idea from the “Aristotle”, but otherwise this is representative of a small Japanese oroshigane hearth furnace.


…..And I remembered to take some pictures as I built it!


Given that we are creating temperatures high enough to melt iron ( well over 2000F), I figure it would be prudent to make the base at least somewhat fire resistant. I cut a piece of old roofing tin into a convenient size, then mounted it in a wooden frame.


Yes, the frame could burn and no, I'm not at all concerned.


This was actually the first furnace that I made this year and lacking experience, I attempted to make a sort of high temperature, insulating refractory cement. I would not choose this route again, but for the record, the mix is a 2:2:4 mix of fireclay, perlite and mortar mix.


The mortar adds the sand for structure and strength, plus sets up fairly quickly, a nice aspect to minimize slumping. This would be a great mix for a low temperature smelter for aluminum, but it can't handle the high temps needed for iron melting. Next time I'll just use straight sand and skip the cement content entirely.


Once the ingredients had been mixed dry I added a measure of shredded bark mulch to help tie the mix together. Grass, straw, peat moss, anything will work here.


I spread a layer of the refractory mix to provide a solid base to build from.


…….and then somehow forgot to take pictures for a while …..*sigh*.

For this furnace build, I made a tube of chicken wire to act as reinforcement that will give the furnace at least a fighting chance of lasting for more than just a few uses. I set the chicken wire in place, then molded the refractory mix around it. A much better way would be to start out with a sturdy cardboard tube of about 6” diameter to use as a form. Slap on a base coat of refractory, wrap it up in chicken wire, then slap on more refractory to cover the wire. The form tube will burn out during the preheat, WAY faster and easier...20/20 hindsight!


The air plenum is formed around a handy cardboard tube that I pulled from the recycle bin. This paper towel roll is a bit small in diameter, 2” or larger might be better here, but this works.


Here you can see the bottom hole where the air supply comes in, as well as the cardboard form used to shape the vertical shaft.


Remove the form and you are left with an “L” shaped plenum that is open at the top and bottom.


The air enters the furnace shaft around 4” up from the bottom, 10 cm in this case. One very important detail that dictates the function of this furnace is the height and angle of the tuyere, where the air enters the main shaft. Referring back to Sumihira,

  • A shallow angle to the tuyere and a shallow depth (20-50mm) underneath is used for reducing carbon of cast iron. 5-6 degrees, 10 degrees max. A trumpet shaped tuyere gives a spreading, more diffuse air blast and soft, low temperature charcoal is best.
  • A steeper angle and more height (50-100mm) is better suited to raising the carbon content of the base iron. 4-18 degrees are given as a range, with a more focused tuyere to concentrate the heat. Slower burning, high heat charcoal is good here, often a mix of miscellaneous hardwood charcoal.


I throw a dart…..18 degrees it is! I use a 12mm diameter stick to punch a hole into the main shaft.


It's not very clear from this picture, but the tuyere inlet is inside the “L” shaped plenum which will be sealed during the operation of the furnace.


Looking down from the top…..stick still in place.


The tuyere is just a hole where the air enters the stack. Keeping things simple and flush with the side  of the shaft will allow better access to the bloom for removal, but also suffers a significant amount of blast erosion of the furnace wall itself. As the wall melts, it deforms the air blast until it clogs, resulting in a bloom that gets stuck in place anyway. AMHIK.


Ideally, the tuyere will protrude into the shaft a bit, maybe 25mm or so. Sumihira uses a tuyere shape that was favored by his teacher and is cast from a high temperature refractory cement. Here you can see that it protrudes into the main shaft, probably around 1 sun=30.3mm, and the furnace bed of crushed and moistened charcoal fines has been raised to be nearly flush with the tuyere. This would be intended for lowering the carbon content of cast iron.


As I mentioned before, I don't have an acceptable high temp refractory but a serviceable substitution was used by Dave Friesen of Island Blacksmith, for his museum forge build. Crushed charcoal fines and clay are mixed with a minimum amount of water, formed into an appropriate shape and left to dry. In this video, Dave is making the tuyere for a traditional Japanese swordsmith's charcoal fueled forge, but the tuyere shape and function is nearly identical.


I love all of Dave's Crossed Heart Forge videos. Who would think that watching a talented bladesmith hammering on steel could be so restful?!


The “Aristotle” furnace that I built uses a consumable liner made from charcoal fines and clay, with a bit of peat moss added for structure. The mix is combined and kneaded until it is fully blended, then shaped into a patty and formed into a dish that sits at the bottom of the shaft. While not super durable, after it has been fired the resultant mix does hold together surprisingly well. For this Oroshigane furnace, I combined the two design features, a sacrificial furnace bed and a protuberant tuyere, both formed from charcoal fines and fireclay.


You can also see the stick that was used to punch the hole in the sidewall is still in place. The end of the stick ended up being about 8cm up from the bottom, not the 10 that I was shooting for. Not the end of the world, but it may affect the results some, not sure yet.


The mixture that Dave specified for his tuyere has a ratio of 6 parts charcoal to 2 parts clay. I've been using a 50/50 blend because it looks neat in the mixing bucket, haha.


My last handful of clay is used to seal the area where the air enters the plenum at the very base of the furnace. I'm using a 2” PVC to a 2” galvanized nipple, but anything could be used here. The plenum design keeps everything cool so straight PVC alone would be fine, as long as you don't drop too much burning charcoal on it.


And finally, the plenum gets covered up by a cool chunk of lava that Ellie found.


The rock isn't bonded in place because you need to be able to take it off periodically for tuyere access. When the tone of the air supply changes pitch, it's probably due to the air being restricted in some way. Grab a metal rod to clean the blockage and ream it out when it happens. The access port also lets you peek into the inferno to watch as your steel forms…..


Primal fun!