To hopefully clarify things a bit, the melting furnace that I have been describing up until now has been the “Aristotle” design that I first encountered on Lee Sauder’s site.

It's a neat little thing, quick to make, economical to run and, if you get lucky, will make you some high carbon bloom steel to play with. It's very small in size, with an internal shaft diameter of 10 cm, and 20 cm in height. Think of a 2 liter bottle of soda and you'll understand how small this is. The air comes in through that bumpout on the right side, a plenum that makes the air supply connection easier. I really like that aspect of the design, and while I love that this thing uses barely any charcoal, it's small size makes it a tricky proposition to get repeatable results.
The Japanese swordsmith Sumihira gave the particular details of size and construction of a very similar design on his website. His vertical shaft furnace is used to either raise or lower the carbon levels in steel, the primary difference being that even at its lower range in size, this oroshigane furnace is still about 6x larger than the “Aristotle” in bore volume.

The dimensions that I used in this build have an internal shaft diameter 15 cm and a stack height of 30 cm. It's still small, but I think that the larger size makes it more stable in operation. The walls are 5 cm thick and the increased thermal mass holds the heat better, acting to buffer swings in temperature a bit. That said, this design is still at the small end of the size range given and Sumihira notes that getting consistent results with a small size furnaces can be problematic. I used the plenum idea from the “Aristotle”, but otherwise this is representative of a small Japanese oroshigane hearth furnace.
…..And I remembered to take some pictures as I built it!
Given that we are creating temperatures high enough to melt iron ( well over 2000F), I figure it would be prudent to make the base at least somewhat fire resistant. I cut a piece of old roofing tin into a convenient size, then mounted it in a wooden frame.

Yes, the frame could burn and no, I'm not at all concerned.
This was actually the first furnace that I made this year and lacking experience, I attempted to make a sort of high temperature, insulating refractory cement. I would not choose this route again, but for the record, the mix is a 2:2:4 mix of fireclay, perlite and mortar mix.

The mortar adds the sand for structure and strength, plus sets up fairly quickly, a nice aspect to minimize slumping. This would be a great mix for a low temperature smelter for aluminum, but it can't handle the high temps needed for iron melting. Next time I'll just use straight sand and skip the cement content entirely.
Once the ingredients had been mixed dry I added a measure of shredded bark mulch to help tie the mix together. Grass, straw, peat moss, anything will work here.

I spread a layer of the refractory mix to provide a solid base to build from.

…….and then somehow forgot to take pictures for a while …..*sigh*.
For this furnace build, I made a tube of chicken wire to act as reinforcement that will give the furnace at least a fighting chance of lasting for more than just a few uses. I set the chicken wire in place, then molded the refractory mix around it. A much better way would be to start out with a sturdy cardboard tube of about 6” diameter to use as a form. Slap on a base coat of refractory, wrap it up in chicken wire, then slap on more refractory to cover the wire. The form tube will burn out during the preheat, WAY faster and easier...20/20 hindsight!
The air plenum is formed around a handy cardboard tube that I pulled from the recycle bin. This paper towel roll is a bit small in diameter, 2” or larger might be better here, but this works.

Here you can see the bottom hole where the air supply comes in, as well as the cardboard form used to shape the vertical shaft.

Remove the form and you are left with an “L” shaped plenum that is open at the top and bottom.

The air enters the furnace shaft around 4” up from the bottom, 10 cm in this case. One very important detail that dictates the function of this furnace is the height and angle of the tuyere, where the air enters the main shaft. Referring back to Sumihira,
- A shallow angle to the tuyere and a shallow depth (20-50mm) underneath is used for reducing carbon of cast iron. 5-6 degrees, 10 degrees max. A trumpet shaped tuyere gives a spreading, more diffuse air blast and soft, low temperature charcoal is best.
- A steeper angle and more height (50-100mm) is better suited to raising the carbon content of the base iron. 4-18 degrees are given as a range, with a more focused tuyere to concentrate the heat. Slower burning, high heat charcoal is good here, often a mix of miscellaneous hardwood charcoal.
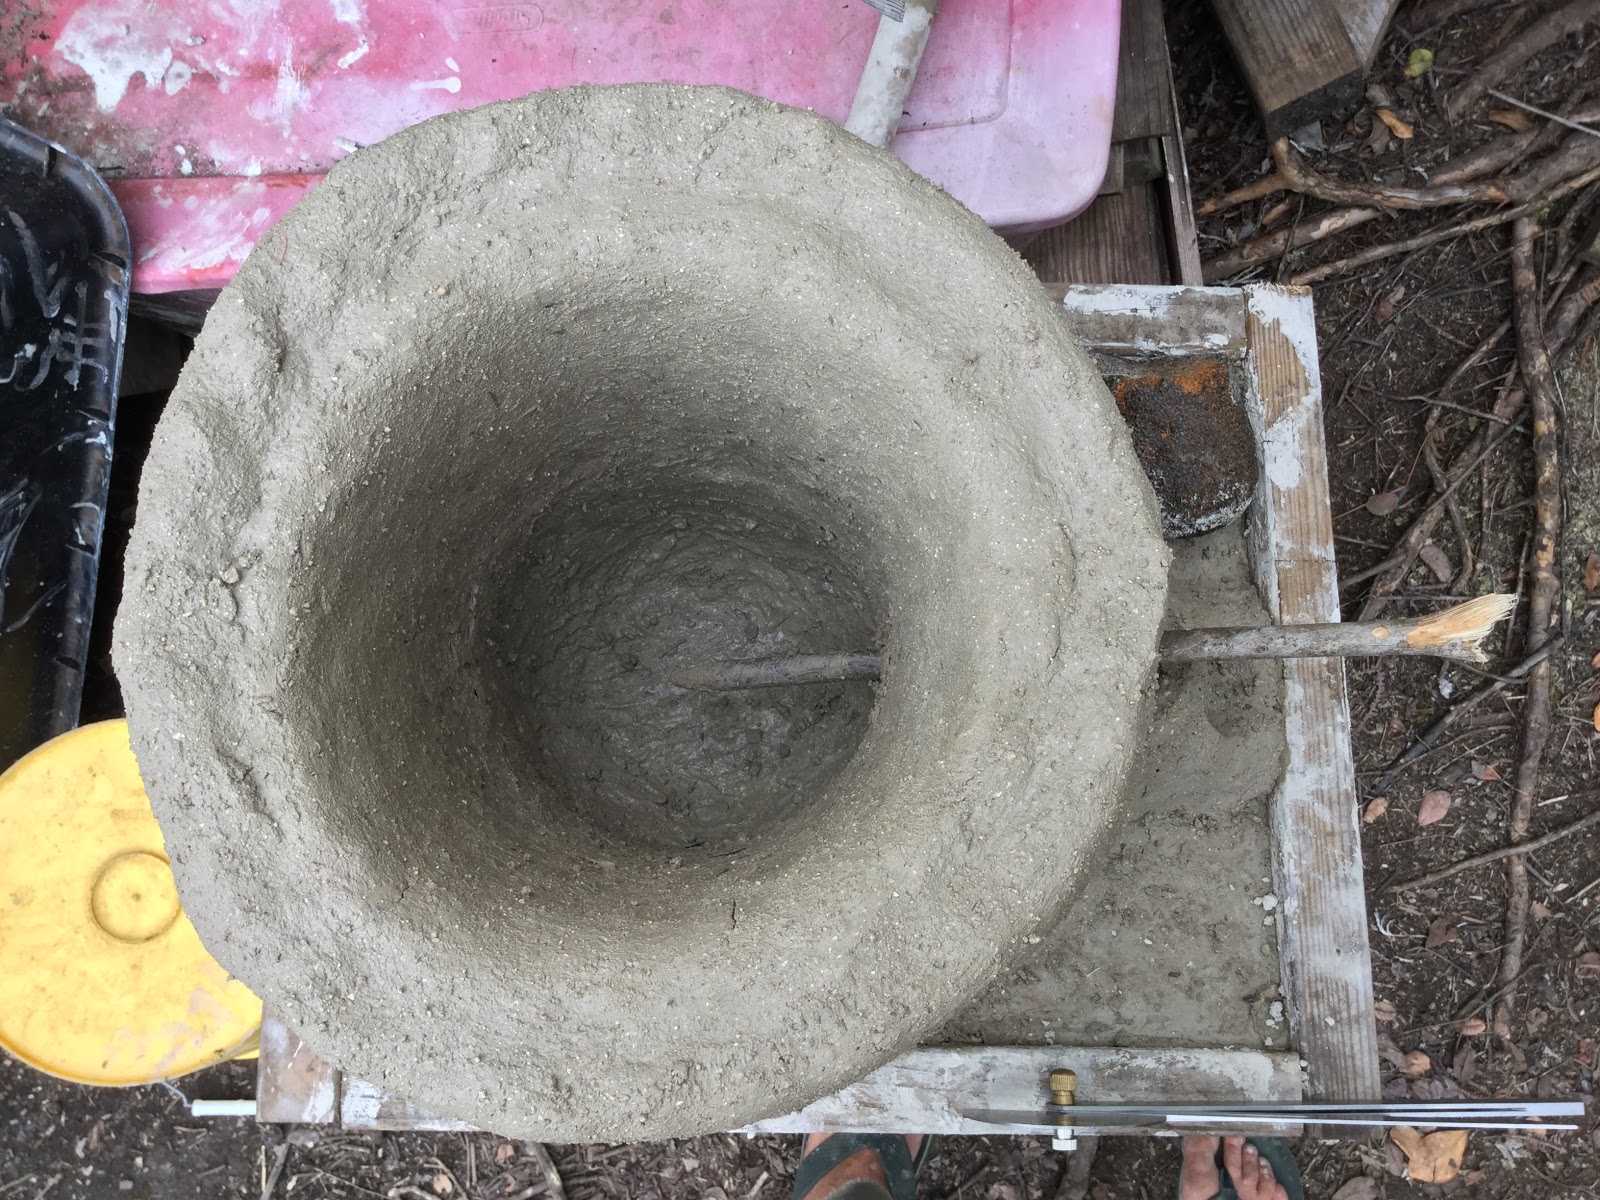
I throw a dart…..18 degrees it is! I use a 12mm diameter stick to punch a hole into the main shaft.

It's not very clear from this picture, but the tuyere inlet is inside the “L” shaped plenum which will be sealed during the operation of the furnace.
Looking down from the top…..stick still in place.
The tuyere is just a hole where the air enters the stack. Keeping things simple and flush with the side of the shaft will allow better access to the bloom for removal, but also suffers a significant amount of blast erosion of the furnace wall itself. As the wall melts, it deforms the air blast until it clogs, resulting in a bloom that gets stuck in place anyway. AMHIK.
Ideally, the tuyere will protrude into the shaft a bit, maybe 25mm or so. Sumihira uses a tuyere shape that was favored by his teacher and is cast from a high temperature refractory cement. Here you can see that it protrudes into the main shaft, probably around 1 sun=30.3mm, and the furnace bed of crushed and moistened charcoal fines has been raised to be nearly flush with the tuyere. This would be intended for lowering the carbon content of cast iron.

As I mentioned before, I don't have an acceptable high temp refractory but a serviceable substitution was used by Dave Friesen of Island Blacksmith, for his museum forge build. Crushed charcoal fines and clay are mixed with a minimum amount of water, formed into an appropriate shape and left to dry. In this video, Dave is making the tuyere for a traditional Japanese swordsmith's charcoal fueled forge, but the tuyere shape and function is nearly identical.
I love all of Dave's Crossed Heart Forge videos. Who would think that watching a talented bladesmith hammering on steel could be so restful?!
The “Aristotle” furnace that I built uses a consumable liner made from charcoal fines and clay, with a bit of peat moss added for structure. The mix is combined and kneaded until it is fully blended, then shaped into a patty and formed into a dish that sits at the bottom of the shaft. While not super durable, after it has been fired the resultant mix does hold together surprisingly well. For this Oroshigane furnace, I combined the two design features, a sacrificial furnace bed and a protuberant tuyere, both formed from charcoal fines and fireclay.

You can also see the stick that was used to punch the hole in the sidewall is still in place. The end of the stick ended up being about 8cm up from the bottom, not the 10 that I was shooting for. Not the end of the world, but it may affect the results some, not sure yet.
The mixture that Dave specified for his tuyere has a ratio of 6 parts charcoal to 2 parts clay. I've been using a 50/50 blend because it looks neat in the mixing bucket, haha.

My last handful of clay is used to seal the area where the air enters the plenum at the very base of the furnace. I'm using a 2” PVC to a 2” galvanized nipple, but anything could be used here. The plenum design keeps everything cool so straight PVC alone would be fine, as long as you don't drop too much burning charcoal on it.

And finally, the plenum gets covered up by a cool chunk of lava that Ellie found.

The rock isn't bonded in place because you need to be able to take it off periodically for tuyere access. When the tone of the air supply changes pitch, it's probably due to the air being restricted in some way. Grab a metal rod to clean the blockage and ream it out when it happens. The access port also lets you peek into the inferno to watch as your steel forms…..

Primal fun!
No comments:
Post a Comment
Like all of us, I am figuring this out as I go, so when you see something that is incorrect or flat out wrong (and you will!), let me know. This is a learning process. Real people and names, please. Constructive comments and questions are very welcome, but hate speak/politics are not! Life (get one!) is too short.
Thanks, Jason