Showing posts with label sharpening stones. Show all posts

Saturday, November 22, 2014

Correcting a "chippy" blade...


I've got this great little kanna blade, 48mm wide and I use it all of the time. It has one significant problem, however. Try though I might, the edge develops little micro-serrations in some areas, and don't want to come out, no matter how much I sharpen.


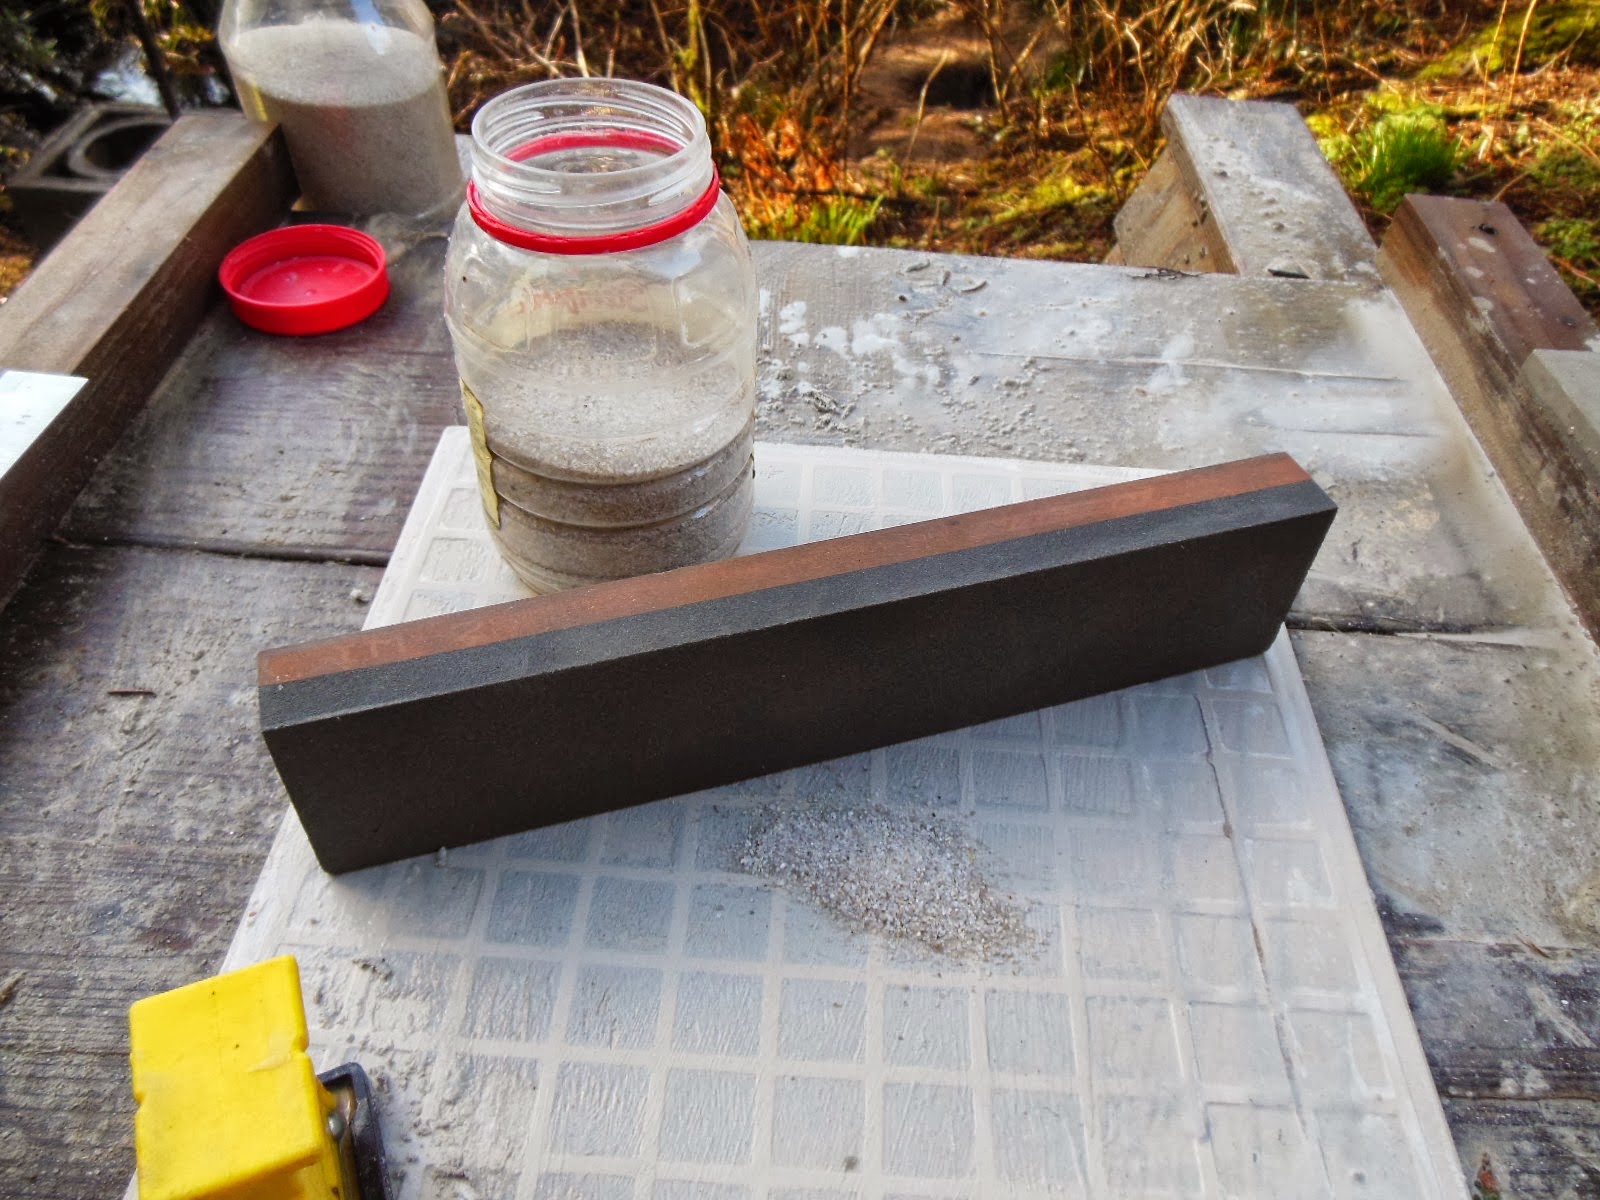
There is a procedure called "Killing the edge" that often works to correct for this jagged edge tendency. When it is time to re-sharpen, you first drag the edge over something hard. A glass works nicely but the side of your sharpening stone works well, too. What you are looking for is a clear, unbroken line of "bright" that runs the full length of the edge. This line of clean metal ensures that you are into the fresh stuff, and not fighting some remnant scratch or blemish.


Some blades are difficult no matter what you do.


Right now at least, I prefer very hard blades. Sometimes the blade can be TOO hard, though. I suspect that the degree of hardness that the blade is capable of carrying is partially due to the underlying grain structure of the steel. A fine grain structure will support a very hard edge, where a more coarse grain will tend to chip or fracture. The grain of the steel is established by the blacksmith, so we are stuck with that, being what it is.

A coarse grain structure needs be softer, in order to maintain its integrity. Tempering is the act of softening a blade, and is something that is well within the abilities of anyone. Easy stuff.

Really.


Preheat the oven (I start at 325°F).

****
Preheat the oven, because your oven runs full-bore until it reaches operating temperature. The high heat would potentially harm the blade, so.... Preheat.
****

Place the blade on something large and heavy/dense.


Some ovens control their heat more accurately than others, and the cast iron skillet (in this case) acts as a buffer. A little extra protection (and I was seasoning the skillet anyways, so I got to kill two birds with one stone!).

I cook the blade for 30-60 minutes. The actual tempering occurs nearly instantaneously, but extra time won't hurt anything and may contribute to a more thorough temper.


After the blade is done cooking, let it cool, then back to the stones.


Not good enough. 325°F didn't seem to change a thing.


Magnification concurs. The jagged edge remains.


So, back into the oven, this time at 350°F for another 30 minutes, then sharpen.


Better, so at least I might be on the right track, but not good enough yet.


I try again at 375°F...


Much better, smooth and straight. I don't want the blade any softer than necessary, so I'll stop here, for now.

This blades jagged tendencies appear to have vanished, but I'll reserve judgment for now.


The blade seems to sharpen up much better now, both easier and "sharper" feeling.


The kanna works better. Nothing to write home about, but definitely good performance. The true test will be in the longevity and ease of re-sharpening.


I could possibly get more work done if my assistant would stop napping on the tools, though.


I was taking a break from all of the carpentry obligations of the last month, by spending a little time in front of the forge (Yay!!!! Hammer time!!!). I am trying to salvage a sloppy laminated blade that I forged a few months ago. After a lot of massaging, I've ended up with something that is getting close to being a proper blade.


The heavy lifting in the shaping department has been taken up by the $Store sharpening stone. This is proving to be a favorite of mine, being soft enough to function as a waterstone, but hard enough to hold its shape without immediately dishing. And it cuts fast! Amazing performance for $1!


I only tempered this blade to 325°F , and it's WAY too hard for a kitchen knife. Harder than anything that I've ever used before, anyway.

Even worse..... Chipping at the edge.


I tried a second temper at 350°F, and it might have been sightly better, but still chipped pretty bad.


So.... I skipped right to 400°F.


375°F would've been perfect, haha! 20/20...

400°F didn't ruin it by any means, I just like to be more thorough about these things. You don't learn as much if you skip the proper steps, you know?


Unfortunately, this blade is a junker.


This little crack will propagate. I could take in the edge a bit.... Regrind the bevel...


The tip would need some work too. See how the end looks all fuzzy?


That's because the hard steel runs out and gets mixed in with the soft iron. The tip is too soft. The "fuzziness" is due to the way that the iron finished on the natural waterstone. The hard steel finishes to a near-mirror state. I could grind the tip back until I get to the better steel......


Even though the steel is now soft enough to *barely* form a burr, it still tends to chip out.

*hmmm*

I don't want to temper the blade any higher. It's soft enough already (actually it's a very practical, hard edge. I just want to see *how* hard I can make a knife!)....I am wondering if I could improve the steel structure through a series normalizing/grain reduction heats, at the forge, and do a new quench...... Re-shape the blade...... Sharpen again......

The new blade would only be, ohhhh.....a paring knife maybe?

I've already spent an unreasonable amount of time grinding out that uber-hard bastard, what's another hour?

Good practice.


Thursday, May 22, 2014

More home-brew diamond sharpening stone stuff....


Still goin'....


Call me masochistic, a slow learner, what ever.....I have a problem with wanting to reinvent the wheel.

The acrylic showed some promise, but maybe can be improved? This time I used a file to prep the surface, leaving a scratch pattern that was perpendicular to the primary axis. Side-to-side, as it were. I was thinking that maybe the grit would set into the substrate more evenly.


A sprinkle of gems...


Then set, using a hardened steel roller. A large roler bearing, mounted on a handle is what you SHOULD be using, but.....


This time, I just sprinkled the grit loose, no glycerine. I had a chip-breaker/back blade/secondary blade (laminated construction, just like the main blade) that I had shortened, so am setting a whole new bevel here. Well.....I hog out most of the material with a grinder first. This is refinement, I guess. Babbling..... Sorry.


I rinse off the accumulated swarf and any loose grit that still remains, then have at it again. 


Yep, it works. The action is peculiar, like the blade is riding in tracks, on rails, so I try to incorporate a swirling or erratic stroke. This can speed up the sharpening process (think "random-orbit" sander vs the older vibrating palm Sanders), but it is hard to maintain a flat bevel this way. That's why the scratch pattern looks all screwy.


Maybe acrylic isn't the best material, or maybe this stuff was too hard. The material that is commonly used for a lapping plate varies. Balsa wood, copper, brass, even lead, it all depends on what you are lapping and what you are trying to achieve.


MDF


I liked this MUCH better. The grit bedded down well, possibly too well? The scratch pattern tamed down quickly, probably because the larger grains bedded more deeply during use. This combination felt more like a sharpening stone, but still not particularly fast or aggressive.


Derek Cohen has a great writeup on his blog, about making lapping plates from old cast iron plane bodies.


A cast iron clutch plate. Cast iron is made in a whole variety of hardnesses and densities. I think that a "soft" iron would be nice to try. This clutch plate is pretty hard.


It works. It feels like the diamond is mostly rolling around, and only a portion of the grit is getting embedded into the cast iron. If you look at the bevel, you can see a division between the soft iron and hard steel laminations, just like you would see if you were using a waterstone. It is the loose grit, tumbling around and putting microscopic dents into the iron, that gives the characteristic "hazy" look that is so pronounced with a laminated blade.

It works dry (see above)...

.... And wet. The viscosity of the fluid used to lubricate and flush away the swarf can have an effect on the "feel" of the lap, and the appearance of the blade itself. This is using a (relatively) thick oil, 10w40 synthetic motor oil.


I liked this combo for the "push". It felt like the high viscosity slowed down the rolling action of the grit. It left a more even haze to the iron. Compare the even, gray look of the soft iron to one of the pictures of embedded grit/acrylic substrate. The embedded grit leaves a very shiny/scratchy finish. I think that it's soooo cool that the same material (#120 diamond grit) applied differently, can give such different results.

This is using a thin oil, mineral oil cut 50% with mineral spirits. Is about the consistency of WD40. 


It feels different, looser, light, and very rumbly/roly/crunchy. And VERY messy. The appearance of the iron is more scratchy and not as fine as when used with the thicker oil. It still feels like only a small proportion of the grit is getting embedded into the cast iron substrate. This is a great combo (a cast iron lap w/diamond grit) for finer grit, something like a #400 and up. This coarse...... Not so much.


And a piece of maple plywood. 


The diamond grit embedded well into this material, as is evidenced by the uniformity of the bevel face. There is almost no visible line between the soft and hard metal. That means that the grit stayed anchored and actually sheared the metal, as opposed to rolling. This combination felt the most similar to an actual diamond sharpening stone. That said, the aggressiveness still quickly diminished as the diamond grains got pushed further into the substrate. 


My ideal would be this stone.....


... just a bit harder. Super fast, sharp grit, and fun to use (and it looks like a rock! I love that!), but too soft. It dishes quickly and gives up too much slurry, which gets in the way. I need to get back out to the beach, and find some new "real" stones. Like this one, but harder.

Saturday, March 1, 2014

Fresh and fast..... flatten an India oilstone quicker than I thought possible


I am trying REAL hard to wean myself off of my diamond sharpening stone dependency. They are fast, but they are also expensive and can wear out at an alarmingly quick rate, when used with any frequency. A light touch can help prolong their life but there is more to it then that.

I need a seriously flat stone for lapping and none of the stones that I have tried are even close to truly flat. DMT offers the dia-flat line, but then they also say that their other stones are flat too, which has not been my experience. And their grit seems to wear erratically. And my stone is delaminating. And It seems to leave the occasional REALLY deep scratch that takes forever to bring out...... I'm not feeling too good about DMT right now.

Eze-lap? WAY not-flat (too bad, they are otherwise very good). The Tsuboman Atoma seems to be the gold standard, but I am loath to drop $100 on a consumable item, just in the name of convenience.

I plan to start using loose diamond grit on a lapping plate. I use loose grit for lapping stones and it is so much faster than any kind of fixed abrasive that it doesn't bear comparison. AND you actually make surfaces flat, as opposed to domed, cupped, and twisted. That should be good for flattening blade backs, but what about the bevels?

I got a HUGE 11.5 inch India/carborundum dual grit stone from my friend Brandon, but as with nearly all used stones it required a fair bit of flattening. You can do this with sandpaper on glass, but buy a lot of paper and give yourself a month to finish. It is SLOW! Beware of falling standards.... You can use a diamond stone, but ruining a $100 stone to save a $40 stone........ my math skills are poor, but not THAT poor.


This is super fast AND super cheap! This stone was dished and had a central groove on both faces, not badly, but something to be aware of. The main issue was that it was SLOW(!!), probably glazed, so using differential use/wear to get it back to a flat condition wasn't gonna happen. This DOES work.

Supplies:
  • A FLAT ceramic tile ($1, bring a straight edge. This was the flattest out of the 5 that I looked at.)
  • Sandblast grit (Free, from my friendly building supply store. The bags leak a bit or get ripped, so there is often some on the floor. I grabbed both coarse and fine.)
  • A stone that needs flattening


I used the BOTTOM of the tile.


The carborundum side wasn't too photogenic, but it was SUPER fast and proved "proof-of-concept".


Make SURE that the bottom of the tile is as flat as you want your stone to be. I tried this without the grit and the results were underwhelming. The grit is key. It is only quartz sand, but it makes all the difference. Just sprinkle some around, add a tiny bit of water, and start rubbing.

T=0 seconds
I used the coarse grit for the carborundum side, but for some reason it didn't work well on the India side.

The fine grit worked great. It breaks down quickly, so just add more as needed. I used about 1/4 cup total. A $12 bag would be a lifetime supply (for you and your 300 SharpeNerd™ friends...).

This is the fine grit....

T=60 seconds

T=3 minutes or so
As the stone approaches flatness, the surface area increases and progress slows. Maintain your high standards! Flat is good.... and makes sharpening MUCH easier. You might have to apply more pressure to one end or the other. Use a straight edge.


T=8 minutes continuous ( 45 minutes if you count sprinkling, washing, squinting, and clicking).
This was used with oil, so there is some residual staining.


F is for flatness.... It's good enough for me......


You might not want to wear your best clothes, though....


Results? I've got a really hard laminated chip-breaker that need sharpening....

It feels like a completely different stone. Before, the blade just skated around and not much metal was removed. Now the stone makes a gawd-awful grinding crunch...... Obviously the stone was glazed with old swarf and grit filling the pores. Not anymore!

I am using water, not oil.


This is good, but the feel of the stone is...... unpleasant. 

My good friend ODC to the rescue.....


The ODC fills the pores without clogging them and smooths the action by forming a slurry. 


**This seems to be an important point**

In use, as the blade extends over the edge of the stone, it can grab slightly, digging in and marring the blade. This will prevent you from using the whole surface of the stone, which is what will eventually cause dishing, grooving, etc. My theoretical goal is to never NEED to flatten a stone, so I use every part of the stone and frequently check for high/low spots. The ODC  cushions or buffers the action by making slurry and reduced the feeling of "dragging". The blade is easier to control, and the whole surface can be used effectively. It also quiets the sound a bit, too (no small thing!).


India side.... Better than it was, but still slow. It feels like the metal is being scraped away, not cleanly sheared. This is partly due to using water instead of oil.


Pretty light....not much swarf, is there?


With the ODC?


Color! Again, a different beast.

I initially tried the coarsest W/D I could get, 220 grit, 2 sheets...... 30 minutes of work yielded little on the carborundum side, and even less on the India. Using loose grit quartz sand on an inverted ceramic tile, I flattened the carborundum side in maybe 2 minutes, the India in 8 minutes.

Physically the work is easier, too, at least as these things go. Sandpaper has a high coefficient of friction, whereas this is like rolling around on..... sand. Sandpaper tears. Sandpaper is expensive. This cost me a whole $1 for the tile (and the tile is virtually unaffected. Since I was using the back, the face is still good. I could even use it as a... tile!).

This combo-stone isn't as fast as diamond, but might actually work for me. With the ODC nagura.


Friday, February 14, 2014

Waterstone reality.... an Asagi of Indeterminate Origin (AIO), part 2


Slurry slurry slurry...... A funny sounding word in its own right, and it just gets MORE odd when you use it.


DMT #1200 slurry.


This is new territory for me, in terms of natural waterstones. My finest stone is a koppa (piece or splinter, sort of) Ozuku asagi, but this stone is finer yet and the action is smoother without being soft. Really easy to use and FAST, for its grit. I thought that the Ozuku was relatively fast, but THIS waterstone is about 4x faster! When I close my eyes and touch the Ozuku, I think of a blackboard, a writing slate, cold, sharp. When I touch this stone, I think..... cool, firm, a hard surface dusted with powder...


I want to try this stone with the ODC, but first I need to go back and do a bit more ground work..... and a reality check.


T=30sec. each stone (I'm not hardcore or anything).

This is the "ink" stone and the Ozuku asagi, using the ODC nagura. The slurry on Inky has oxidized to more of a gray/brown, but it was black a few seconds ago. The slurry of the Ozuku is still black. I am concentrating on polishing just the steel, so I am using a stroke parallel to the cutting edge.


When I use the ODC, I give the stone just a few swipes, barely enough to see. It is a VERY mild abrasive and as the ODC breaks down, it seems to expand about 10x in volume. Strange stuff.


T=15sec.

Even stranger..... With this stone, the slurry forms but only gets a bit darker, a gray tinge. "Normally" the ODC breaks down and quickly turns black with iron particles. With this stone, the slurry just sits there, as though the stone isn't working..... VERY interesting!

I THINK that what is happening is this......


A typical natural waterstone is composed of a range of particle sizes that are mostly larger than the particles of the ODC. The smaller ODC stuff acts as a cushion or filler, reducing the metals exposure to the abrasive. As the ODC degrades, more of the base stone's surface is exposed. In effect, the largest, most jagged particles are buffered by the ODC until they are worn down to a common size with the other abrasive grains.


 The slurry is the worn and degraded particles that have been dislodged from the parent stone. They both abrade the tool steel surface AND the stone surface as they get ever smaller.....


This stone behaves differently, with the ODC slurry at least. Magnify the last drawing 10x....


This stone seems to have an average particle size that is slightly SMALLER than that of the ODC. The ODC is masking or preventing the steel from making contact with most of the parent stone. Only a few particles are larger than the ODC, so they would be responsible for the slight darkening in color of the slurry. 

I feel that this is significant. I think that I have found the practical limits of the ODC nagura. This speaks well of both this stones quality AND the utility of the ODC nagura. WAY cool!


T=15 sec. 
No nagura and almost no slurry formation, but the stone doesn't feel super hard and is quite friendly. That dark patch on the upper left corner of the stone is basically all swarf. Amazing.


Full mirror on both steel (hagane) and iron (jigane). This blade is harder than most and somewhat special.


 Different blade, still good, but not AS hard. About as hard as my daily "users".


T=15 sec
I set the bevel to the stone, close my eyes, and slowly "guide" the blade. You can "feel" the stone remove the metal. I haven't felt ANY scratchy bits yet, not even the two dark spots. 

This bevel is reasonably flat and, if you look close, you will see some rust pitting but almost no scratches left over from other stones. 


Like I said, this is new sharpening stone territory for me, and I think that I know why.

Alex Gilmore at The Japan Blade  has a few stones that look similar, like this beauty....@$2,100!

Nakayama Maruka awasedo ttoishi


Here is my AIO again.


Very similar, especially the skin, although his are stamped and have a known provenance. If you go to his site (Item Nakayama #19), you can watch a video of his stone in action. The speed of metal removal is comparable to mine.... incredibly FAST!

I must admit to a certain degree of , not scepticism but maybe uncertainty, about how GOOD these old Toishi were/are. These old premium stones are an order of magnitude better than anything that I have used to date.

This is my A-team grit progression.... Inky, Ozuku, and AIO.


The bar has been raised.


Tuesday, February 11, 2014

Waterstone reality.... an Asagi of Indeterminate Origin (AIO), part 1


Wow! 3 days from Florida!


Just like the pictures from the auction. It's heavy, very dense and looks to be a fine grain slate. Very slight usage, as near as I can tell, and only needs a bit of lapping, no more than 1/32 here and there. Mostly around the edges. The size is a bit smaller than stated, but still a very respectable 212-76-36mm. I was hoping for more of a "blue" color, but it is definitely tending towards the gray end of the spectrum. 


A very faint stamp, but unreadable.


Full skin (kawa) back with just a wee bit of the corner chipped away.


Some skin on a few of the outer corners, too.


I think that these are called "moles" by natural waterstone aficionado's. Some sort of inclusion, like a trace of iron ore. There are two, and they look like they may be scratchy....

So here it is. While not exactly disappointed, I was hoping that it would be a liiiiitle bit more..... flashy. I was hoping/dreaming that as soon as I brushed off the grime I would be looking at some wild pattern of black spots and a bright blue color, a nice kerasu asagi. The reality is.... different.


While not perfectly flat, it is close. This will give me more opportunity to work on flattening this huge India stonestone (Waaa!!! Synthetic?!) that I got from my friend Brandon. 


Too slow, the heck with that! Bring out your diamonds! #340 or so, I forget, but it was very fast. I tried a #400 eze-lap plate but the "stiction" was a pain. This cheapy worked great. I use the darn things every day...... $8 for a set, and the only problem is getting them to adhere to a substrate. Best $8 ever!


Well, here she is, in all of her glory. For the price, I can't complain. I would've been bummed if it was a synthetic, though there was not much chance of that, with the skin and all.


Let's take it for a test drive. This is where we left off.....


Hard blade, steel type unknown, mirror finish ( from the Oregon coast sandstone) with some slight scratching. These are the artifacts from different stones on an incompletely prepared bevel.... my bad. 


Whoa!! 5 seconds! Look at all of that swarf! Instant reaction and no slurry, but the action is still smooth. NO rubbing/dragging/digging. it's a bit like using a black crayon on gray paper. Slight hyperbole, but only slight. REALLY fast and smooth..... Soooo smooth....


No weird, new scratches. Just building polish.


This stone doesn't seem to need a nagura, but let's try it anyway.


Diamond nagura?

This slurry acts strange......... It gives the impression of being about as thick as milk, but doesn't get in the way. It is as though the blade almost goes UNDER the slurry, if that makes sense. The blade feels like it is riding gently on a very thin cushion, which it is. This also makes it very easy to feel the "bite" of the tool, allowing you to minutely adjust the angle of the blade.  If I hadn't seen how quickly the stone cuts, I would think that it was a slow cutter, but...

This photo mostly shoes how un-flat the bevel is, haha, but it also shows how the steel at the blade's edge is being polished by the slurry. You can see that the steel is almost divided into three horizontal bars. The leading edge is being polished by the pressure wave of loose abrasive grains that comprise the slurry itself. Because the particles are no longer anchored to the substrate, they bounce and roll about, becoming smaller and smaller, and in doing so produce the  characteristic hazy finish that is the trademark of a natural waterstone


The second line, the hazy one in the middle, is where the steel is actually TOUCHING the stone surface. This would be the "true" grit of the stone. The third line is likely formed by a trailing eddy of slurry, and makes it clear that the bevel is not flat, my technique is poor, or (most likely) both of the above. 


Now, I am just testing out this stone so I'm not concerned with the less-than-flat bevel, but if I was GOOD at sharpening AND wanted the finest possible edge, I would lighten up on the hand pressure, just the weight of the blade itself, and polish until the slurry has degraded into nothing and is forming a dry glaze. At least, if this was a normal stone that actually MADE some slurry....


As if this wasn't long enough, there is more....