So, I have determined that this is a good prospect for restoration. Nothing fancy, just a good user plane.

One of the things that I love about old tools is the history of how it was used. You can infer sooooo much, just from the shape of the steel, the way that the blade has been sharpened, how the two blades are matched together.....
And the dai..... Is the body warped, how is the fit of the blades to the body, has the head been shaped to allow for hammer strikes or is it a standard square cut ( and maybe smashed out of square from being pummeled!). Often the dai will be marked with the owners name, or have been branded with a construction company mark.
Some will be marked in different ways.... I often get a kanna that has been unintentionally marked by an errant saw blade cut. When you cut a piece of wood, you prop up one end to prevent pinching of the saw blade at the end of the cut, so naturally you grab the closest scrap of wood.... your plane (!), and....... Awww crap!
When I get a new-to-me tool, I look at it, hold it in my hands, to feel how the handle has been polished smooth from years of use. I think, "Was this someone who's work I would respect? What KIND of work did he perform, cabinet maker or carpenter, or something else?". You can easily tell if a tool has been cared for, was valued as a means to do good work, or was just an edge, a wedge to be hammered into the wood, essentially no different than a pointed rock.
Which do I respect more? Will what I do honor what was done before? I like to think that the work that I do today will be appreciated in some way, perhaps many years in the future. That said........ What do I change, and how much, when I recondition a tool?
With this kanna, the point is moot. I feel completely comfortable doing pretty much anything to this guy. It has barely been used, and would have little collector value (guessing), so all I am trying to do is improve. Don't misunderstand, this tool is NOT junk, and can be used to build great things. This is about potential!
Wow! Blah blah blah....
The blades.......
The blades have a good (rough, a bit coarse) forged finish and show little sign of use or abuse.

There is a slight bit of mushrooming at the head, so I take the blade to the anvil and use a rounding hammer to cold forge it back into shape. The rounding hammer also leaves a nice imprint. This is my opportunity to build some character into the tool.

File-work. I am not preserving the original forge patina, so I can take a free hand with the file. Again, different tools leave different marks. I choose a double cut bastard file to leave a slight tooth, a serration to both the radius and the chamfer.

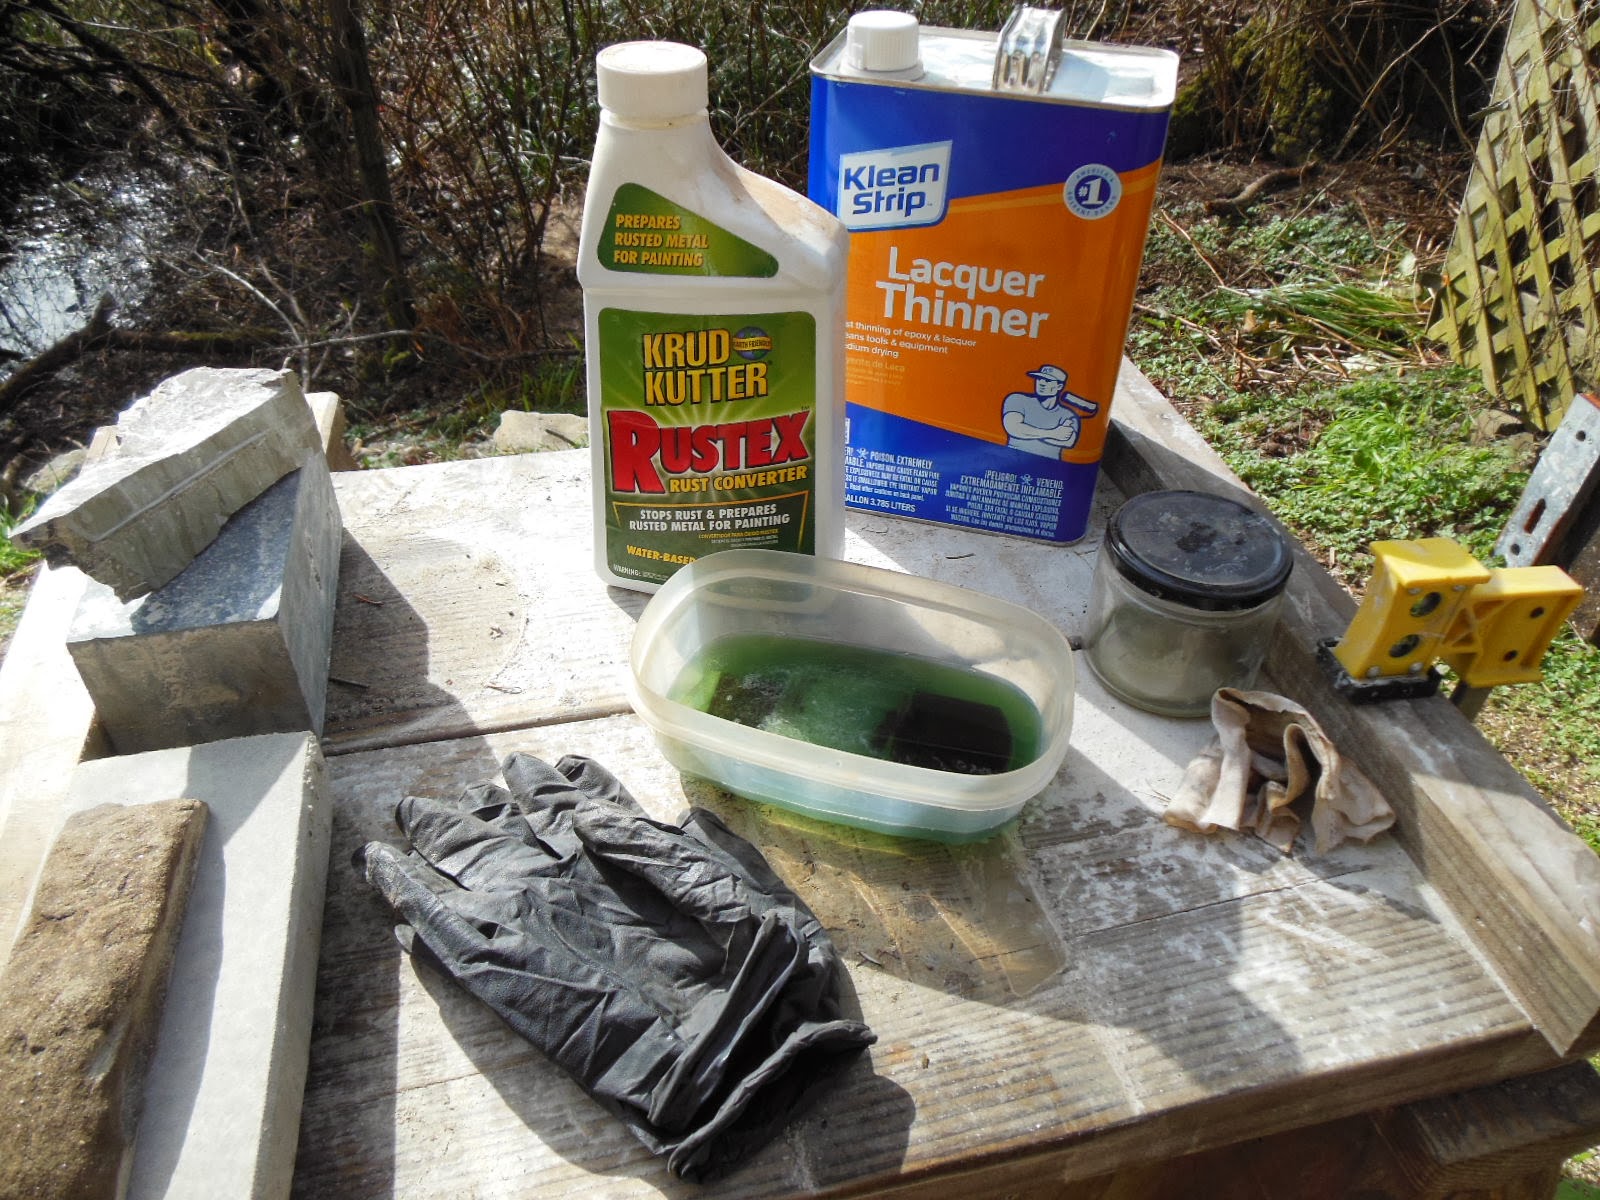
The blades aren't too rusty, but the File-work has made parts of the blade too shiny. The original finish can be removed with a mild acid soak, after first removing any protective lacquer using lacquer thinner or acetone. I am using phosphoric acid, but regular vinegar works well, just a bit slower. THIS WILL REMOVE ALL ORIGINAL FINISH, so if you want to remove rust but keep the original forge blackening, use electrolysis instead.
**Caution!** The electrolysis process removes rust and...... sometimes the black finish on Japanese tools is a RUST finish! You can put a thick rust oxide finish on steel by allowing/forcing the metal to rust, then submerging the rusted metal in boiling water. The red iron oxide turns into black magnetite..... rust blackening. THIS MAY OR MAY NOT BE REMOVED BY ELECTROLYSIS! I have used electrolysis on some blades.... fine. Other blades... finish was removed. Go figure...... I'll let you know when I learn more.
The phosphoric acid will darken the iron to a mild gray. It made the high carbon steel quite a bit darker.

If you intend to use gun blue to darken the metal to a true black, you can't use phosphoric or muriatic acid for rust removal. These acids inhibit the chemical reaction, so at best you will get a dark gray, but that's OK with me. For this project, at least.
Birchwood-casey perma-blue.

Decide on a bevel philosophy (a whole blog post, right there). These big, heavy blades will cause your bevel angles to drop lower and lower if you are a sloppy sharpener. Nearly all of the old kanna blades have bevel angles of 22-27 and rounded bevels, too. I want 28-30 and flat. Rebuilding bevels is hard work, but is a 1-time effort *IF* I stay attentive when sharpening.

Learn what 30° feels like. Train your hands.
I check the way that the blade fits in the body of the plane. Is it square, or does the blade tilt. Does the edge protrude on one side more than the other? In this case, the blade doesn't protrude at all, so I make everything square. THINK AND CHECK FIRST! Your kanna might have been built out-of-square, and if you just automatically make everything even and square, the blade won't fit right. Sometimes the edge of the blade isn't perpendicular to the primary axis because of careless sharpening, but sometimes it is intentional. Don't assume that the last guy was a fool!
Kinda square now.

The back of the blade needs to be flattened. I ground back so much of the edge, it is time for ura-dashi. Yay! This is one of those things that is scary at first, but if you get an old beater kanna (like this one), you learn that it's not a big deal. Make friends with it! Just like sharpening, it's a part of kanna life.
Des King has a GREAT series of posts on his blog about ura-dashi. READ IT (and buy his book!). I have nothing to add.

Make a reference.
Tap it out. I use a small tack hammer that I shaped with sharp edges and points to prevent skidding and slips.

I obviously belong to the "Thousand strikes" school of philosophy, haha! I need a bigger hammer. This blade is hard! A ren-tetsu (wrought iron) blade is much easier to shape. The backing metal on this blade is just low carbon steel and not particularly soft. The edge steel is very hard too. I wonder what it is? I am curious to use this plane and determine the edge durability. It FEELS tough.
Getting closer.....

Not great, but good enough. Time to do the chip breaker.

Make sure that the edges are parallel, front AND sides.

If you are going to do one, you might as well..... Lots of ura-dashi practice today!

This edge polished up nicely!

I am pleased! The blade, while not made from cool wrought iron, is still hand forged. The steel edge has great thickness, perfect for a beginner kanna, and feels...... tough. Also, the chip breaker/back blade is hardened steel, and very tough. Not laminated, but still very hard, not mild steel like some cheapies.
My favorite cheapie kanna....

I have a small (6 inch long) 30mm ko-ganna block plane that was probably a very cheap tool. The main blade is laminated, but the lamination line is flat, so probably done by machine. The back blade is mild steel, hell, it wasn't even shaped, just a flat slice of metal that I had to MAKE into a blade. The blade is VERY easy to sharpen........ and is incredibly tough! I have only sharpened this blade 3 times in the last year, and I use it every day for the toughest tasks, like glue or plywood. Even the cheap tools can work well.
Next: Time to dai! (Yeah, I know......)
No comments:
Post a Comment
Like all of us, I am figuring this out as I go, so when you see something that is incorrect or flat out wrong (and you will!), let me know. This is a learning process. Real people and names, please. Constructive comments and questions are very welcome, but hate speak/politics are not! Life (get one!) is too short.
Thanks, Jason