Showing posts with label Diamond grit lap. Show all posts

Monday, June 2, 2014

Sharpen the Miki hisa folding knife using the King man-made/natural waterstone


Inertia has set in big-time. I've been working on my blacksmithing (Tong forging mania!! Interesting, no?), the to-do list just gets longer, and some of my projects have been on the back burner so long that I've no idea where to begin (again!). In addition to all that, the shop is getting so packed full of stuff that it's getting hard to find room to move, yet alone get some work done. EBay, here I come! I need to work on my meager photography skills. Certainly no lack of things to do, but where to start?

I know! Let's sharpen something!


A while back, I bought a peculiar looking waterstone. You can't have too many natural waterstones (or kanna, or chisels, or odd bits of wood/rusty metal/screw's/nails/files....), right?


Odd looking, to be sure. I thought that it *might* be a Japanese natural waterstone....


.....but it's not :'( 


What I thought was a manufacturer's INK stamp (first photo), is actually an IMPRINTED stamp. Bummer!

It's a weird stone, though. The fractures are probably due to freezing, but might just be from sitting too long in the water tank. It has the feel of a stone that doesn't want to be permanently wet. The fractures *look* like something that you see associated with old aotos, showing vertical cleavage planes and a somewhat coarse structure. It doesn't have the uniform grain of most man-made waterstones. Now that it's all cleaned off, it's composition is obviously very homogeneous. Definitely man-made.


Prior to bidding, I did a fairly thorough search for artificial waterstones with similar color, size, and markings, but didn't find any matches, so I was somewhat optimistic that it would be a natural stone. Oh well. Since I already have more synthetic stones than I can use, I set the stone aside for a while. A few days ago, this popped up on one of the Japanese sharpening stone blogs that I follow.....


We have a match! The gist seems to be that it's an old, unusual, King brand waterstone that is made from reconstituted natural materials. I guess that I was partially right, haha! In any event, my interest was renewed. And, yes, I actual read blogs about sharpening.......


The stone is 210-68-40 mm and feels rather light in weight, with an odd grainy, soft feel to it. It puts me in mind of a big chunk of powdery chalk, and feels too soft to be very practical as a tool sharpening stone. You can see how dished it is. It's obviously been used for sharpening knives, so.......


For ages now, my pocket knife has been one of those plastic, breakable blade disposables.


Even a $-Store craft knife can be improved by a little sharpening. A couple of swipes on a fine diamond stone will work wonders! The problem now becomes that the plastic body of the knife wears out faster than the blades do. And..... Plastic.

I sharpen disposable blades. My name is Jason and I have a sharpening addiction.......


I  got this a few weeks ago.


A Miki-hisa folding pocket knife, nothing special, but decidedly nicer than what I have been carrying. Mass produced, but with a laminated blade and a Bubinga body, after a bit of massaging it seems OK. I relieved the sharp metal edges and reshaped the body some, until it felt better in the hand, and while I wouldn't pay full retail for one ($40'ish), I thought it worth the $12 I paid.


Amazingly enough, I have had this for 3 weeks and it STILL has the factory edge! It's time to try out the new "mystery" King waterstone!


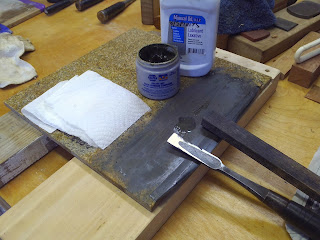
But first, some ground work. I use the Po'boy #125 diamond lap (loose diamond grit on a maple wooden block) that I wrote about before.


T=20 seconds. A minute on this is sufficient to remove most of the coarse factory grind.


Before I get too carried away, I need to work the hollow ground back of the blade. I start on a #400 Eze-lap. On the right edge of the stone, you can see a strip of black electrical tape. This is to keep the upper (curved) back of the blade contact to a minimum, at least for the roughing stages.


This being a cheap knife, the blade has a pronounced curve or hook towards the steel side,  so not only is the back of the blade hollow ground, it's also bowed along its length. This makes it pretty well impossible to make the back truly flat without making the urasuki all misshapen and ugly. 


I go for looks, cheat a little bit, and only do the minimum required to establish a small flat at the cutting edge of the blade (the lower, straight edge). The back is still slightly bowed, but it is adequate.


From the #400 grit diamond stone, I go to the oddball King man-made/natural. It is a very open bodied stone and needed to be soaked for about 5-10 minutes before using. It's very porous. 


And interesting....... Nowhere near as soft as I was expecting. I thought that this guy would  fall apart and be a heavy mud producer, but that wasn't the case, at least with this blade. It felt moderately fast, but without being aggressive. A soft, rough stone. Weird. You can feel the grainy nature, but it isn't scratchy at all.

An analogy: If carborundum/ silicon-carbide is a handful of finely ground glass, a typical aluminum-oxide stone would be a handful of fine beach sand. This stone would be a handful of dirt, or maybe sawdust.


The finish is in the #1000-2000 range, but the scratches are shallow, not sharp. This thing serves the same purpose as a coarse aoto. It would act as a bridge to transition from a sharp and scratchy synthetic stone to a natural finish stone. I strongly suspect that was the intention of the manufacturer. 


I would like to try this stone out using a hard kanna blade, but both the top and bottom surfaces are WAY too dished. This thing is shaped like an "S"!


Sticking with the "odd" theme, I use one of my favorite Oregon beach stones next. This was a bit of a step back, grit-wise, but served to confirm the relative grit finish. I didn't want to wait for more synthetic stones to soak. Most of the natural waterstones are splash-and-go.


I consider this stone to be around #2000, but a touch scratchy and the density is uneven. I still like it though.


And another Oregon natural waterstone to finish.


Good enough for a pocket knife.


Thursday, May 22, 2014

More home-brew diamond sharpening stone stuff....


Still goin'....


Call me masochistic, a slow learner, what ever.....I have a problem with wanting to reinvent the wheel.

The acrylic showed some promise, but maybe can be improved? This time I used a file to prep the surface, leaving a scratch pattern that was perpendicular to the primary axis. Side-to-side, as it were. I was thinking that maybe the grit would set into the substrate more evenly.


A sprinkle of gems...


Then set, using a hardened steel roller. A large roler bearing, mounted on a handle is what you SHOULD be using, but.....


This time, I just sprinkled the grit loose, no glycerine. I had a chip-breaker/back blade/secondary blade (laminated construction, just like the main blade) that I had shortened, so am setting a whole new bevel here. Well.....I hog out most of the material with a grinder first. This is refinement, I guess. Babbling..... Sorry.


I rinse off the accumulated swarf and any loose grit that still remains, then have at it again. 


Yep, it works. The action is peculiar, like the blade is riding in tracks, on rails, so I try to incorporate a swirling or erratic stroke. This can speed up the sharpening process (think "random-orbit" sander vs the older vibrating palm Sanders), but it is hard to maintain a flat bevel this way. That's why the scratch pattern looks all screwy.


Maybe acrylic isn't the best material, or maybe this stuff was too hard. The material that is commonly used for a lapping plate varies. Balsa wood, copper, brass, even lead, it all depends on what you are lapping and what you are trying to achieve.


MDF


I liked this MUCH better. The grit bedded down well, possibly too well? The scratch pattern tamed down quickly, probably because the larger grains bedded more deeply during use. This combination felt more like a sharpening stone, but still not particularly fast or aggressive.


Derek Cohen has a great writeup on his blog, about making lapping plates from old cast iron plane bodies.


A cast iron clutch plate. Cast iron is made in a whole variety of hardnesses and densities. I think that a "soft" iron would be nice to try. This clutch plate is pretty hard.


It works. It feels like the diamond is mostly rolling around, and only a portion of the grit is getting embedded into the cast iron. If you look at the bevel, you can see a division between the soft iron and hard steel laminations, just like you would see if you were using a waterstone. It is the loose grit, tumbling around and putting microscopic dents into the iron, that gives the characteristic "hazy" look that is so pronounced with a laminated blade.

It works dry (see above)...

.... And wet. The viscosity of the fluid used to lubricate and flush away the swarf can have an effect on the "feel" of the lap, and the appearance of the blade itself. This is using a (relatively) thick oil, 10w40 synthetic motor oil.


I liked this combo for the "push". It felt like the high viscosity slowed down the rolling action of the grit. It left a more even haze to the iron. Compare the even, gray look of the soft iron to one of the pictures of embedded grit/acrylic substrate. The embedded grit leaves a very shiny/scratchy finish. I think that it's soooo cool that the same material (#120 diamond grit) applied differently, can give such different results.

This is using a thin oil, mineral oil cut 50% with mineral spirits. Is about the consistency of WD40. 


It feels different, looser, light, and very rumbly/roly/crunchy. And VERY messy. The appearance of the iron is more scratchy and not as fine as when used with the thicker oil. It still feels like only a small proportion of the grit is getting embedded into the cast iron substrate. This is a great combo (a cast iron lap w/diamond grit) for finer grit, something like a #400 and up. This coarse...... Not so much.


And a piece of maple plywood. 


The diamond grit embedded well into this material, as is evidenced by the uniformity of the bevel face. There is almost no visible line between the soft and hard metal. That means that the grit stayed anchored and actually sheared the metal, as opposed to rolling. This combination felt the most similar to an actual diamond sharpening stone. That said, the aggressiveness still quickly diminished as the diamond grains got pushed further into the substrate. 


My ideal would be this stone.....


... just a bit harder. Super fast, sharp grit, and fun to use (and it looks like a rock! I love that!), but too soft. It dishes quickly and gives up too much slurry, which gets in the way. I need to get back out to the beach, and find some new "real" stones. Like this one, but harder.

Tuesday, May 20, 2014

Experimenting with diamond grit

I am still in search of my Holy Grail, an effective coarse grit sharpening stone. Preferably one that stays flat, works well with multiple metal types, and eats steel faster than the kid I used to sit next to at lunchtime. Oh yeah, cheap too. My personal Holy Grail would be a natural stone as well...... We can hope, right?


I have used valve grinding compound (silicon carbide in a grease carrier). It's cheap, available at any auto parts store, and it works tolerably well.

You need to find a good substrate, though. This pink granite tile shows significant wear after lapping the backs of 4-5 chisels and a couple of really hard kanna blades.


Don't do this with your nice granite surface plate, OK?


I have a real love/hate relationship with diamond bench stones. Of the two DMT Duosharp stones that I have had, neither was particularly flat (one was seriously NOT flat), both very quickly lost their initial aggressiveness (minutes) which was replaced with a very lackluster bland feeling (forever), both left random large scratches (forever), and both quickly lost their nickel coating at the edges and corners (months). Both were expensive, too.

 The two Eze-lap stones that I have are not flat, but aside from that, still work well after years of use. All diamond stones lose some aggressiveness/harshness as they get broken in, but at least the ezelaps feel like they are still working.

 The cheap Chinese stones that I have wear similar to the ezelaps and are sooooo inexpensive, they would be perfect, if only they were flat.

 I want a diamond stone that has that firm "bite" of a good, coarse sandpaper, and if it could be recharged as it's performance began to fall, more the better. To that end, I have been experimenting with the use of loose diamond grit. The question is what type of substrate will work best. One other wrinkle..... I want to be able to use this for sharpening the bevel side. Others have said that loose diamond works poorly for doing bevels. Why?


I have some thick pieces of acrylic, the remnants of a bunch of old boat hatches that I didn't have time to use. You want to use a substrate that will allow the diamond grit to sink into, to grab onto, rather than just rolling around on the surface, and acrylic seems like it would work well.


I am using a 125-106 micron size, pretty coarse, about a #125 grit.

I put a small pinch into a syringe with a bit of glycerine as a carrier.


I sanded the acrylic to give it a bit of "tooth", then applied a little of the diamond compound. This is just the smallest fraction of what's in the syringe.


I used a piece of hard D2 steel to rub the stuff around, trying to distribute the diamond grit somewhat evenly. The black stick is a piece of oak that helps me bear down on the steel, really grinding the diamond into the substrate.


It works!


It feels funny, though, like the diamonds are mostly rolling around on the surface, instead of bedding in properly.

As the glycerine dries out, it needs to be scraped off of the blade. It is black from all of the iron and steel swarf, and I can't help but wonder how much of this is diamond that didn't embed. Rather than discard this stuff, I wet it slightly, then spread it around as though it was a typical waterstone slurry. You can feel the abrasive diamond rolling around still, and the feedback is pretty poor.


You can see the sparkles of diamond that DID get embedded into the substrate.

The glycerine rehydrates using just a spritz of water. Can't decide whether it is working better wet or dry.


The swarf and grunge rinses off very easily, using just a spray bottle. When I wipe off the nastiness, you can see that the diamond has been well distributed, but the concentration is thin. 


I add more diamond compound to the plate, but it feels like it has reached a short of maximum capacity. This might be a misperception, but secondary (and third) applications don't dramatically improve the "feel" of the lapping plate. 

The feel is hard to describe. There is a very distinct "grab" as though some of the diamonds are much larger than the others and cut deep grooves in the metal. The combination of coarse grit and deep grooves makes the plane iron steer funny. The blade gets pulled around rather than floating, and you get the sense that moving the iron back and forth is just riding in the same grooves rather than removing new metal.

It would be nice to get this figured out, as I have more window sills to plane. The Port Orford Cedar requires a very sharp edge for a nice finish.