Showing posts with label laminated blade tools. Show all posts

Sunday, August 2, 2015

New old tools!

It's tool sharpening day again.....Oh joy! As you know by now, that's not meant to sound sarcastic, either.


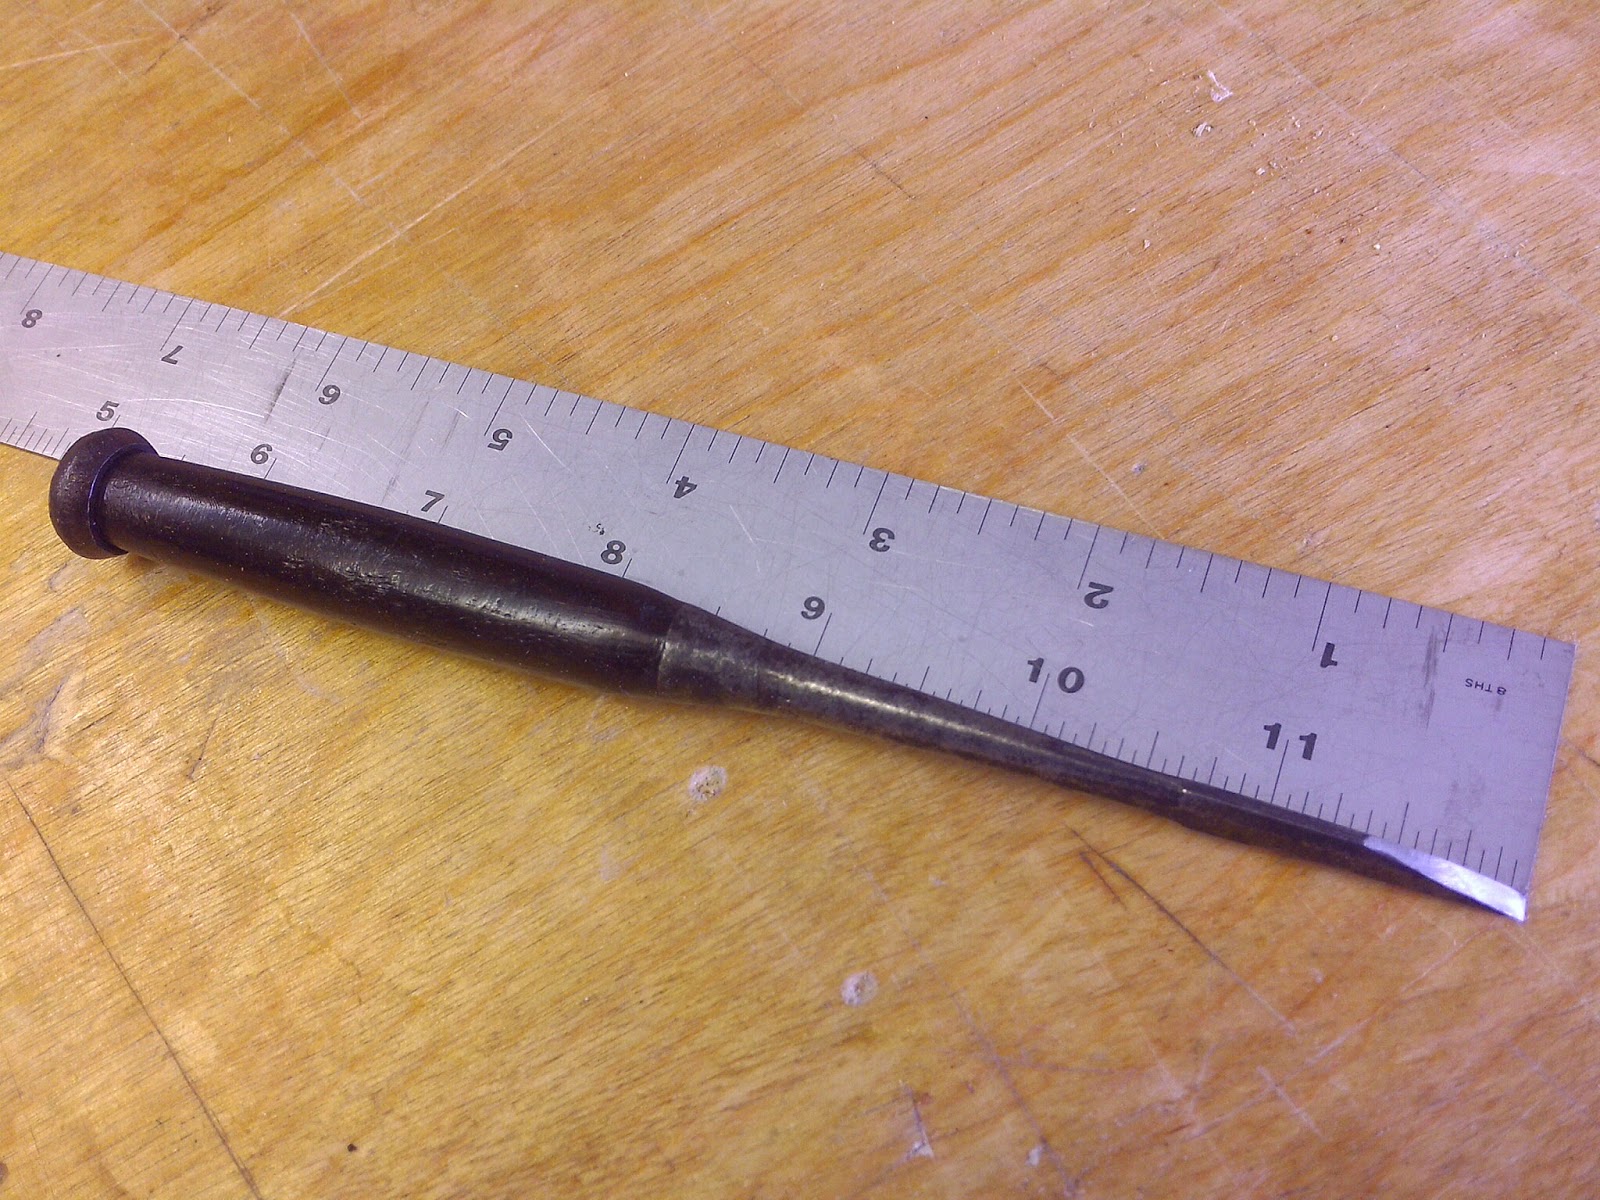
The bevel on my old drawknife is a bit more round/convex than I prefer, and now seems like a decent opportunity to flatten it out a bit. I don't need it to be PERFECTLY flat, it's not like I can sharpen this 12" monster on the stones.....which brings me to another point....getting the bevel perfectly flat isn't meant to be some sort of religious or ethical dilemma. A flat bevel is self-jigging, makes sharpening more easy and repeatable, that's all. A convex bevel seems to get away from you after a while. 22 degrees =>24 degrees =>45 degrees, you know? This bevel angle wanders around a bit, so I'm just trying to improve things a little bit.

Problem is, normal files won't touch this steel, it's too hard. To have any hope of getting this done today, I need to use my cheap China diamond files.

What looks like dust on the blade.....that's steel. These files cut!

This $10 set of files has the coarsest grit of anything that I've got, and they are turning into one of those "life-saving, off-grid, must have tools". They've held up amazingly well so far, and look nearly new still, despite having already seen some fairly hard service. The diamond grit is embedded very thoroughly, so as you use the files, more grit gets exposed and the action becomes more aggressive. They have shown no tendency to shed grit when used on soft-ish steel, something that can't be said of many of the more expensive diamond stones from guys like DMT.

This drawknife is most definitely NOT soft. I bought this thing on eBay last year, but haven't had much cause to use it until now. It still had most of the factory paint on it, I couldn't see any makers stamp, but it seemed nicely forged. The handles aren't too nice, and are mismatched, to boot. It hasn't been used much at all, nor mucked up by fools. I figured it for a decent newer import knife, but today I took a closer look.

D.R. Barton, Rochester, NY. The makers stamp is so faint that it was obscured by the paint. The blade is laminated. I couldn't see that under the paint either. The Barton stamp was used until 1923 I read, so there you go. I think I paid around $20 shipping included. Old drawknives are painfully cheap, and almost certainly better than anything that you can find today.

Ever more, my tools are around the 100 year old mark, which sounds impressively old, but now that I'm nearly 1/2 that age, it doesn't feel as exceptional, haha. If you think about tool life and return on investment, these old tools are really phenomenal values. I am lucky to see 4 years of use from a power tool, but many of the hand tools that I use every day have been in use for over 100 years. That's just incredible to me. Talk about value and economy!


My friend Brandon is soon to set sail to the far corners of the globe in our old sailboat (and now beautiful, thanks to him....he sure didn't get it that way, haha!) and boat space being at such a premium, he figured that I might be able to put some of his old tools to good use. Thanks yet again Brandon.....you're the best! They arrived two days ago, and they are perfect!


A lipped shipwrights adze (yeah, the handle's upside down,oops, my bad, haha), a hewing hatchet.....


....and an arrow for Ellie.

The perfect gift for her (and she likes the harmonica that you sent, too! Lucky for me, she is developing some skill with music, otherwise....:-p

This arrow is one of a set that Brandon made years ago for elk hunting. Now she needs to build a decent bow, something that has enough muscle to push this monster. Hawaii smoked ham, here we come!


Phosphoric acid takes away the slight amount of surface rust.


Even more importantly for me, it reveals the details of the forging.

A laminated blade, L.& I.J. White, Buffalo, NY Kent pattern #3 broad hatchet. This hatchet is also well over 100 years old. According to the catalog, you could buy these for $16/dozen, of course that was in 1890. Not cheap, these tools.

I've had a few broad-axes and hatchets before, but now that I really need one...I've got nothing. Your gift is SO very timely, thank you!


Something that I wasn't aware of before, is that some of the broad hatchets have a welded steel face on the poll of the axe.

That seems odd to me. All I can assume is that this is the original shingleing hatchet, so you'd want a hardened hammer face to use for driving nails. One end splits, the other end drives. Cool!


I love the original tooling marks.

Laminated blades are awesome.


When viewed on edge, you can see how the steel bit was forge welded to the body, using a nice long scarf.

Very clean. A really nice, solid tool. Perfect.


And on to the adze. It needs some BLO, to nourish the dried wood.


Looking better, now that I've got the handle facing the right way.


Sharp.

I should've taken the hatchet down far enough that the grinder marks were eliminated. I figured that they would soon disappear due to sharpening attrition, but now I don't know. This steel is tough, much harder that the adze. Those grinder tracks might be there for a LONG time yet.


As I was sharpening the adze, I kept wondering if I was seeing evidence of a lamination, but I'm pretty sure that it isn't, despite how the picture makes it appear. Even on the back of the blade, though, it almost looks like it could be. I can't say with 100% certainty, but if it is laminated, the heat of forging it caused enough carbon to migrate out of the steel that the separation line is virtually eliminated. And not that it matters one lick, it's an awesome adze, and I've wanted one of these lipped adze for the last 20 years. I'm pretty happy, partly a delayed gratification thing, partly just overwhelmingly pleased with the tools that Brandon sends me.


Thanks Brandon!! Ellie, too. She's psyched!


Now for something completely different.....

I have a short list of tools that I've wanted for quite some time, but I haven't really felt the lack until recently. I am of divided mind on tools acquisition. I used to flip through the tool catalogs endlessly, each tool suggesting new possibilities for projects, each idea giving birth to ever grander plans. I made lists, added up the totals then promptly chucked the lists out the window. How many tools do you really need, anyway (Coincidentally, Sebastian has been exploring this same issue with the students in his woodworking classes down in Chile.)? As I get more proficient, the answer is less and less. Before, I wanted ALL the tools, seeing them as somehow being necessary to proper craftsmanship. Now, I tend to view many of those same tools as being a crutch to make up for a lack of skill. How can you improve if everything is done for you?

On the other hand, I've gotten more than a few tools, just bought on a whim, but then later realized how awesome they are. The "point of a sword" knife that I forged is one of those tools (although I wouldn't buy one for the $300 they cost), a wakitori-ganna (a special plane used for shaving the sides of a groove) is another. The POAS knife I've never seen for sale used, but the wakitori-ganna are so common they are nearly free. Buy one.


Anyways, here is another tool that just never made it onto my must-have list, but it's there now.

A (Gasp!) new tool. Finally I've bought myself a sashigane! I had been planning to buy an old one, made using German steel (what was that stuff? Aluminum? Pewter?), but my needs overcame my wants. A new Shinwa sashigane, stainless steel and everything.

I have come to hate and despise the western style framing square, but even so, how different can the Japanese version be? It has been all of this Project Mayhem framing joinery practice that has finally made me see the light. When you watch those YouTube videos of the old Japanese carpenter laying out the joint, whipping the sashigane left and right, tilting and angling..... I realized that the square can be an artful and dynamic tool, more than just the 90° reference it is commonly used for.

A western framing square is placed down, skootched into position, then the line is drawn. It is stiff and heavy, and unless you are striking from an already square edge, you pretty much need to use two hands to move it where you want. A sashigane is different. It's thin, light and nimble. It's a single-handed tool that you poke down right where you want it, draw a line, then give it a twist to the next location, mark, move, mark. This Japanese joinery has so many cut lines that the layout becomes part of the fun itself, nearly a dance if done properly. I'm only beginning to feel this, but I REALLY like it.


Of particular importance in how the tool works..... The corner.

The edges of the sashigane are relieved . You know how when you are marking a line and it is just the slightest bit off, due to the interference between the square and whatever it is that you are using to mark with, the thickness of the pencil, whatever..... You need to pull the square back from the line before you strike it, if you want it to be accurate, you know?


To hazard another esoteric byway/explanation......

I have been striking my layout lines for years using a pencil for rough cuts, a knife for the important stuff. I use a knife, because it's more sharply defined than what the carpenters pencil in my pocket can provide. A knife works great with a square, because you can run the blade right next to the edge of the square, zero clearance like. The knife also gives this great little divot point for placing the tool as you progress the marking out, an index mark. I started using the knife more, because I wanted greater accuracy than my pencil would provide.


Ironically, now that I've started laying out these crazy complex joinery works, I am frequently wanting an even more accurate mark than a knife can provide. How is a relatively fat 0.2 mm line considered more accurate than a 0mm width knife mark? Obviously it's not, but the problem is that I want to fudge the cut some arbitrary amount one side or the other AWAY from the line, and that doesn't work well with a knife line. The knife struck line disappears if you get too close. An ink line lets you fudge, but still keep the original (in part at least). Right now, for my skill level, a 0.2 mm line feels like a good goal to shoot for. I can cut one side, then the other, and chances are I'll get an acceptable fit. Far from a piston, but I'm happy for now.


Anyways, back to the other tools.....


A sashigane has its edges ground back, so the edge doesn't actually touch the surface. It is said that's  because the Japanese guys layout using ink, and the relieved edge prevent the ink from getting all over the square and fouling the surface, but in practice it is more than that. When I use a sashigane, I can stick the corner point exactly where is want it to be, then angle the drawing tool (sumisashi, pencil or knife) to mark the line perfectly. It is so much faster and easier.

I never would've guessed.


Living in this way, very simply and with no power source, can be difficult in many ways (try living in a warm climate without refrigeration, haaa!) but it also has its rewards. Renee has seen the value of having all of these ridiculous hand tools! Now that she gets to see things in action (and she does much of the work herself, too), she's given me encouragement to buy more of what I need/want tool-wise.


Doing the Project Mayhem joinery challenge has brought to light one of my biggest lacks. Despite the amazing resource of the Internet, there is still not much info out there on basic Japanese carpentry practice and joinery. There are a handful of books however, that keep being referenced, but I don't have any. Strike that.....didn't have.


Books are coming, a survey of what might be useful to a relative beginner (I guess that's what I am. I'm sure no expert, haha ).


I'm also dreaming.....


.....dreaming of a shaded porch, lying in a hammock, feeling the afternoon breeze.

Thursday, November 27, 2014

Guesstimating carbon content using the "Spark Test".


I've been using old machinists metal working files for the cutting edges on my laminated blades. Of course this begs the question; What's in this stuff anyway?

It has long been thought that files are made from 1095 (0.95% Carbon) high carbon steel. I really wish that I had some 1095 to compare against, haha! What I DO have is a handful of old files and a grinder (a camera, too), so I'll start with what I've got.


I don't profess any sort of expertise at this, in fact, rather the contrary. Mostly, they just look like sparks, right? I've looked at the stream of sparks shooting aft of the grinder many a time, but this time I figured that if I took some pictures, I might be able to see something interesting. I'm gonna warn you now, this is a very monotonous series of photos that is only going to be of interest to a few people (kind of like the rest of this blog, haha!

It was dark, and I was outside anyways.


The first time I tried the spark test on this Heller file, I knew that I had better start paying close attention. This is an old 8" file, of unknown age. It was old, rusty and dull when I got it, so I can't attest to its value as a file or how hard it is.


Usually the sparks that get thrown off of high carbon steel look like long, red streamers. This file was different.


These sparks are short, red, frilly little things. Also, extremely numerous and active. Notice the many forks and branches, ending with the smallest of explosions. It's like the 4th of July!


The cameras exposure time means that these photos make it look like there are more sparks than you would see in real life. That is one thing that was always throwing me off  when comparing my results to what I was finding online. An actual volume of 2/3 to 1/2 might be more accurate.


These sparks feel soft, delicate, fuzzy.


Next is an old 12" Heller. Again, old, rusty, and dull.


I have read that sometimes the carbon content might be slightly lower in a large file like this one, but that doesn't appear to be the case here.


In real life at least, these sparks look the same (to my eye, that is).


This picture is more accurate in terms of the volume of sparks that I was seeing.


Volume, length, color and intensity, all are indicative. If you apply more pressure to the grinder, you get a longer spark trail and maybe a more fully developed spark, but then it gets hard for me to take the picture, so....


Now for something that I am more familiar with, a Nicholson 4-in-hand file. I've bought a bunch of these in the past and have never been particularly thrilled with their longevity. There they are handy to keep in the toolbox though.


A very different spark here. 


A more intense yellow, a longer stream, and not as much "activity". Fewer sparks, but what is there looks to be intense. Many of the tracers end with a little burst and a branching fork.


Notice how the sparks are bouncing off the tin wall? The spark stream is nearly 4x longer than the Heller files showed.


These sparks feel harsh, coarse.


Now.

I am probably guilty of promoting the same information, right or wrong, as everything that I've found written on the net, but again, we work with the tools we have. 

It has been said that in the old days, Nicholson files were made from a special type of C1095 high carbon steel that had1.22%(+/-) carbon, but since the '80's have been made from plain 'ol 1095. I've seen a number of old technical reference books online that list files as having a carbon content of anywhere from 1.20%-1.50%, and made from the same type of steel that taps and dies are made from. Just the other day I was reading a technical paper that specified using Vallorbe (Swiss) files, made with a 1.22% carbon steel.

I can say with absolutely NO certainty that certain files are made using a particular type of steel. What I am comfortable stating, is that the spark pattern from these Nicholson files is significantly different from the spark pattern from these old Heller files. I would also say that these particular files are NOT overwhelmingly hard.


How about an old Simmons "Red tang"?


This is my current favorite, and an absolute brute when it comes to chewing through metal. It's age is anyone's guess, and it's still sharp, though certainly not anywhere close to being new.


The sparks are starting to look familiar now.


They look nearly identical to those of the Heller files.


Another Simmons Red tang, this time a triangular tapered saw file.


Same (or near enough).


Now for something interesting.....

This rasp sprays a very impressive stream of yellow/red sparks, but there is almost no branching, explosions dots or dashes. It shows just a stream of large tracers that only fork at the ends (if at all).


This is one of those cheap China files that are pitifully soft, and absolutely worthless at removing metal.


The length of the stream is telling as well. See how the sparks are rebounding off of the back wall?


All right, I am beginning to associate long, intense, yellow/red, boring looking sparks with really crappy files. I have a few of these (I know a bargain when I see it!), and they all behave in a similar fashion. In my entire stash of miscellaneous metal, the only thing that I've found that compares to this spark pattern is some dead soft, iron tie wire used for wrapping rebar bundles (a great source for free 1/4" iron, BTW, and easy as hell to straighten!).

I think that this may be a case of.... Case hardened steel.


How about another cheap China file? 

Here is one of those super hard, little detail files that I bought at Wal-Mart, and am always raving about.


Short-ish red sparks, very active, with a multitude of branching, forks, and explosions.


Last one (for now)....

An "Oregon" brand chainaw file.


Can anyone else see the similarity here, or is it just me, haha!


Interestingly enough, the "Oregon" files are made in Switzerland....

.... By Vallorbe.


Wednesday, November 5, 2014

Chisel rehab/therapy

I guess that I've been restoring too many of these old tools. I've noticed that periodically, when I'm getting a bit restless and notice a sort of itchy feeling..... It's time to sharpen something. Today feels like a chisel day.


Buying old chisels that haven't seen much action, then getting them ready for use, has turned into a favorite form of relaxation for me. If they haven't been used, they haven't been mucked up, most likely. This makes for a fast and fun(?) setup.


Junji sold me this nice old 36mm Toyohisa chisel. I set this guy up a few days ago.


There isn't much to show here, really. These chisels required..... not much. A good cleaning with a cleaner/degreaser (409 works well, and won't dissolve your skin, haha!), followed by a scrub with #0000 steel wool removes all of the grime and light oxidation. I have shown those processes often enough that I thought to spare you the details (or just forgot to take photos?).

On probably 75% of the chisels that I buy, I need to drive the chisel hoop (the kasura) further down on the handle . This chisel was no exception.

 I put shellac on my tools to keep them looking somewhat clean. Shellac, varnish, and polyurethane (I draw the line here) are all film forming finishes, and might not be the best choice for tools that get handled much. Oil finishes might be better, but they tend to go black over time, and often get sticky as well. Shellac is quick to apply, easy to renew, and simple to remove. I would prefer the handles to stay unfinished, but they get so nasty looking..... Vanity wins!


The ura side of this chisel was in really good (original) condition, so I get to shape things as I wish. Establishing and maintaining a nice shape to the urasuki is part of the fun for me.


Wow, I need to get a life, haha!


This is a high quality, older chisel. It has the stamp of the Tokyo chisel makers union, long since disbanded.


This is a 9mm by the same maker.


The ura side is looking nice. The better quality tools often are easier to setup, this being no exception.


Part of what I find so enjoyable about the initial setup, is that you are obligated to do your best work because the results will be visible for the life of the tool. The ideal isn't to do this as quickly as possible, but to do your best.


The bevel is not done yet..... saving some fun for another day.


A small chisel, short (6.5 inches, more or less) and narrow (3mm).


The handle is rosewood, presumably. It's so dark and dense that I can't be certain. The kasura needed to be set down more fully, because the dense wood doesn't compress as well as oak..... and they never seem to be set very well, anyways (the kasura/handle ring thingy).


No urasuki remaining on this guy, unfortunately. There is some rust pitting.


The back was fairly flat, but lately I've been trying to get my chisels VERY flat. I have this one most of the way done, but I need to check something else first.


So far, only artificial stones have been used, so I haven't gotten a look at the lamination line yet.


I've got a feeling about this chisel. I *think* that this chisel will have a very thin and delicate hagane, and as I'm working on this chisel, it reminds me of another chisel that I was working on a while back.


I bought a chisel quite a while ago, and initially it was one of those "What the hell was I thinking?!" kind of purchases.


As received, the chisel was.... Small. Also dry, dirty (The handle was so black from iron staining that I couldn't tell what type of wood it was made from. I had originally bought it thinking that the handle was ebony, haha!) and slightly corroded. But mostly it was small, and though I thought it a little bit, um.... un-manly, I tried it a few times and found it to actually be a fun tool to use. These little chisels fit right into my hand, and so small that you almost forget that you are holding them. The control is phenomenal! It's as easy to use as pointing your finger, and really feels as though it is an EXTENSION of your finger (if your finger was a super-sharp laser beam type of finger, haha!).

Anyway, I prepped this little chisel, and though I never finished giving it the full-on sharpening treatment, I did remember one impression in particular. The hagane seemed rather thin.


As I began cleaning up the little chisel, I figured out that it was a bit unusual and kind of nice.


I think that the style is called suminagashi (ink pattern), and it is similar to the more familiar mokume (wood grain), which looks like the even more familiar Damascus.


None of this was evident when I bought the tool, but only revealed itself after lots of scrubbing, de-rusting, chemical etching, and blackening.


I was surprised.


The ura side isn't too messed up, thankfully.


The ferule is hand forged, and a little rough, with lots of character.


The top ring is similar.


And here's that thin hagane that was previously only a hint.


Very thin for a chisel, the lamination line is clear and distinct. The upturned corners are very crisp and even. I was hoping for a ren-tetsu jigane, but you can't have 'em all, I suppose.

The blacksmith who forged this tool was very skilled, and it is these types of details that I want to incorporate in my own work. I've got a long way to go though.


OK, back to the other chisel. The point that I wanted to remind myself of, was that before I get too carried away, I need to polish the bevel a bit. That reveals the steel lamination line (at least if you use the right stones).


It IS thin, as expected. If I make the back of this chisel (obsessively, compulsively) completely flat, I run the risk of someday running out of the hard steel hagane. It's flat enough as it is, so I give it a rest.


Yeah, I know...... Lots of words, but not saying much, mostly just showing off some pretty tools.


I suppose that if there *had* to be a point to this post, it would be to check the lamination before zealously flattening the back of a Japanese chisel. Sometimes the nice tools use very thin laminations, and if you go too far.....

This is a great chisel, an Umehiro 48mm tataki-nomi, and it's a brute.


A small problem, though. The hagane is too thin at the corner on the right.


This corner doesn't hold an edge very well....Let me clarify. The corner itself is great, but that little spot where the soft iron intrudes? That little spot dents almost immediately. It's like having a permanent chip in the blade.

I am sure that if I ground the blade back about 4-5mm, I would be back to an area that had sufficient steel to hold an edge. I am loath to do that, and would rather put up with the perma-nick, rather than shorten the life of the chisel by 5 years.


Still, it has a nice backside.


The hollow was perfectly shaped, and the various users over the years haven't messed it up.

This is a high quality tool, and the blacksmith forged this blade with care. The little problem with the corner wouldn't be an issue if the previous users had done ura-dashi on this blade.

 I enjoy ura-dashi so much, that I do my chisels, too.

Segue....