
Yeah, pretty it's not.
Charcoal making, be it for forge or the garden....it's a messy business and the kiln itself is no exception. Charcoal is made by cooking all of the moisture and -some- of the volatile organic compounds from wood, leaving behind the pure carbon. There are a variety of ways to go about this, but essentially there are two different means of driving the moisture out, direct fire and indirect fire.
Direct fire is the traditional and most familiar method. You make a big pile of wood, then bury it under a mound of soil. You leave various small opening to start the fire and allow in air for combustion, then as the pile begins to take, you gradually close off the holes until the entire mound is sealed. The fire buried in the mound will gently smolder for the next few days, leaving behind pure, carbonized wood.
Back in the day, charcoal makers would head off into the woods for the entire season, collecting the leftovers from timber harvest, then making mounds of charcoal and filling the sky with clouds of smoke. The direct fire process is the only efficient way that I know of to make huge amounts of charcoal, but this scale is far beyond my needs. And it's smoky. And messy.
Direct fire is viable on a small scale if you use a 55 gallon steel drum as a containment vessel. Take a drum with a lid, cut 6-8 1" holes around the perimeter at the bottom, then pack the drum full of *VERY DRY* wood. Try for as uniform a size as possible, nothing too big, and pack it clear to the top. Light a fire of small sticks and twigs right on the top of the pile, then keep feeding the fire until you can see that combustion has reached the very bottom of the barrel. When that happens, seal the top, then cover the holes at the bottom by shoveling dirt around the base, cutting off all oxygen to the fire. By the next day, the charcoal should've cooled and you can open up the barrel. It will probably be about 1/2 full of mostly overcooked charcoal, if your results are similar to mine.
This could be called a "top-down" burn, and the nice thing here is that by having the fire on top, much of the smoke of coaling gets consumed in the process. You need to mind the fire, and it's not smoke free (a smoke free burn is the Holy Grail for us charcoal makers, BTW). While not perfect, this is one of the simplest ways to make charcoal, and would be excellent for making basic blacksmithing charcoal.
Here is a much better description of the process.......
http://iron.wlu.edu/reports/CharcoalBarrel.htm
You can do a "bottom up" burn too, but I find that it results in greater amounts of both waste and smoke. The bottom up method seems to generate higher heat, leading to more overcooked charcoal and lower yields, maybe >15% less than a top down burn, but the process is even easier. The burn requires less monitoring, just start a fire, then keep piling on the wood. When the fire is clear to the top and raging hot, cap it and give it a day to cool. Perfect for making biochar for the garden, super easy. Great fun on a cold fall day, bonfire in a can! Bring hotdogs!
Indirect burn is where the wood that is being reduced to charcoal never actually touches the fire. This could be called the "retort" method of coaling. When I was making charcoal for the forge back in Oregon, that was the method I was using.
http://mypeculiarnature.blogspot.com/2014/08/charcoal-for-forge.html

Long story short.....Take a big can, punch some holes in the bottom, then fill it full of wood. The same parameters apply here, use dry wood of as small and consistent a size/diameter as possible. Seal the lid. This is your retort. Start a fire in a bigger can, then place the wood packed retort into the fire, placing more burning wood around the sides and top. As the wood in the retort give up its moisture, you will see jets of smoky water vapor coming from the little holes, then later when the wood gives off its volatile gasses, the jets turn into tiny flamethrowers. At this point the retort sounds a little like a jet engine, very fun stuff.

The retort method of coaling is easy, and most of the smoke gets consumed in the process, so this is a good option for those who have neighbors. The only complaints that I have are that in my case, the process didn't scale up very well, and it's difficult to know when to remove the retort from the fire. My forays into larger retorts resulted in larger batches of overcooked charcoal —perfect for biochar, but not so good for the forge. The retort method is just too darn hot.
The seduction of the retort method is that it comes tantalizingly close to being efficient. The gasses that get expelled from the wood during the coaling process are very combustible, and the Internet is rife with excellent examples of retorts that channel this gas to good use, creating a self fueling charcoal kiln. You start a fire to get the process going, but by the halfway mark, the volatile gasses from coaling are doing all the work, a positive feedback loop.
So....The retort method uses the least amount of fuel, and it's the least smoky, two strong positives in its favor. If I was making biochar for agriculture use, this is the method that I would use. The retort gets extremely hot, so if you are using a barrel as your containment vessel, it burns up pretty quickly.
There is another, lesser known method of indirect heat charcoal making, and that is the Iwasaki style barrel kiln. Based on traditional Japanese coaling methods, the Iwasaki kiln is an insulated horizontal chamber packed with the wood to be coaled, then a separate fire chamber with a baffle in between the two. The baffle serves to keep the flames of the heating fire isolated, but still allowing the hot gasses to pass into the coaling chamber.

http://iwasaki-sumiyaki.com/esub2.htm
You fill the main chamber with wood, then start a small fire in the smaller burn chamber. As with the other charcoal methods, you watch the smoke to determine when to seal the kiln (or if you're feeling flush, a temperature probe). First you get the white steam of water vapor that is expelled from the wood. Next will be an acrid white/yellow plume, the volatile compounds. When most of the volatiles have been driven off, the smoke will turn blue-ish for a short period, then go nearly clear. That's your signal to seal off all openings. Let the kiln sit for a day to ensure that the coaling process is finished, then open it up.
Dave Friesen, the "Island Blacksmith" outside of Vancouver, BC has gone through the charcoal evolution process as well, and it was from his blog posting that I learned of the Iwasaki kilns. You can follow his charcoal journey here (and check out his work as well.....beautiful and extremely skilled. I LOVE his forging videos!)
 |
| http://islandblacksmith.ca/2013/03/charcoal-kiln-v-3-0/ |
If your kiln was well insulated, you'll be left with some wonderful blacksmithing charcoal! The difference between using well made pine (the traditional blacksmithing charcoal, East and West, has always been made from pine) charcoal and overcooked mediocre char is notable. By all means, use what you got, but the nice stuff is clean burning, nearly smoke free, and produces very little ash. It also burns fast and hot, so if you leave your blower running in between heats, you're gonna burn up a lot of charcoal for no good reason. That's yet another reason to build a traditional fuigo Japanese box bellows.
The kiln that I am building is similar in spirit to the Iwasaki kilns, but more simple. I have seen a couple of YouTube videos of this basic design, but I have some ideas that I've been wanting to try out. I am building a side by side pair of kilns, but a single unit would be great too. I figure that if you need to be sitting there tending the small heat fires anyways, you might as well be tending two.
So.
If you stuck with me this long, here are the pics.
I bought a couple of used barrels with removable lids, then traced and cut out two holes in a piece of old roofing tin.

How did I cut the holes in the steel, when we have no electricity?

My hot cut chisel that I forged from a cheap wrecking bar worked great, slicing through the steel with little difficulty. MUCH faster (and easier) than using tin-snips, and resulted in a neater job, too.
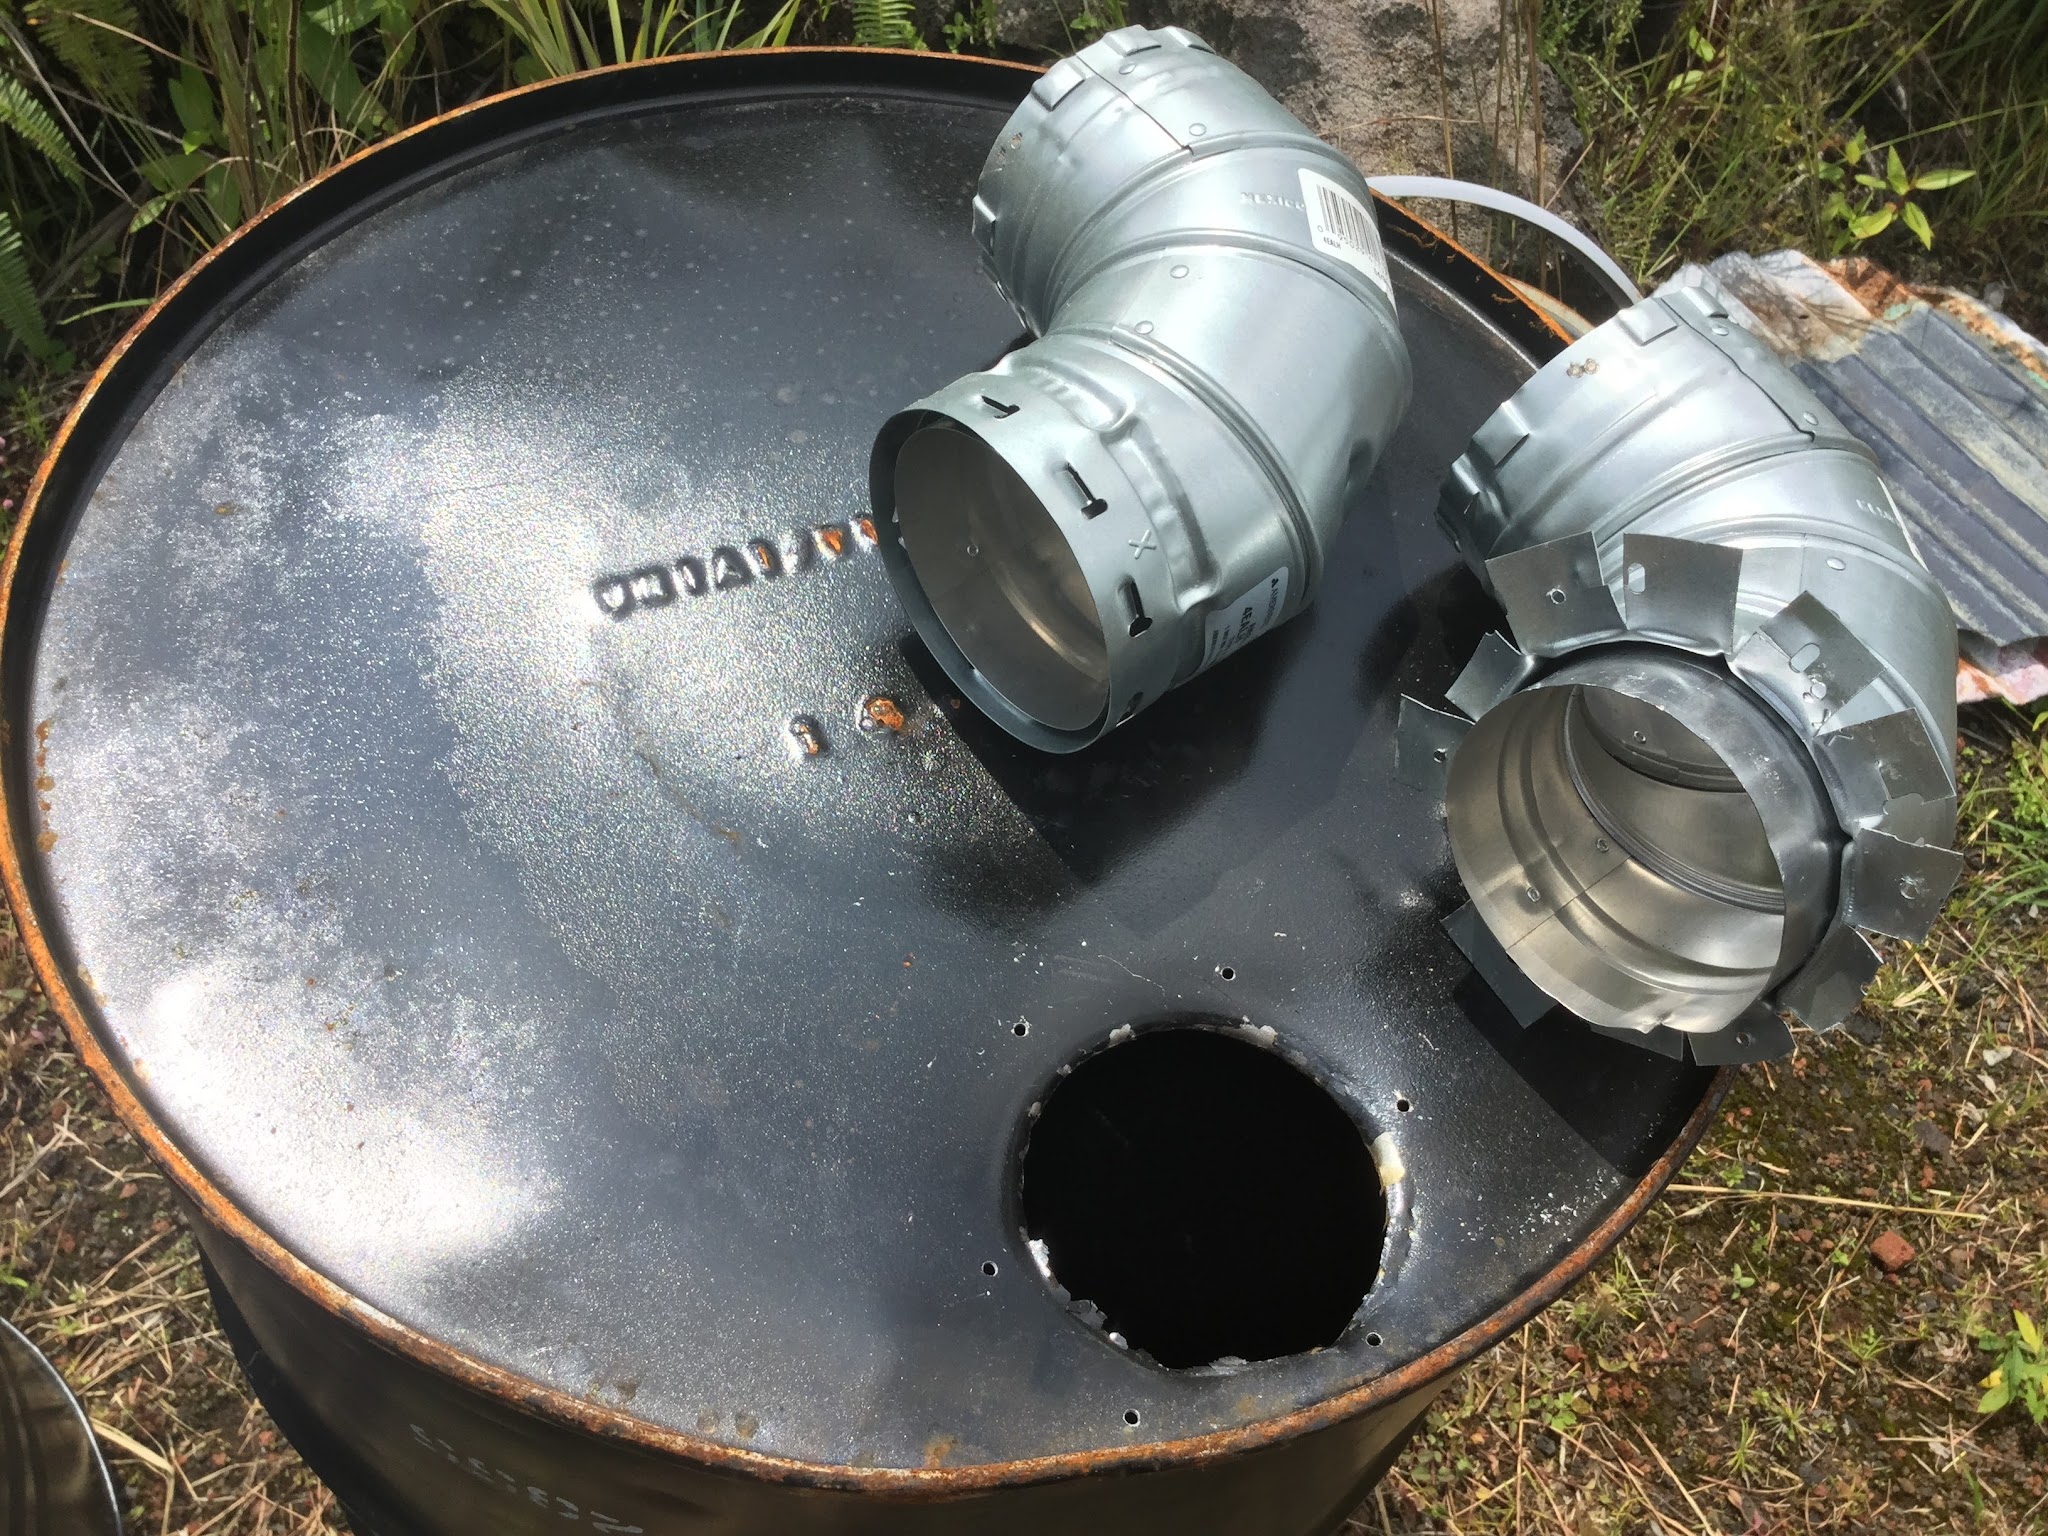
At the rear of the barrel I cut a 4" hole to receive a 90* elbow fitting for the smoke vent. For this kiln I am using a double wall vent pipe for both the ease of attachment –I slit the outer jacket to form tabs to attach the elbow to the barrel– and also to keep the stack temperature as high as possible. A double wall or insulated vent should contribute to forming a better draft, not so important here in balmy Hawaii, but might be a good idea in areas that see more cold weather. Single wall would be fine as well, cheaper too, but here in Hawaii the price was nearly the same, go figure.
Two elbows, before slitting and after.
To seal the joint, I mix up a little clay paste, then fasten the elbow in place with sheet metal screws.


The 90 degree outlet will be at the bottom of the horizontal barrel.
So here is the enclosure itself, with two holes for side by side barrels.

Four corner poles and some old roofing tin. All of the rock around here is lava, the most perfect insulating/refractory brick that you could hope for. Try to get good even support for the barrels, and lay a slight slope towards the front so that when you forget the stack cap off, the rain will drain out on its own. More importantly, the liquid that condenses inside the kiln will flow towards the front where the heat is most intense, and so get consumed.
What's that? You don't have lava kicking around because don't live on a volcanic island? Sand would make an excellent bed, as would most anything really. A material that offers some insulative quality is preferred, but again......use what you got. Don't buy anything, just use dirt.
I want to insulate the barrels as much as possible, so I am going to try making a straw /mud slurry. Except I don't have any straw laying around. I've got lots of weeds though. Time to trim the driveway!

I also don't have any clay –few areas in Hawaii do– but I found a bag of fire-brick mortar clay at Home Depot, in the torn/damaged pile....50% off.
I mix a slurry, then plunge handfuls of grass into the soup. My mix is much thinner than I would like. I would rather it coated thicker, more like thick cream than my skim milk.

50# of powdered clay doesn't go very far, so if at all possible, find a local source for something that will work. You don't need sticky stuff, you just need something that will coat the grass and prevent it from catching fire. Soaking clumping, non scented cat litter in a bucket of water was my second option, something that I've wanted to try out but haven't yet.
You can see here that I am once again killing two birds with one stone. When I weed the walkway, the weeds pull up little clumps of nice red lava cinder as well.

I first lay some gloppy grass/mud mix against the wall of the barrel, then bury it in lava rock and cinder. Since my mud mix was so thin, I'm half expecting the whole thing to catch fire on the first use, but hopefully the lava rock insulation keeps the blaze under control.

I add a 5' extension to the smoke pipe, also double wall stuff, then keep burying.


I'm just doing one side for now, so we'll stop here. There's more a comin'.
Thank you and More Please! What material are you charcoaling with? Did you have to do a long low burn to dry out the insulation? How long does it take to run a batch, and how much does it produce?
ReplyDeleteSeriously, frikin' excellent Jason.
Haha, you realize that some state or county idiot would mistake that for a moonshine still...
Great questions Gabe! Most of the answers will be forthcoming in the second instalment, if my crummy Internet connection would cooperate with my photo upload....ugh. You've pointed out some stuff that I need to include, though, so double thanks!
DeleteJust be forewarned, there might need to be three installments, I took so many pictures of smoke and temperature. BORING!......but not if you are actually going to do this yourself.
Isn't it funny what captivates our interest? I just LOVE making charcoal! So much of this exploration ends up being synergistic. You have these realizations, "So that's why **insert obscure reference ** is so important!", haha.
That is probably the best one I've seen, it looks pretty darn good!
ReplyDeleteSeriously, I learn almost more reading you guys blogs than I do at school.
Now if only it would pay the bills......
DeleteSeriously though, these strange knowledge bases come in handy throughout life, surprisingly. If nothing else, you developed a perspective on things that affords great amusement.
"Monster trucks, dude!!"
"Naw......I want to sit on the floor and sharpen my antique Japanese saws. Thanks though."
Hahaha!
That was actually what me and my tech teacher were talking about one day. He was saying forestry is a good field, a lot of jobs, but not a lot of money. I said, ya, but if your hobbies are pretty much 'free'- ie, making charcoal from fallen branches, enjoying parks, and sawing your own lumber- then you really don't need a ton of money. You won't be living the new American Dream mass produced by the credit card companies, but you will be living the old American dream of self-sufficiency.
DeleteOn top of that, most of these hobbies are very profitable, if you do need extra income. Hawaii sounds like a very great location for a woodworker/blacksmith. Oh, and I found this album in /r/blacksmith, perhaps it can inspire: http://m.imgur.com/a/fMxM8
Jason, This is seriously cool! I can hardly wait to see it in action. Looking forward to Part II (and III).
ReplyDeleteSteve: I love "the old American dream of self-sufficiency." That is really the better of the two.
Brandon