Showing posts with label projects. Show all posts

Sunday, February 7, 2016

January progress.....a bit, anyways.


Perhaps it's my Midwestern blood, but wintertime is still a period of hibernation for me. This, despite our now living in Hawaii with its tropical climate and long(er) day length. At least that's what I'm telling myself.....surely that's a good excuse for my lack of progress on the home-building front?


"So.....what have you guys been up to, anyways?"


—*NOTE TO SELF*—

When buying salvaged roofing material, try not to choose the stuff that has 20-odd layers of old paint on it, no matter how cheap it may be. Remember and acknowledge how obsessive you can get when picking old chips of peeling paint from a surface.


The wire wheel/grinder combo might be faster than going it all by hand power, but not by too much.


"But wait......I thought that you guys didn't have electricity?!?"


Please bear witness to our emergency generator. Not only is it huge and inefficient, it's also one of the most expensive ways to create watts, haha.


The jumper cables run into a tote, inside of which is a deep cycle battery that acts as a buffer for heavy surge loads, and from that, to moderately cheap 2000 watt sine wave inverter.


The inverter is mounted to a piece of plywood, keeping both the inverter and battery from shifting around, and elevating everything from any acid spills or inadvertently accumulated rainwater. In the picture, you are looking at the side of the inverter, that silver thing under my multi-meter. The silver box looks pretty boring, but that's where the magic happens, Direct current (DC @12 volts) being altered into its Alternating (AC @120 volts) wave form.


The whole setup is pretty ghetto, but that's how we roll. It works, though I try to use it as little as possible, it being a severe impediment to my being able to brag about how we don't need their stinking electricity anyhow, thank you very much....haha.


There's more fun where that came from.


The beautiful Renee has been doing the real work for the last month, finding the perfect place to put all of the lava she digs up.


The Okinawan sweet potatoes love it here.


Paths and terraces.


It's a little hard to discern, but she has been weaving the guava whips into a sort of living fence. Soon the thin shoots will be sending out new vertical growth, turning this surface into a wall of solid green.


The walls surround an area of dappled sunlight, perfect for growing some of the more shade tolerant plants.


She weaves the stiff Aluhe fern stems, wrapping ever more of the thin Guava shoots, around and around......


.....hangs them in the trees, then tucks in an Orchid (actually vice-versa, but you get the gist).


Homemade planters for epiphytes, pretty cool.


I've been incrementally cutting my way through the tangles of Guava, swinging the chainsaw in an arc roughly 6" above the ground.


It doesn't look like much, but this area, only 20' to a side, created a stack of Guava nearly the height of my head.


We separate the shoots by size, smallest to large, then cutting off the branched top, to be composted. I see an army of stick chairs here....


...or maybe a stick house?


We are roofing the structure with clear polycarbonate sheets in the interest of keeping the weight as low as possible.


It's also cool, because when you lie on your back and look to the sky, it's as near a thing as having no roof at all.


Initially, I have screwed the intersecting pieces together. Then, after the branches have had a bit of time to shrink some, I lash things tight, using lengths of nylon seine twine. Screws alone won't suffice for long, the forces of the bending and shrinking sticks being enough to snap the stiff deck screws here and there. The twine square lashing stiffened things up remarkably, tying the structure into a springy and resilient whole. I like that.


What maybe doesn't show in the photo, is that there are approximately 10 bazillion intersecting branches in this glorified 12' x 23' gazebo, and many of the lashing are stacked one atop the other. Access gets awfully tight in spots, so progress is slow. I try to tie each lashing perfectly, and despite having already done this *many* times already, I still occasionally take one apart that just doesn't look right.


Aside from the time involved in doing a good job, there is also the concern over UV degradation, bring roofed with clear panels and all. The lashing need to be coated with something, paint most likely, but I can already see that as another one of those projects that gets delayed too long. The proper time to coat the lash is...immediately!


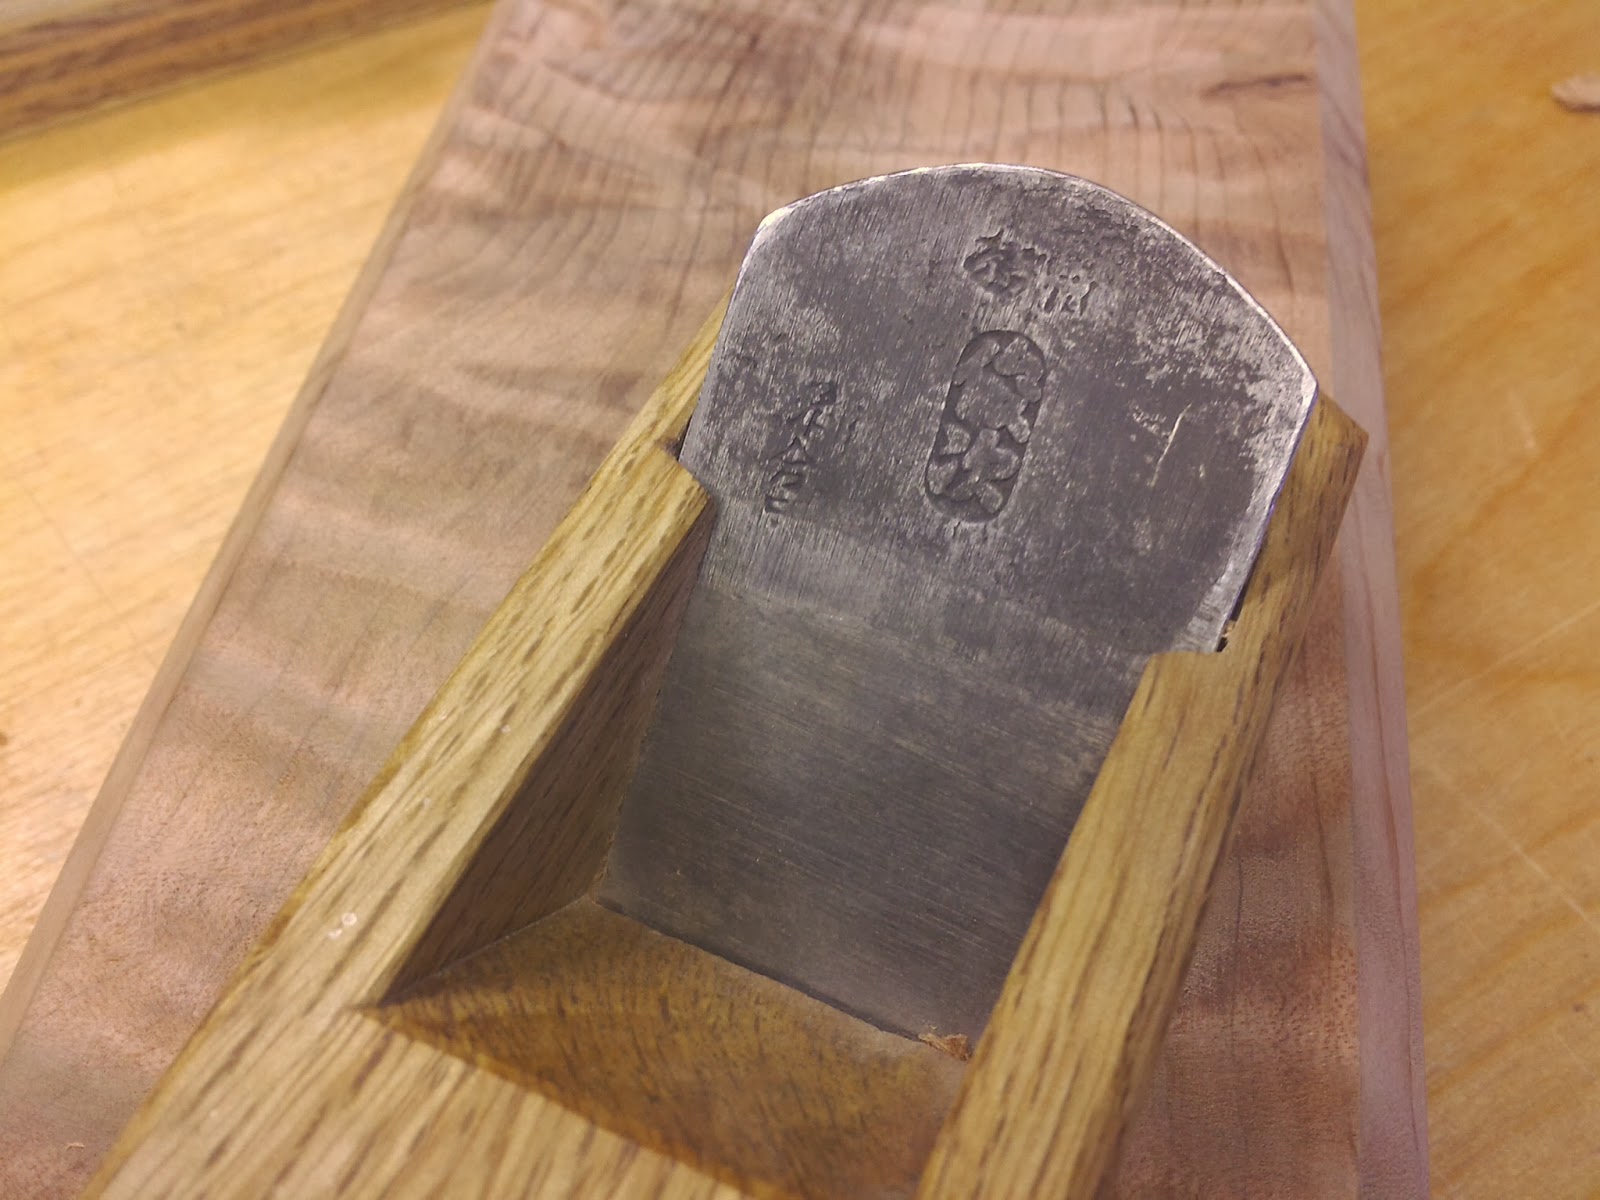
You also might notice that I'm using unpeeled logs. Initially, this was to be just a quick way to get a roof over my head, a dry spot to work. Famous last words, right? I started out peeling the sticks, stripping them of their bark, but being in somewhat of a hurry (ie: lazy), I swiftly transitioned into using the stock just as it came, bark and all. Within just days, I noticed something interesting though. The sticks that had been peeled were immediately lunched by the ferocious powder post beetles that we've got here, whereas the unpeeled stuff remains untouched to this day. The bark and leaves of this Guava contain so many tannins, nobody wants to eat it. Working the stuff instantly turns steel tools black, and makes your clothing look as though you've been crawling around under your car, dropping the transmission or something. This stuff will make a great ebonizing, purple/black dye....That's for another day though.


So what have I *really* been doing?


Mostly sitting on my ass, filling page upon page in my "Book of bad ideas".


See, the real problem here is that I've got too many options. I'm extremely adept at making the most of little, but now that most of the typical restraints have been lifted, I'm at a loss for direction. We have money, and we have space, but no map. Each route has its attractions, particularly so, as our standards are very low, haha...... Or are they?


To be honest, I'm finding that building with sticks and branches is....unfulfilling. Renee has forbidden me from tearing the "stickhaus" down and starting anew, but I swear....given half a chance....


I'm spoiled, I admit it, but working on a project that doesn't fully resonate within, it's draining. Why don't I build what I REALLY want to build? Well, what I've been obsessing about, apparently it hasn't been done before, at least according to Google. I consider myself fairly adept at sifting through multiple search term queries, and I know that the truth is out there, but I'm not finding much inspiration.


What I want to build is a system, something that I've touched on before, a modular format, prefab, portable when need be, type of small structure design. Individual components must be portable by one strong individual or two, if your hermit has a friend. The standard size of sheet goods is 4'x8', too big a fit for most cars, so smaller multiples are required. I want it to look nice too, so I'm intending to use as much "real" wood as possible, only resorting to plywood and it's like if it's worth enduring its unfriendly working qualities.


A small and efficient shelter, low cost, and not too difficult for the average person to build. Let it be nice to look at as well, and you might be seeing them tucked into cozy secret corners, without drawing too much fuss by the neighbors (and authorities). Not a "tiny" treasure McMansion, nor a 1970's Swedish erector set house. Legos color scheme is too bright, so no love there either.


There is no way that I am the first here, but really.....

Saturday, July 18, 2015

Finishing up the Japanese style saw vise


It's about time to finish up this project. The rains have stopped, the rainbows are out, and I've got some saws that are in need of some sharpening. It's time to finish the vise!


I'm great at starting projects, lousy at the finishing stages.. I'm too enthusiastic for my own good.


From the previous post, the two halves of the vise have been shaped, now it's time to attach them. This being my first attempt at a Japanese style saw vise, combined with my choice to run the wood grain the "wrong" way, it would be wiser to attach the halves using some means that would let me adjust or separate them when I undoubtedly need to. So, of course I choose the permanent (but much cooler) means of attachment....riveting them.


My rivet stock will be some old bent nails that are never in short supply. For the roves, I drill the centers on another thing that is seldom in short supply, pennies.


I bore shallow recesses to get everything below the surface. When I do this next time, I will bore less deep or skip the recessed thing entirely. Although it gives a neater finish, when I inevitably need to grind these off later, access will be a bitch.


The nails are lightly galvanized, but a little phosphoric acid removes that quickly. Jasco Prep&Prime to the rescue!

The zinc galvanizing causes the acid to get all foamy, but the nails are under there. I give it 15 minutes.


The reason for removing the galvanized coating is that I want the nails in as soft a state as possible before peening, so I need to anneal the metal first. Burning off the galvanizing works great, but also causes the formation of nasty gasses that can cause brain damage/kill you/etc. I'm challenged enough as it is, so prudence prevails. I don't get to say that very often.


A propane torch, get 'em red hot, then let things cool, the slower the better.

I thought that the lava rock worked well as a fireproof surface. Talk about an appropriate material.


If you happen to find yourself moving out into the boondocks and haven't yet built your forge (everyone needs a forge, right?), a good propane torch and a decent sized piece of ceramic blanket insulation makes a sort of workable emergency, half-assed forge. The ceramic insulation is key though. I wish that I brought some. 20/20 hindsight.


You can make a small propane forge from a tin can, and using sheet rock mud/sand mix as a refractory lining. It is handy to have around for making small tools and blades, but the key word here is small. A charcoal forge is SOOO much better. Quiet, too.


Peen the nails to lock everything together.


I cut the wedge from more of than mystery ham-wood stuff that I suspect is something like Brazilian cherry.

Whatever it is, it's hard, finishes smooth as glass, and it's more than my crappy kanna blade can handle. Rather than re-sharpening every 10 minutes, I decide that it's finally time to open up my treasure chest of tools. It's time to pull out the big guns!

"Rashomon" kanna, by wholesaler company Cubs torosaburo. Our favorite luthier, Tanaka Kiyoto has a couple of these kanna and was surprised at the blade quality and toughness. He puts the steel toughness just shy of HSS and some of the "super" steels. He doesn't know how actually forged the blades, but he was impressed.


http://kiyond.blogspot.com/2014/11/youtube_13.html


I bought this kanna from my Japanese tools pusher, Junji. It had a huge crack in the main blade and generally looked like hell. I showed some of the blade repair here, but haven't gotten around to fitting the blade into the dai....until now. It feels at least 4x more durable than the plain-Jane kanna that I have been using, yet the blade is still fairly easy to sharpen. Laminated blades are awesome!


The wood that I used for the wedge is probably too hard and slippery. The vise works wonderfully, 'cept the wedge likes to pop out at inopportune moments. I'll try roughing up the surface, see if that helps.

Next step....sharpening my old kataba saws. I plan on converting this old guy into a madonoko tooth pattern but first I will see how well it works as is, with the original modified rip tooth it has now. I've been thinking real hard about the mechanics of saw tooth design, and now is my opportunity to do a fun compare/contrast project.


Ellie is using the ugly saw, but doing great work. She's making a rabbit hutch.....more pets. Ellie, the rabbit farmer.

She did her layout using the bamboo sumisashi.


Focus and intent!


If you look closely, she's spot on the line.

That's my girl!


Tuesday, June 10, 2014

Forged carving tools and...... Sharp enough?


On Saturday some friends stopped by the house for a visit and one of their sons has been bitten by the wood carving bug.  The kid grabbed the nearest branch and got busy whittling, hard at work for nearly an hour, on making his perfect spoon. That was one of my first carving projects too, carving a spoon! Problem is, you need a knife with a properly shaped blade. Where does a kid get a good spoon carving knife?

Sunday morning I made these.


One is a curved, double edged carving knife, similar in shape to a yari-ganna (for him). The one on the bottom is a striking knife for marking layout lines (for me).


Both knives have cutting edges around 1-1/4" long. I used type O-F (Old-File) steel.


I might have to name this one "Nick".


This is the forth one of these knives that I have forged, of which two were immediately deemed too ugly to bear, and so ended up in the recycle bin. This one isn't terrible.


It has a pretty curve, but the sweep isn't dramatic enough. For carving spoons, I need to give the next knife a longer blade AND a more pronounced curve. I said the same after forging my last knife, but evidently this curve is etched in my brain, because this one turned out nearly identical to the last, haha!


The back of the blade is a bit hollow. The trick, for me at least, is getting the proper amount of curvature on the back, to support the cutting edge. The small land, in between the hollow and the edge, is what gives the knife stability. Too much flat and the knife will dive into the grain and will be hard to steer. Too little, and again, the knife will dive and be hard to steer. 


That weird, swoopy shaped, man-made aoto is coming in handy after all. The steel shows a beautiful lustre.


I actually like this stone! More later....


In use, the cut feels rather heavy. Part of that is due to poor sharpening....


...but mostly due to the bevel angle at the cutting edge.


The forged bevel angle measured at 32°.


My benchmark blade is a laminated steel Japanese craft knife.


This knife has the lightest cut of any knife that I have ever used. Nearly effortless cutting, moderate edge holding ability, and easy to sharpen, I assume that it is a simple high carbon/white paper steel.


The bevel angle of my craft knife/light saber measures at a far shallower 23°.


I gave the striking knife an extremely shallow bevel because I wanted to have a larger bevel surface to polish. This blade was clay coated prior to quenching, to temper the hardness of the steel. Mostly though, I was just trying to achieve a cool hamon effect (unsuccessfully, I might add).


It's there, just not very interesting. I like the clay quench, but need a lot more practice...... More knives!


This guy is a ridiculously low 13°!


I needed to put a 22° secondary bevel on this blade, both to stand up to use and to make a line thick enough to see.


My inspiration for spoon carving is Swedish carver Jogge Sundqvist.


Beautiful work.


Jogge Sundqvist spoon from Peter Follansbee ( humbly borrowed from his most excellent blog).


Speaking of sharpening....... How sharp is "sharp enough"?

Remember this guy? From the 5 part kanna restoration (Part 1), I have been using this kanna regularly, and though it showed early signs of edge wear, I figured that I would keep using it until it wouldn't cut any more. You need a VERY sharp edge to cut thin, but the ability to take a shaving of more practical thickness is a simple thing to achieve. That said, it's finally time to sharpen. 


This Red Cedar was pushing it.


You can see the shiny "Edge of Dullness", a bright line the full width of the blade.


 I would normally never let a blade get this dull, but this was a test, after all. This plane stayed functional for a LONG time, just not usable for the finest work. In some ways, a slightly dull blade cuts more effectively than a super sharp one. A sharp edge is temperamental, and will cause tear-out, just like a dull edge.


This still cuts pine, though. Cherry and walnut, too.
  

You can see how the shaving tears alternately, and goes from thick to thin. That would be caused by edge instability. The blade is alternately digging in, then popping out of the cut, signs of a VERY dull blade. Amazingly though, it will still cut!


Forging the occasional tool is a lot of fun, certainly more fun than buying something out of some catalog. Then again, for me the tools are more interesting than the projects. I need to work at the forge more.

The problem for me is that the laminated Japanese blades establish a VERY high standard, both in terms of edge durability, and the actual "sharpness" quotient. I find it very difficult to get a traditional western blade reeeeeeaaly sharp. There seems to be a point at around #2000-3000 grit where additional gains are negligible, and what little is gained is also quickly lost, generally after only a few cuts. I know that simple carbon steel can achieve and maintain a good edge, but the practice eludes me.

In my own forging, I want to work more at developing a good clay quench. Also to try a salt brine, to augment the basic oil or water quenches that I have been performing. And...... Swords. My daughter has requested a dragon sword, to be used for slaying knights! She wants it made with a nice cable Damascus, something with scales.

Someone's beautiful cable cable Damascus blade

What can I say? The kid has good taste in tools.


Tuesday, February 25, 2014

Waterstone pond..... and accessorizing your sharpening stones


Rough stock. An old, decrepit sailboat, full of still valuable teak.

This


Into this 


A stone platform for a new waterstone pond.


Also ……

Old, OLD old-growth redwood, washed up on the Oregon coast about 6 years back. Some of it turned into windowsills for our house but this ribbon figured piece.... What will IT be?


The surface, as left by a Japanese plane, then a file.


 The plane gave a good finished surface with some minor blemishes, and just the slightest bit undulate.... Following the surface grain. I lightly hand sanded with 330 grit, even though I know better. Muddy. Then draw-file using a flat mill file. Better. VERY hard to avoid ALL tear-out, particularly in a such a soft wood as redwood.

Still, I can do better..... A different plane, one of my favorites, a small 42mm ko-ganna, single blade. Bought from Junji (eBay seller yusui), then cleaned/tuned and put to work.


The kanji is hard to read. Nothing too special, just a good, user plane. The blade does use a nice ren-tetsu wrought iron for the backing metal, though. Each blade is different. I love that.


Tight mouth = reduced likelihood of tear-out.


Much better. Sharper grain definition. The sheen is back.


Notice the difference in surface quality. The chamfer is much rougher than the other two faces.


The rougher chamfer is the file finish. I may leave it this way, I haven't decided. And what is this to be, you may ask? My original intent is for it to be a box enclosure for a 1200 grit synthetic waterstone. Something practical for kitchen knives, and nice enough that it doesn't get stuffed into a drawer, never to be used.


The inside has been hollowed and will get lined with some thinly planed teak. The base platform will be Brazilian walnut...... We'll see.


I am of two minds divided. Stone enclosures, while great for oil stones, are less well suited for thirsty synthetic waterstones. Some man-made stones suck up a LOT of water and the box prevents drying out.....AND the man-made stones are messy, too. This kind of defeats the purpose of a nice box.


This is what is in our kitchen.....


.... an old carborundum oilstone in a simple, fitted mahogany box. It gives a nice, toothy edge to knives. I mostly use this dry, but sometimes with water. If I use a LOT of water, I can expect the box to swell/shrink for the next two weeks or so. A more rational mind might just use oil instead of water (so messy!) OR, say, cut the box for a looser fit, hmmm?


Rational..... bah!