Showing posts with label tool performance. Show all posts

Friday, December 5, 2014

Last is first, first is last----having a bad "kanna" day.


Sometimes they are your best friend, sometimes you want to chuck them out the window. I'm having a bad kanna day. Not really bad, just a little annoyed is all.


We are moving, literally in just a few days, and I just received my last kanna from my tool seller friend Junji (eBay seller yusui).


Unlike the other kanna that I've bought, this one is a "known" blade, and WAY better than anything that I would normally dare to purchase. So my first famous blade is also my last purchase (for the foreseeable future). First is last, get it?


"Kanzan", by Hideo Ishido Teruhide. 


Hideo Ishido passed on in 2006, I believe. I'll do my best.


It's a little hard to see in this photo, but just below the lamination line, to the left is the stamp of the Tokyo plane manufacturers co-op.


There is a nice feather pattern on the display face.

It is in pretty good condition, and lightly used. Definitely used though, so I can be comfortable putting this guy to work. Whew! I don't know what I'd do with a really nice kanna, you can only look at them so much, before you need too remember that they are just tools, haha.


Matching sub-blade.


There are stamped markings on the front side as well.


(Damn this iOS mobile app!! My apologies for the strange picture sizes.)


This kanna is very close to being ready as is, but the blade protrusion is slightly uneven. I need to shave a small amount from one side of the blade retaining groove. As I use these tools more, I am coming to the realization that "less is more", meaning that you should only do the barest minimum required to get the job accomplished. This is not to be confused with the easiest way, or the least amount of work. Perfection is a floating target at best ( and an illusion at worst), but you do the best that you can.

With my first few kanna, I adjusted the fit of the main blade to accommodate more lateral blade adjustment than was really needed. I was carving out the sides of the grooves so that there was about 2mm of gap on either side, but that's not the proper way of accommodating a blade that sits unevenly. Maybe it would help if I explained how this came about.


My first kanna had been sharpened unevenly, so that the blade edge was no longer perpendicular to the long axis. Seeing this, I thought, "Sloppy bastard, too lazy to do a good job, etc etc", then proceeded to square things up. It turns out that the dai had been cut slightly uneven, so the guy who was sharpening the blade funny was right, and I was wrong.

Now I had a kanna that was taking a bigger bite on one side, so to even things out, I needed to tap the blade over to one side. That meant deepening the grooves. Now the blade is sloppy, and I still need to tap that blade over to the right, each and every time that I use it. Forever. A better fix would've been to sharpen the blade so that it was no longer perpendicular to the long axis. Smart guy, I am.

We are so used to thinking of things as needing to be square, straight, flat, whatever, that it's easy to shoot yourself in the foot. These tools just aren't made that way. It's tough, but there is no standard/perfect/anything. You need to think. There are general rules and guidelines at least. Thank god, cause thinking isn't always my strong suit.


In my perfect world, the main blade of the kanna would slide down perfectly to within maybe 3mm of where it would start cutting. It would be perfectly centered, and would take an even thickness shaving the full width of the blade. There would be only 0.5-1 mm of clearance at each side of the blade, to accommodate any changes in humidity that might cause the blade to bind. If I *could* somehow get that perfect fit, then it would be a relatively simple matter to keep it that way. If I happened to sharpen the blade unevenly, pretty soon I would get shavings that taper to nothing on one side, so I would then refine my sharpening technique. I would be learning. It's cool!

I strive for a perfect world. It's an ideal, not a reality.


I laugh at those guys who need to have every tool ever invented, but sometimes it is nice to have some specialized help. I was sceptical of ever using a knife with a left hand bevel, but here is a good example of one, seen in use.


Right hand bevel, left hand bevel, and a 3mm chisel.


The left bevel knife really is handy for trimming flush to the underside of the groove.


Then the right bevel gets to do the other side of the groove.


The blade bed already has tape on it, so at least I don't need to feel guilty when I make the blade fit too loosely. Someone else beat me to the punch, haha.


Time for a preliminary bed check, using the straightedge light gap technique. I am going to borrow a picture from Kiyoto Tanaka (because he's a DUDE!, and the best in the world!) that serves to illustrate my ideal bed configuration.


This photo....it's perfection. There is a minimum of contact at both the front and rear of the bed, and just a sliver touching right before the blade......THIS IS THE MOST IMPORTANT AREA! You can also see how the hollow in the bed of the blade gradually becomes deeper, then sweeps up to contact just before the cutting edge. 

Perfect.


This is what I've got.


Close, but needs some tuning. The notch is where the blade protrudes, so you can see that the bed is touching behind the blade. We want the opposite. We want the light to shine behind the blade.


One more thing. When I get the sub-blade aaaaaalmost to where I want it, it overrides the main blade on one side.


You can see the sub-blade osae-gane peeking out at the left. Crap! I hate when that happens!


The osae-gane fits perfectly, so never being one to take my own advice (much less others).....


......I take a bit off the side.


Just a smidge, I swear!


A little scraping, for starters.


And finally, a first test on some stringy, mystery mahogany.


Not too bad.

 It's a start, and is certainly workable as it is, but I want to see what this baby can do. The idea of getting the thinnest shaving possible isn't about the thin shaving. It is a simple matter to get the plane to work, to cut a shaving, to smooth the wood. That is easy. To get it to work perfectly? That is what the thin shaving thing is about. Any fool can get the damn thing to cut.


I messed up the edge when the osae-gane overrode the main blade, so it's time to sharpen. 


As is with almost all of these, the bevel isn't perfectly flat, but because I'm, uh, time constrained, I just concentrate on the edge itself. It pains me, because I REALLY want to see what this blade looks like polished, and I can't quite get all of the edge right, either. It needs to be redone, but that will have to wait. The rentetsu is even and fine grained. The lamination shows perfect heat control, and has no evidence of carbon migration. Very nice welding.


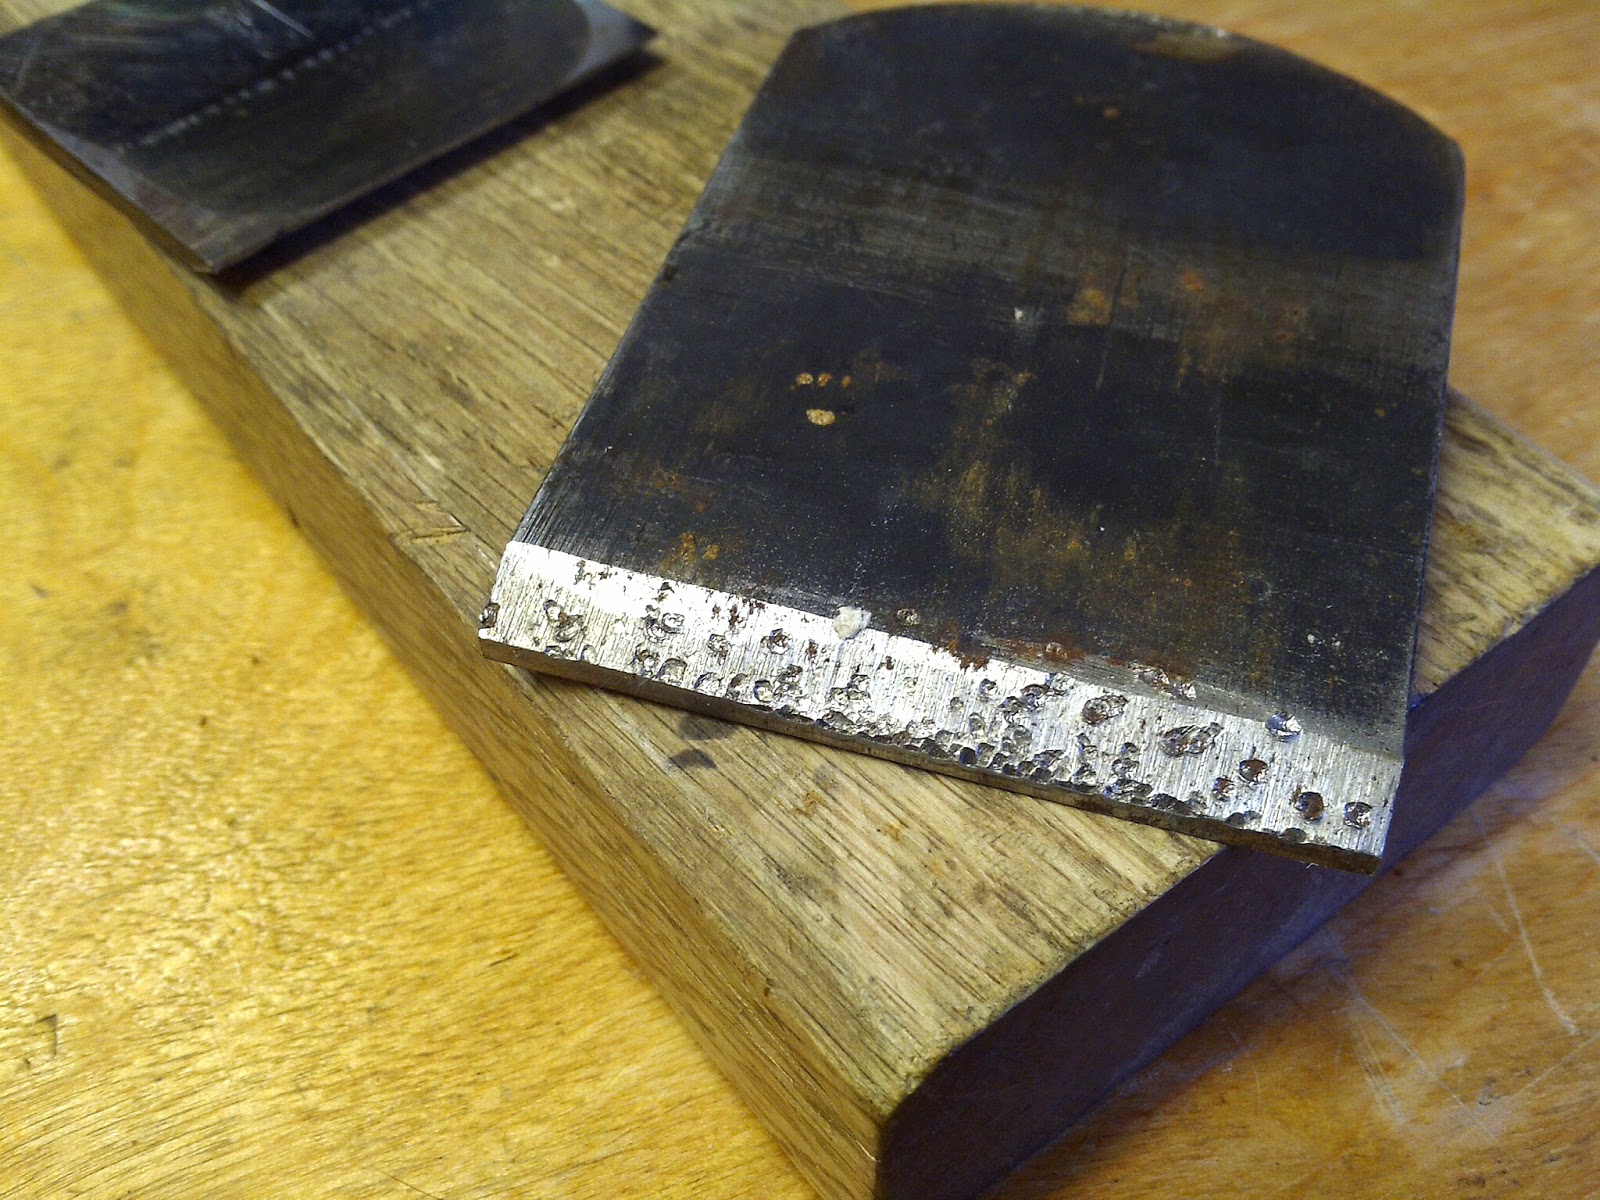
I try to get the osae-gane as close to the cutting edge as possible.


I think that I can see a thread of edge down in there.....


The African khaya shavings are very glossy.


However, something just isn't quite right. The blade isn't taking a full length shaving, and only partial in width, too. The board is only a short thing, and a quick visual confirms that it's not the board's fault, so it must be the kanna. I had a day like this a few months back, and it can be maddening. Everything is there, but something is off.


When the kanna isn't working right, the first thing I always check is the condition of the edge. It seems obvious, but almost every problem is rooted in sharpening, one way or another. 80% maybe?

I just sharpened, and although the blade isn't as perfectly sharp as I would wish, it doesn't explain the lack of proper performance. If the blade is fine, then it had to be the dai.


The dai looked ok when I performed the light gap test with the straightedge, but I'm often not as thorough as I could be, so it seems likely that I have missed some spots. A quick, yet nearly foolproof test is the "sandpaper stuck to a piece of glass " test.


High spots are lighter, the lower are dark. The hollow at the center of the dai is fine, but all of the light areas along the edges represent material that needs to be removed before this kanna will work properly. 


The section of the bed behind the blade needs attention, too.


Light test.


This usually goes back and forth a few times. Scrape, check the gap, then scrape a different area, probably.


Don't forget that little bit to either side of the blade mouth.


The difference is remarkable. When the bed of the plane is configured properly, you can feel the kanna sort of squat down as the cutting edge bites in. That's when the kanna will make its distinctive *Skweeeeep* sound and pull shavings the full length of this Bubinga, no problem, but......


This mystery wood (soft maple, perhaps) has a mild curl to the figure, and gives no problems, but still....


I feel like the sub-blade/osae-gane could be set a little finer, but it doesn't want to cooperate. This kanna is getting tired...... or maybe it's just me. Best not to push too hard, at this point.


It is a gray day, so photos of glossy, reflective surfaces are in short supply.


It's glossy, trust me.


 But *still*.....something is not quite right. I can check the blade bed, I haven't done that yet. I can fiddle more with the hollowed portions of the dai, they're not quite perfect yet. And I can do a better job sharpening, too.  

It has to be......*something*!


At least I can make it pretty.


Monday, December 1, 2014

ChoMasaru a la Sebastian.......

"


I am an edge tool kind of person. My passions are sharp and polished to a beautiful haze and cleave wood as though it were an illusion. I love planes and chisels, axes, adze and knife. 


First, though, comes the saw. The saw is the primary tool, all others being secondary. I mean, think about it.... All of those other tools are only used to make up for the sawyers deficiency. We use the plane to remove the saw marks, and the chisels to pare to the line. In my deepest (darkest?) fantasies, I can wield the saw so skillfully, that no further work would be required. 

I used to detest sawing, seeing it as a necessary evil that should be completed as quickly as possible. Possibly that feeling originates with using dull tools? Japanese saws present me with a unique conundrum. When new, they are a pleasure to use but, as they get dull, they become progressively more difficult to use, wandering further from the line and grabbing, bending, then buckling. And breaking... Don't forget breaking. Japanese saws can break, oh yes.

The frustrations of a dull saw are common and universal, so much so that the saw market has shifted almost entirely to a disposable blade philosophy. When the blade gets dull, throw it away and pop in a new blade. Therein lies the conundrum...... I'm not a throw away kind of person.

The new blade is so nice, but each time that I use it, it gives me a little bit of sadness. I am thinking that  the blade will never be as sharp, the cut will never be as clean, the act will never be as much fun as it is right now. It's all downhill from here.

The disposable blades are impulse hardened, which is great, meaning that they are super hard, and stay usable for a longer period of time, but it also means that they are difficult to re-sharpen. You need a diamond grit yasuri file for that. Not to mention that I've been putting off saw sharpening for far too long and have very little experience, much less skill. 

Being who I am, need to be honest with myself. I need to use traditional (not impulse hardened) Japanese saws, and I need to learn to sharpen and maintain them. For me, this begins with research.


My Chilean friend Sebastian has been immersing himself in the Dao of the Japanese saw, and has sent me some of his early experiments in shaping a particular saw tooth design. 


There is a Japanese saw sharpener (a "metate", and actually soooo much more than just a sharpener) by the name of Nagakatsu/ChoMasaru that has been promoting a different style of saw tooth design. The ChoMasaru design supposedly cuts more smoothly, and requires less effort than more traditional tooth designs, but his work is seldom seen on this side of the world. 

Sebastian has been working on replicating this ChoMasaru design, in his ongoing effort to save every old, rusty and neglected Japanese saw that he can find. Obviously we are cast from the same mold, haha! You can read more at:


The two saws that he sent me exhibit two different style of tooth design, but both share a common philosophy. They are intended for different uses, but work in a similar fashion. Cousins, perhaps?


The big 320mm ryoba (on top) has a standard ChoMasaru tooth, and is for cutting big stuff, rougher work on thicker stock. The smaller 245mm ryoba (bottom) is a "window" style (madronoko, I believe) that is designed to cut efficiently on a bias. It is intended for finer, more detailed work.


The big 320mm is bigger than anything I've got, so for comparison I need to use a smaller 275mm ryoba. That is one big ryoba!


The cut quality (in Port Orford cedar) between the two is very similar, despite the 320mm being a much larger saw. The size of the saw generally determines the size of the saw tooth, with a smaller saw usually showing smaller and more numerous teeth. Many little teeth result in a finer cut, but that's not the case with this saw. 

Although I was surprised by the quality of the cut, what really impressed me was the ease of use. This is a big saw, with good sized teeth, but it showed no tendency to grab or skip out of the kerf. It is nearly effortless to use, you just move the handle back and forth, and guide it the direction you want to go.

It's fast, too. I need to make a handle, pronto!


I tried the saw out on some Beech and Meranti, too. The Beech is hard, while the Maranti is soft.


Both cut beautifully, particularly for a saw this big. Notice the nearly complete lack of tear-out. That's surprising.


The madronoko saw is a more typical 245mm size, perfect for most of the work that I do. The window style has large gullets to get the sawdust out of the way of the cutting teeth. In the west we associate this style of saw with very coarse, timbering saws like lumberjacks used. 


I have another 245mm ryoba, to compare it to, that is my current baby. It's a nice saw and I am liking it a lot. 


Oh my.

Very easy action, and faster than my saw.


The cut surface looks planed, it's so smooth. Really amazing for a saw of this size, and with teeth that are relatively large, too.


The only reason that the cut is less than perfect is that this old saw has a couple of good kinks in the blade, making for some slow going at times.


And more than a few dents.


Each of the shiny spots is a dent that causes the blade to drag and slow down. The spots are shiny because they are rubbing against the sides of the cut, polishing themselves smooth. This blade has seen some battles.


The cut quality is every bit as good on the beech and maranti. Again, there is very little tear-out. If not for the drag imposed by the bent blade, this saw would be extremely fast. As it is...merely very fast. I give it a 4/5, haha!


As for fineness of cut, I can only compare it to my Nakaya D-210C joinery saw, commonly used for cutting kumiko for shoji screens, and one of the thinnest blades available (0.3mm thick!). This saw its fast AND fine (and a REALLY nice saw BTW).


Look at how tiny the teeth on the Nakaya are (32 dpi, I believe), compared to the ChoMasaru diagonal cut pattern that Sebastian made.


Close! Sooooo close! If not for the bent blade and a few errant teeth, these would be a match. The ChoMasaru might even be a touch better. As it is, the ChoMasaru shows better clarity and color in this Oregon walnut. That Nakaya is a surprisingly fast saw, but the ChoMasaru is faster.


And the scary thing about all this? These are some of Sebastian's earliest versions. He's gotten better. It kinda makes you wonder.


It sure works great for trimming doors. The handle is growing on me, too. 


Friday, October 24, 2014

Diamond everywhere! Testing some cheap diamond files for sharpening


More sharp!!....... Inexpensive , China made, diamond tools for sharpening the hardest Japanese tools. It's amazing how cheap ($) this stuff is getting.


I had bought a set of small detail bits suitable for a dremel type tool (1/8" shank). They worked well, and proved sufficiently durable, that I bought a larger set (1/4" shank).

Set of six, 1/4" shank, $11. 

I specifically got these for carving out profiles on some small kanna blades, used for cutting edge profiles. They seem to work just fine, the diamond grit is evenly distributed, and well adhered. If used with a light touch, these should give a respectable service life.


It’s pretty much impossible to determine *exactly* where any of these tools are made, so performance is unpredictable. At the other end of the performance spectrum are these diamond fingernail files. Diamond tools are everywhere!

4 For $1(top), and $0.99 each (bottom)

The upper package was found at the $Store (4 files for a dollar, I used one already.) The two at the bottom are $0.99 each at Walmart. Shockingly expensive, haha!

The $0.99 files are small, cheap ($), and cheap (quality). They work, to a limited degree, but lose their abrasive qualities rather quickly. #220 grit or so.

New on top, and after a few minutes of light work on steel (bottom).

They would probably work just fine on fingernails, but I'm using these files for harsher duty. Japanese plane blades, high carbon steel, HSS......whatever is too hard to sharpen with a standard file. 


The file on the right hand side is one of the cheapest-of-the-cheap $Store files. Larger, slightly more coarse (#180 grit), better looking and grit on all 4 sides. I was psyched to find these at the $Store, but they only had two packages remaining. I bought both!


$2 wasted! Service life can be measured in strokes, 1-2-3-done. I suspect that the file blanks are dipped in diamond fortified paint, as opposed to being electroplated. One file has a coating that stripped entirely off, after only a few minutes of VERY ineffective work. 


So, from the left, we have new $0.99, used (smooth feeling) $0.99, and $0.25 $Store file. 


Unfortunately, none of these are worth buying, even for a cheap guy like me.


For $11 (free delivery), these diamond files are 3" working length, come with 6 grits, and feel very durable. The electroplating, particularly on the scary rough #40 grit, is thick and holds up in use. These files work.


As the tool breaks in, more diamond surface is exposed, and the file becomes more effective. On short acquaintance, I am pleased.


I don't know much about Japanese saws, but I'm getting there. I bought a beautiful little $12, traditional 75mm yasuri feather file from eBay seller: Sakura-pink, to compare against a cheap ($11+free delivery) China-made diamond file.


Not my file-work, BTW! This saw is still fresh.

The sizes are comparable, but the "real" file has a slightly finer profile, and is MUCH faster in use. We shall see which is longer lasting.


About 8 years ago, I bought this knife sharpener at Walmart, for about $12. It has seen VERY hard use, and still works well. Some of this cheap China stuff is pretty damn good.


All diamond tools settle in after a period of time, sometimes minutes, sometimes months. This thing mellowed out after a few weeks, but then...... just won't stop working.


Coarse on one side, fine on the other. The fine is now around #600-800 grit.


If you have some serious metal to remove, but don't have access to a grinder, here is one way to do it by hand.

This kanna blade has had some serious ura-dashi done, and needs to start looking like a cutting tool again. The flat tip is nearly 1/8" thick..... That's a lot of steel to remove!


I tape a line, to act as a guide for establishing a new bevel. Most of the material to be removed is soft iron, so I can use a standard bastard cut file to hog out the bulk of it.

I love working this soft stuff. This only takes 2 minutes.

You can hear the difference, once you get to the hard steel lamination line. Stop, before you ruin your file.


Then use the diamond file, but ONLY on the hard steel portion. I have found that soft steel and iron can strip diamonds from the file (not these, but other diamond sharpening stones, so....), so ONLY use diamond on the hardest materials.


Finally, I finish the bevel using sandpaper stuck onto glass. This establishes a final, level surface over the entire bevel.


The 3M 3X line of sandpaper comes in funny colors, and uses a ceramic abrasive that fractures down nicely in use. It lasts WAY longer than the other common abrasives (al-ox, silicone-carbide, etc.) and only cost slightly more. Money well spent.

Although this was an extreme example, this blade only took about 15 minutes to get to the stage where the sharpening part starts. That's not bad, by my book.

I could've used JUST sandpaper (the good stuff)...... Maybe 2 sheets (so, $3 for sandpaper) and 30 minutes time. It *feels * like harder work, though.